Tuesday, May 10, 2011

Embossed roses for MU5

I am SOOOO glad to have a heat tool again!  My order arrived and in it was my brand new Stampin' Up! heat tool.  It is super!  Heats up fast...way quicker than my now dead non-SU model.  So, I had to put it to work on a card for this weeks Friday Mashup challenge.  Here is the challenge:
and here is my doubly embossed card:
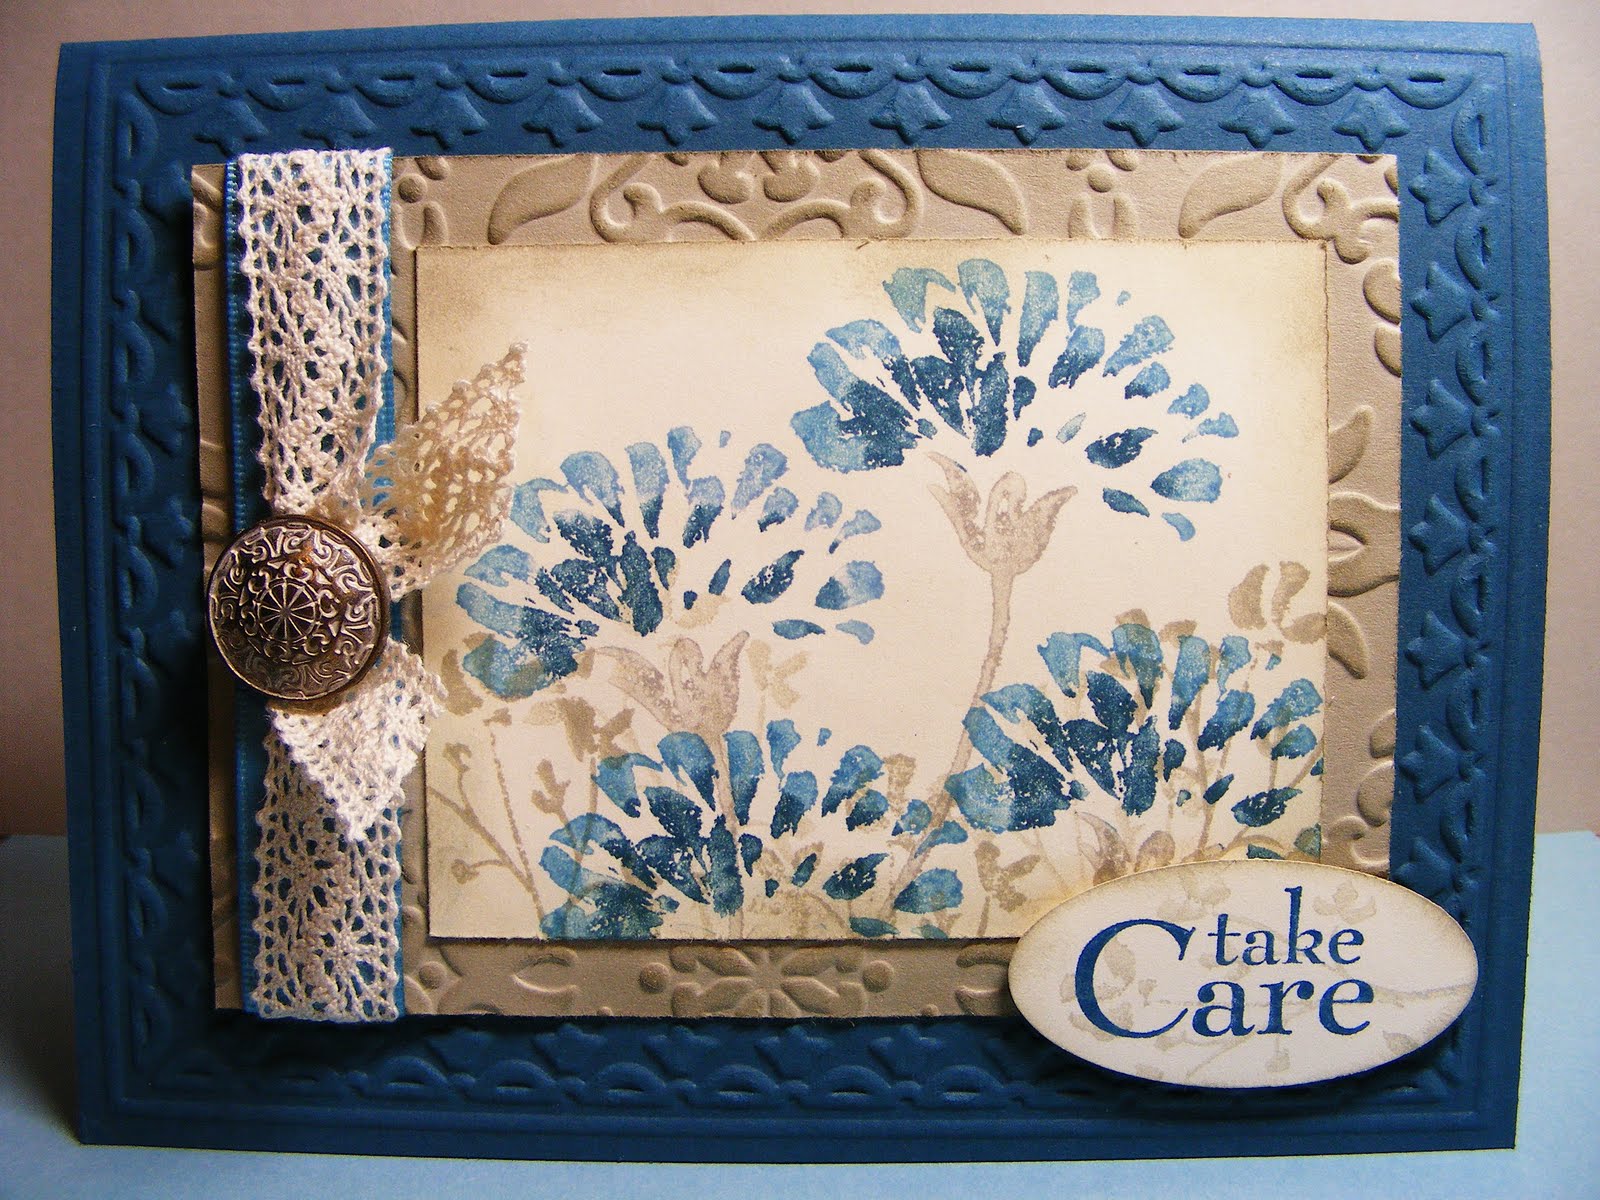
Card for MU5 using Fifth Avenue Floral, Four Frames and Just Because stamp sets

If you're wondering why most of my cards are "Thank You" ones, it is because I am heading toward the end of both the school year and the Stampin' Up year.  I will be needing TONS of thank you cards over the next few months, so many of my samples will be of a thankful nature.  This card could work for just about any occasion (expect maybe Christmas!), so just imagine an alternate sentiment if you'd like.  Here is how I put this card together.
Starting with a piece of watercolour paper, I stamped the rose image three times using Versamark.  I then heat embossed it using the new melon mambo embossing powder.  Then I took my aquapainter and watercoloured the roses using rose red ink...did you know that colour is pretty much a richer, more saturated shade of melon mambo?  I then set the roses aside to dry.  While that was happening I took a 5" x 3 3/4" piece of very vanilla cardstock and ran it through my Big Shot using my perfect polka dots folder.  I layered it on a 5 3/8" x 4 1/8" piece of Woodland Walk DSP.  I then adhered the now-dry roses in the upper left corner.  I wrapped a piece of rose red seam binding around the corner and then threaded a big designer button with another piece of seam binding before adhering to the cardfront.  I adhered the whole thing to a garden green cardbase.  For the sentiment, I stamped the polka dotted frame from the Four Frames set in wild wasabi on a scrap of very vanilla.  I then stamped the thank you from the Just Because level one hostess set in rose red and punched it out with my decorative label punch.  I layered it with another decorative label in wild wasabi and then adhered it to the card using dimensionals.  The final touch was a few basic pearls to highlight the sentiment.

So there you have it:  a pretty, feminine card for someone special!

Monday, May 9, 2011

A Quickie!

I have exactly 15 minutes before I have to start teaching my monthly class, so I will be brief!  Today's card uses one of my favourite and most versatile stamps sets from the main catalogue:  Just Believe.  See what you think...

"Manly'ish" card using Just Believe set and Woodland Walk DSP

Close up of "Shadow Stamped" focal image
I was going for something sorta manly...not sure I succeeded, but I sure do like this card!  The focal image uses a technique called "shadow stamping" where you stamp the image once in a light colour (I used crumb cake here) and then again, slightly off-set in a darker colour, in this case Garden Green.  The result is a 3-D effect that really makes you have to reach out and touch to see if the image is embossed.  It is very cool and still gives me the look of heat embossing while I wait for my new heat tool to arrive!  Speaking of which, I have a whole new appreciation for the quality of the SU heat tool.  The one I had, which I bought before I became a demo, was not from SU.  It died a very untimely death right in the middle of my Stamp-A-Stack last weekend!  I was able to borrow my friend Christine's SU model to finish my class and it sold me on buying an SU model to replace mine.  Can't wait for it to arrive...I miss heat embossing!!  Hurry up Mr. UPS!!

Sunday, May 8, 2011

Happy Mother's Day!

What a perfect day this has been!  The weather is just gorgeous...and what's more it was forecasted to be rainy and miserable...and I've had a wonderful Mother's Day with my family.  My day started with my husband and son waking me up to breakfast in bed...a delicious meal that they made together.  Who knew my husband had it in him!  He looked up recipes online for french toast, and scrambled eggs and then snuck out after I went to bed last night to buy the ingredients.  He was up bright and early and whipped up a scrumptious breakfast!  I was amazed and very impressed!  Then we all headed outdoors to do some yardwork and gardening.  The weather was just too beautiful to stay inside!  We all pitched in to clean up our yard from the ravages of winter and it is looking springtime fresh.  Then I was able to come inside and do a little stamping!  See what I mean about a perfect day?!  The card I made is for the Stamping 411 sketch challenge for this week.  I figure I'm on a roll, so why not enter again?  Here is the sketch:


And here is the card I made:
Vintage-inspired card for  SSC202

Close up of sentiment and flower I made using my build-a-blossom punch.
Although this card looks really simple it took me a while to put together!  I just couldn't decide what I wanted to do.  I had actually started by embossing a whole cardfront with my vintage wallpaper folder, but then decided I needed layers (surprise!).  I trimmed the embossed piece down in size and then flipped it over so that the debossed side was up.  I've had the victoria lace trim sitting on my shelf for a while and decided it was time to use it!  Another thing I finally put to use that I've had for a while was my Build-A-Blossom punch.  I took tons of time punching out each petal and then burnished them with my stylus to give them texture.  I also sponged each petal with a little sahara sand ink.  I added a little very vanilla seam binding ribbon and an antique brad to finish the look.  The sentiment is highlighted with one of the Four Frames stamps, which I coloured with my blender pen.

This card is for all the Moms who read my blog...thanks so much!  You are the reason I keep on stamping!  I hope you've had as wonderful a Mother's Day as I!

Saturday, May 7, 2011

Inspired by spring...

The card I did for my guest designer spot on this week's A La Card Monkey challenge was inspired by the gorgeous colours of spring.  Along my drive home from work these days, there are dozens of forsythia bushes growing in various yards.  The blazing yellow, coupled with the fresh, spring green of the grass is one of my favourite combinations in nature...and I only get to see for a few short days each year.  I decided to try to preserve a bit of this springtime freshness in a card.  Since this week's challenge involves flowers it was an easy fit!  Here is the challenge:


...and here is my springtime fresh card:

Card for MC55 using Fast and Fabulous Level 2 Hostess set

Close up of sentiment from Tiny Tags set.  I substituted the three bows in the sketch for three tags...not a fan of the multiple bows look

Inside of card
This card, for me, really captures the freshness that is all around us right now.  The colour of the grass, before the first mowing is my very favourite shade of green...I could drive around and look at the  rebirth of nature for hours.  Our Canadian winters are so long and dreary that spring is a welcome burst of life and renewal.  Here is how I put this card together:

Starting with a scrap of whisper white cardstock, I stamped the floral image from the Fast and Fabulous set in daffodil delight and wild wasabi.  I then sponged all the way around the outer edges with both colours, using a heavier hand with the daffodil delight and a lighter one with the wild wasabi.  I then adhered the stamped image to a wild wasabi mat.  I adhered that to a piece of Beyond the Garden DSP (from the new Summer Mini) and then adhered that to a mat of daffodil delight cardstock.  I then punched strips of daffodil delight and wild wasabi cardstock using my dotted scallop ribbon punch and adhered them to the cardfront, overlapping them slightly.  I wrapped a piece of white 3/8" taffeta ribbon around and secured it on the back of the cardfront with glue dots.  I then adhered a big designer button in daffodil delight, threaded with white baker's twine, to the centre of the bow using glue dots.  For the sentiment, I stamped the images from the Tiny Tags set on whisper white cardstock and then punched them out with my jewelry tag punch.  I punnched out two more tags from daffodil delight and wild wasabi and then adhered them to the back of my button using glue dots.  The whole cardfront was then adhered to a wild wasabi card base.
For the inside, I just stamped the floral image again as I did for the front, layered it on another piece of DSP an then adhered it inside the card.
This card really was fast...and fabulous!  Gotta love Stampin' Up!

Friday, May 6, 2011

Oops, I did it again!


I can't tell you how much it made my day today to log onto Stamping 411 and find that I had made the Showcase for the second week in a row!  Being pretty new to the whole challenge thing, I am so thrilled to have my work appreciated by others.  It is a huge confidence boost for me...especially with the week that I've had!  Thanks so much to the wonderful operators at 411 for the kind comments too...you've made me smile and put a spring in my step! 

I also discovered that I was an honorable mention at Friday Mashup...thanks to the ladies over there too!
For those of you who haven't yet tried an online challenge...go for it!  It is a great way to inspire your creativity and boost your crafting confidence.  If you do decide to give it a try, leave me a comment letting me know so that I can check out your work.  I'd love to see what you're up to!

I'll be back later today with the card I designed for the new A La Card Monkey challenge that starts tonight.  Till then...happy Friday everyone!

Thursday, May 5, 2011

One of my fav colour combos for PPA 92!

This week's challenge at Pals Paper Arts is a colour challenge using one of my favourite colour combos from Stampin' Up!  Here is the inspiration:
I love these three colours together and have used them often.  So it was easy to come up with a card for this challenge.  Here it is:
Card for PPA92 using Love and Care stamp set for the background behind the flower and lots of Big Shot:  a texture plate and two different dies!

Close up of the flower...not sure what happened to the colour in this one! 

Thanks to my Big Shot, this card was a cinch!  First I stamped the background using the daisy image from the Love and Care set and then sponged the whole thing in peach parfait.  The flowers were cut from peach parfait cardstock using my Daisy #2 die and then some of the layers were sponged in poppy parade.  I curled up the petals using my stylus and mat pack.  The "leaves" are from the Scribbles and Swirls die.  The label is punched with my decorative label punch...see this post for a link to a how-to-video on getting this shape.

Sorry that's all the detail I have time for tonight...I have an assignment to get done for my course!  See you tomorrow!

Wednesday, May 4, 2011

Love and Care

Today's post will be short, as will many for the next couple of months.  I just started an online course for work which is eating up most of my evenings and, as a result, I won't have much time for blogging!  I will still try to post something new for you most days, but my descriptions of how I made the projects will have to go by the wayside for a while.  If there is something that you see that you can't figure out how I did from the photos, please drop me a line and I will do my best to answer your questions.  So, today I have another card I did using the level two hostess set from the Summer Mini:  Love and Care...

Card using Love and Care level 2 hostess set

Close-up of embossing detail

I have found a new appreciation for the colour Not Quite Navy.  It is such a gorgeous blue...not too light as to be wishy-washy, but not so dark as to be...well...navy!  The other thing I love about this card is the embossing...how did I ever live without my Big Shot?!?
Related Posts Plugin for WordPress, Blogger...