Friday, October 31, 2014

Wintery Card

Happy Halloween!  I don't know what the weather is like where you are, but here they are calling for snow flurries for trick-or-treat time!  I'll be bundling my little monster up for sure...I wonder if we can work snow pants and gloves into the costume??
To reflect today's weather I have a frosty, wintery project for you...

Christmas card featuring the Tags 4 You stamp set (retired) and Northern Flurry TIEF.
This is a really quick and easy card I designed for a recent card buffet.  I embossed both the front and inside panels with the Northern Flurry TIEF.  I added some Whisper White Organza ribbon and some silver metallic ribbon over which I layered the label from the Tags 4 You (retired) stamp set.  I heat embossed the image in silver, punched it with the Bracket label punch and then layered it on a 1-3/4" circle punched from silver glimmer paper.  I layered the whole thing on a Smoky Slate card base and then added a few rhinestones to the centre of the embossed snowflakes, and a couple of Frosted Sequins around the label.

As mentioned above, I embossed the inside panel as well, catching less of the pattern to allow space to write.  The sentiment is from the More Merry Messages (retired) stamp set and is stamped in Basic Gray ink.  
I hope your Halloween is a sweet one and that you have a fabulous weekend.  Be sure to check back on Sunday for the latest sketch challenge from Sunday Stamps!


Tuesday, October 28, 2014

Revamped Birthday Card

I mentioned yesterday that I spent Sunday afternoon with a wonderful group of women who were (almost) all new to stamping.  At the hostess' request we made one birthday card and two Christmas cards.  The birthday card I chose is a revamped version of a card I did a while back. 

Birthday card featuring the Bordering Blooms and Tag Talk stamp sets.
To start, I stamped the border image from Bordering Bloooms in Old Olive ink on Whisper White card stock.  Then I embossed the panel using the Perfect Polka Dots TIEF, leaving the stamped portion smooth.  I added some Strawberry Slush thick baker's twine and some little flowers from the Itty Bitty Shapes (retired) punch pack.  The label, from the Tag Talk set, is stamped in Strawberry Slush and punched using the Bracket Label punch.  Of course, a card just isn't a card without some bling, which I added liberally ;)


The front panel is matted on a piece of Old Olive card stock and mounted on a Strawberry Slush card base.


On the inside I stamped the border again along the opposite edge and added a few more punched flowers.  The sentiment is from the And Many More stamp set and is stamped in Strawberry Slush ink, punched with the Lg. Oval punch and layered on a Scallop Oval in Old Olive.  A little more bling and...voila...a fun and easy birthday card.  Perfect for a group of new stampers to have success! 

Now here are this week's Weekly Deals...as always, prices are good until Monday at midnight.

1/16 Handheld Punch by Stampin' Up!
1/16" Circle Handheld Punch
Price: $8.95  
Sale: $6.71
Autumn Traditions Kit -- Digital Download
Autumn Traditions Kit - Digital Download
Price: $9.95  
Sale: $5.97
Blue Ribbon Wood Stamp Set
Price: $28.95Sale: $21.71
Dotted Scallop Ribbon Border Punch
Price: $15.95 
Sale: $11.96
Large Scallop Edgelits Die
Price: $7.95  
Sale: $5.96
Regals Designer Buttons
Price: $7.95  
Sale: $5.96
Word Bubbles Framelits Die
Price: $24.95 
Sale: $18.71

Monday, October 27, 2014

Very Merry Trees

Happy Monday!  I hope you had a fabulous weekend.  I spent yesterday doing one of my favourite things:  stamping with a group of ladies who were almost all brand-new to stamping.  We made three cards and had a blast!  I so love my job!
Today I have a project from my class last weekend.  It uses several new products from the Holiday catalogue:

Christmas card featuring the new Tree punch, Lucky Stars TIEF and Stars Framelits.
Not a lot of stamping on this one!  Just the sentiment, which is from the (retired) Many Merry Messages set.  I chose my colour scheme from the DSP I used:  Cherry Cobbler, Garden Green, Crumb Cake and Whisper White.  The red background circle is die-cut using the Circles Collection framelits and is embossed using the Lucky Stars TIEF.  The champagne glimmer star frame peeking out from behind the red circle was die-cut using the Stars Framelits, as was the medium star on the sentiment banner.  The cardfront is embossed as well, using the Delicate Designs TIEF.  To bring out the texture, I lightly sponged Whisper White Craft ink over it and around the edges of the card.

The trees are punched from Trim the Tree DSP stack.  I trimmed the bottoms of the two smaller ones to create different-sized trees.  The little star atop the left-most tree is punched with the Itty Bitty Accents punch pack.

For the inside I punched one more tree from the Trim the Tree DSP and adhered it to a piece of Whisper White card stock that I had embossed with the same TIEF I used on the front.  The sentiment, also from the More Merry Messages set is stamped in Cherry Cobbler.
Have a wonderful week!!

Friday, October 24, 2014

CASE'd Wreath

Today I have a card I CASE'd at the request of a client.  She found Wendy Johnson's design on Pinterest and asked if she and her guests for an upcoming Stamp-a-Stack could make exactly that card.  Always one to oblige my wonderful clients, I whipped up an exact copy of Wendy's card:

Simple Christmas card featuring the Wonderous Wreath stamp set and coordinating framelits.
Never one to leave well-enough alone, I decided to make a matching gift tag...


This tag was actually one of the offerings for the private card and tag buffet I held last weekend.  It sure was a hit!  The Wonderful Wreath Bundle pretty much sells itself...it is that awesome!  It is so easy to get layered, multi-coloured images and die-cut them perfectly with this bundle.  In case you'd like to CASE my CASE, my colour scheme was Real Red, Whisper White, Pear Pizzazz and Old Olive.  I used the Top Note Bigz die to cut the label shape. 

On the inside I stamped the sentiment that is included in the Wonderous Wreath set in Old Olive and added a little poinsettia in Real Red.


While this card is a wee bit simpler than my usual style, it will be perfect for my relatively-new-to-stamping guests.  I hope this weekend affords you quality time to spend with those you love...enjoy!

Thursday, October 23, 2014

Strong and Free...still

Yesterday was a day my country hoped would never come.  An armed gunman shot and killed an unarmed soldier who was guarding the National War Memorial near Parliament Hill in Ottawa.  Then he entered our Parliament Buildings and opened fire.  Two security guards were injured, thankfully not fatally, before the Sergeant at Arms, a ceremonial figure in our House of Parliament, shot and killed the gunman. 
The death of Corporal Nathan Cirillo, the unarmed soldier shot while keeping vigil over our War Memorial, is senseless and tragic.  That someone was able to enter the heart of our governement with a weapon and open fire is terrifying.  But we will not live in fear.  We will not let the hatred of others turn us to hate.  We are strong.  We are free.
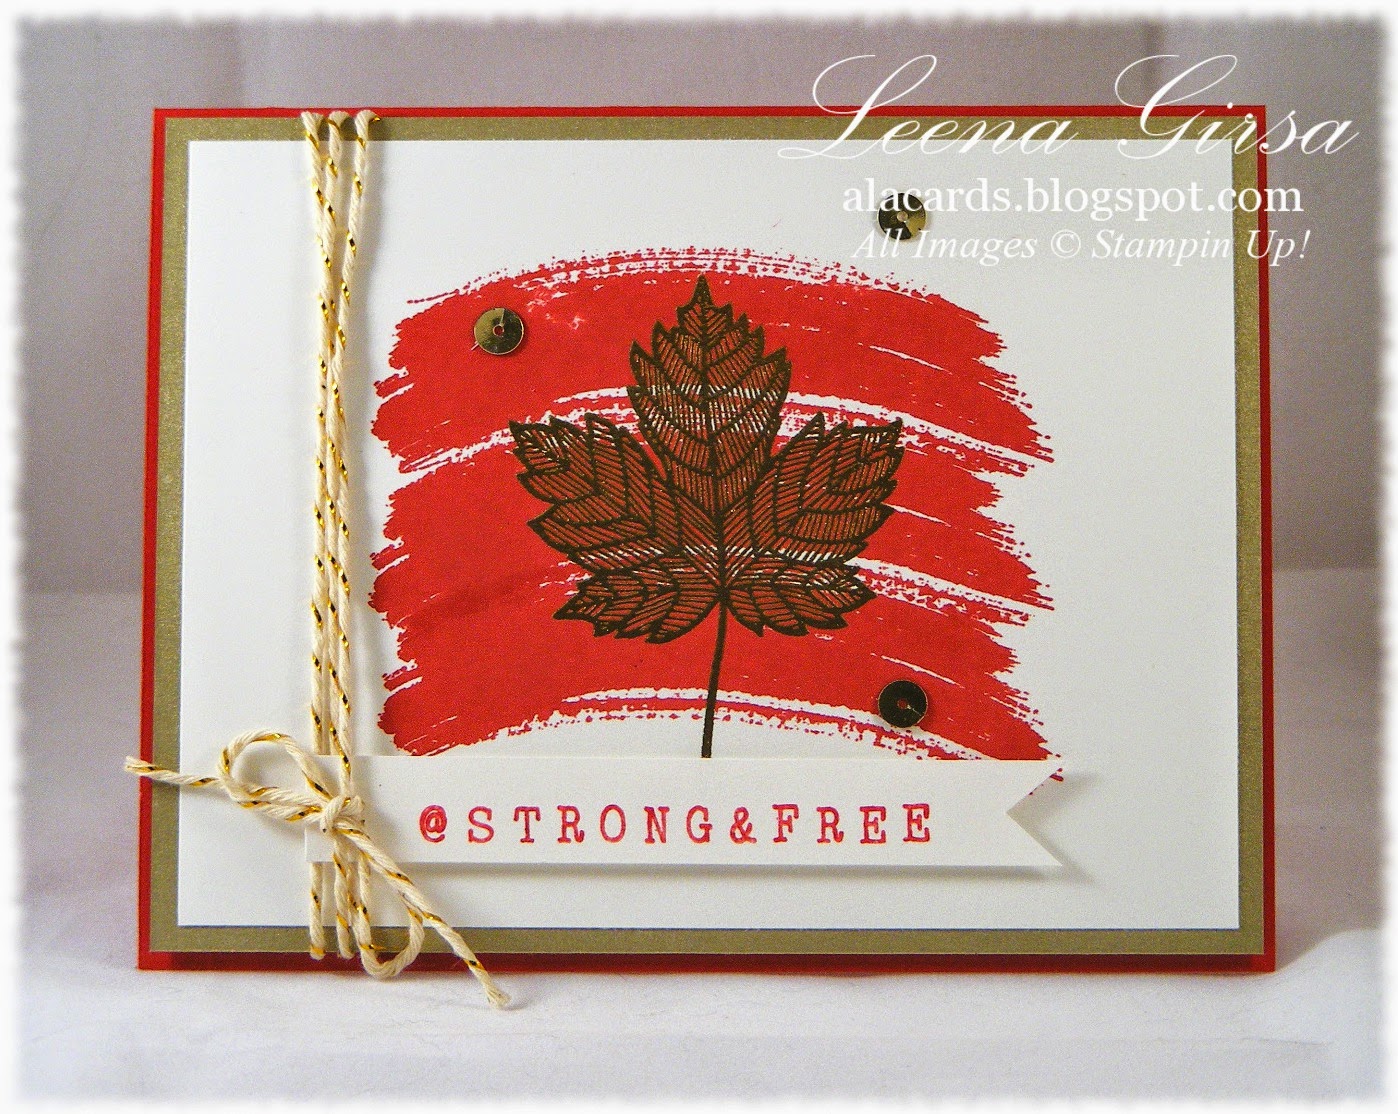
This is a card I posted earlier this year in celebration of our country's birthday.  Today I am reposting it in honour of Corporal Cirillo, and of all those who fight each day to keep us strong and free...

Oh Canada, our home and native land;
True patriot love, in all thy sons' command.
With glowing hearts we see thee rise
The True North strong and free.
From far and wide, Oh Canada,
We stand on guard for thee.
God keep our land,
Glorious and free.
Oh, Canada, we stand on guard for thee.

Wednesday, October 22, 2014

A Non-Traditional Christmas Card

Earlier this week I showed you a very traditional Christmas card.  Today I have one that uses non-traditional colours...

Non-traditional Christmas card featuring the Endless Wishes stamp set.
This one is super-quick and easy if you have to mass-produce a lot of cards.  I used a colour scheme of Pistachio Pudding, Crisp Cantaloupe, silver and white.  The result is a crisp, clean and simple design that is a little bit unexpected.  The large snowflake, from the Endless Wishes stamp set,  is stamped in Pistachio Pudding ink and the small one is in Crisp Cantaloupe.  The medium snowflake and the sentiment are both heat embossed in silver.


I added a Vintage Faceted button in the centre of the largest snowflake and a thick baker's twine bow in Crisp Cantaloupe.  Since every Christmas card requires a bit of sparkle, I added a few silver Frosted Sequins.  I matted the front panel with brushed silver card stock and mounted it all on a card base in Pistachio Pudding.


On the inside I stamped the snowflakes again several times and added the sentiment from the Christmas Bliss photopolymer stamp set.  A couple more sequins and that's it!  Quick, easy and a break from the traditional red-and-green Christmas card :)

Tuesday, October 21, 2014

Merry & Bright

Today I have another project from my weekend card and tag buffet to show you.  It is a simple, homespun-looking Christmas card...

Simple Christmas card featuring the Nordic Noel DSP and Christmas Bliss photopolymer stamp set.
I have to admit that one of my favourite products from the Holiday catalogue is the tree punch and coordinating stamp set.  This particular card doesn't use the stamp set, but I used the punch to create a negative image for my DSP to peek through.  After I had punched the tree I embossed the panel with the Argyle TIEF...one of my favourites for creating a warm and cozy look.  I used a bit of Real Red 1/4" stitched grosgrain ribbon (retired) and added the little banner which I die cut using the Banners framelits. 


The sentiment stamp is from the Christmas Bliss photopolymer set, which is not in any catalogue, so it is easy to miss.  It is a great set that offers lots of different sentiments and images for various Holiday projects.  I layered the embossed card stock on a piece of Nordic Noel DSP, which is matted on Real Red card stock.  I used Garden Green for the card base.

Inside view with image from the Cheerful Tags stamp set and sentiment from Christmas Messages (retired)
On the inside I stamped the tree border from the Cheerful Tags set along the bottom edge using Garden Green ink.  The sentiment is from the Christmas Messages set (retired) and is stamped in Real Red ink.

Be sure to check out this week's round of Weekly Deals...on sale till Monday at midnight :)

Calypso Coral  3/4 Chevron Ribbon
Calypso Coral 3/4" Chevron Ribbon
Price: $12.50 
Sale: $9.38
Jumbo Sticky Rounds
Jumbo Sticky Rounds
Price: $6.95 
Sale:  $5.21
Little Buddy Birthday Wood Stamp Set by Stampin' Up!
Little Buddy Birthday Wood-Mount Stamp Set
Price: $26.95  
Sale: $20.21
Lovely Lace Textured Impressions Embossing Folder by Stampin' Up!
Lovely Lace Textured Impressions Embossing Folder
Price: $9.95
Sale: $7.46 
Settin’ Sail Photopolymer Stamp Set
Price: $16.95  
Sale: $12.71
Soft Sky 1/2 Seam Binding Ribbon
Soft Sky 1/2" Seam Binding Ribbon
Price: $9.50  
Sale: $7.13
Spook Central Designer Ensemble -- Digital Download
Spook Central Designer Ensemble - Digital Download
Price: $13.95  
Sale: $8.37
Zig Zag Textured Impressions Embossing Folder by Stampin' Up!
Zig Zag Textured Impressions Embossing Folder
Price: $9.95  
Sale: $7.46

Monday, October 20, 2014

Piney Wishes

Happy Monday...hope you had a great weekend!  I ran a private card and tag buffet for a client and her friends and family yesterday afternoon.  They got lots of stamping done and I have lots of new designs to show you!  Today I have a traditional Christmas card featuring the Ornamental Pine stamp set:

Christmas card featuring the Ornamental Pine stamp set.
It doesn't get much more traditional than the iconic pine boughs and pinecones for the Holildays.  I focused on a red and green colour scheme, using Mossy Meadow ink to stamp my pine branches on the Sahara Sand card front and Cherry Cobbler on Very Vanilla card stock for the sentiment.  To die-cut the label I used the Project Life Cards and Labels Framelits.  The pinecones are heat embossed in Early Espresso, which gives them a bit of shine.  I adore the 1" Sheer Linen ribbon in the Holiday Catalogue...it is so pretty and easy to work with.  To create the "bow that isn't a bow" I simply gathered a small piece of ribbon between the prongs of a Basics Glimmer Brad (still available DIRT CHEAP on the Clearance Rack!), poked a hole in the card front and inserted the prongs, opening them on the back side to secure it.  Voila...a bow that requires no tying!  My guests were thrilled!


I used Mossy Meadow card stock to mat the card front and then mounted it on a Cherry Cobbler card base.
For the inside I stamped the pine branch again in Mossy Meadow and the sentiment in Cherry Cobbler.

This was one of the most popular designs with the group yesterday.  I guess we all like a little tradition in our Holiday season!

Now today is also the day the new Holiday Supplement goes live!  This addendum to the Holiday Catalogue has some fabulous new products, including a new Project Life card kit and accessory pack to make documenting your family's Holiday memories a breeze.  Check out the online version of the supplement here or email me to request your free complimentary hard copy.

Click the image to view in pdf format.

Sunday, October 19, 2014

Patchwork Pumpkins

Happy Sunday!  I hope you are having a fantastic weekend :)
It's time for a new challenge over at Sunday Stamps...this time it is a colour challenge:


I have to admit I found this challenge tough!  I am in full-on Christmas mode, so working with such summery colours was a big shift for me.  I decided to allow the images in the photo to inspire me and go with a Fall-themed design.

Thanksgiving card featuring the Fall Fest stamp set with sentiment from Good Greetings.
 Now, you're probably thinking I didn't use the colours in the challenge, right?  Wrong!  I stuck to the colours exactly!  The pumpkins were created using the Emerging Colours technique and I used Daffodil Delight, Pumpkin Pie, Cherry Cobbler and Tempting Turquoise to achieve the look.  Here's how I did it:
  • I sponged splotches of Daffodil Delight ink on a piece of Whisper White card stock, making sure to leave lots of white space for the other colours.
  • I added splotches of Pumpking Pie ink in between the Daffodil Delight, overlapping and blending where the colours touched.  I still made sure there was white space left.
  • I filled in the remaining white space with Cherry Cobbler ink, once again blending the colours where they touched.
  • I sponged the entire surface once again with Daffodil Delight ink to allow the colours to blend.
  • Once the ink had dried, I stamped the leaves from the Fall Fest set all over using Versamark ink and then heat embossed using clear embossing powder.
  • Then I sponged the entire surface with Tempting Turquoise ink.  The ink blends differently with each of the other ink colours for a cool patchwork look.  The embossed leaves resist the ink and allow the original colour to show underneath.

Once I had created my patchwork of colour I die-cut the pumpkins using the Fun Fall Framelits.  I also cut some leaves from Champagne glimmer paper because, well...because I like bling!
Then it was just a matter of creating my arrangement.  I added a bit of linen thread and some Autumn Wood Elements for texture and dimension.  The sentiment is from the Good Greetings Host Promo set and is stamped in Cherry Cobbler ink on Very Vanilla card stock.  I layered it on a bit of Burlap ribbon.  The card base is Naturals Ivory card stock and is embossed using the Delciate Designs TIEF.


I hope you'll give this colour challenge a try and join us over at Sunday Stamps.  It is great fun to challenge yourself to step outside your comfort zone...and it does wonders for your creativity!

Friday, October 17, 2014

Eclectic Christmas

Today I have a funky Holiday card I came up with using two sets from the Annual Catalogue.  Check it out:

Christmas card featuring the Kinda Eclectic and Sassy Salutations stamp sets.
This one looks kind of retro, no?  I love that starburst image from the Kinda Eclectic set and thought it might make a fun background for a Christmas card.  I used a colour scheme of Smoky Slate and Coastal Cabana, along with Whisper White.  The background panel is embossed using the Snowburst (retired) TIEF.

The sentiment is from the Sassy Salutations set.  I highlighted the sentiment panel with a star frame that I die cut from silver glimmer paper using the Stars Framelits.  I added a little silver metallic bow and some Frosted and In-Colour Sequins.


On the inside I stamped the starburst image again is Smoky Slate and then added the sentiment from the long-retired Many Merry Messages set, which I punched with the XL Oval punch. 

Be sure to stop by on Sunday for the new challenge from Sunday Stamps.  In the meantime, have a fabulous weekend!

Wednesday, October 15, 2014

Fall Birthday

I have a private class coming up in a couple of weeks.  One of the projects that was requested was a birthday card, so I figured I would do something Fall-themed...

Fall-themed birthday card featuring the For All Things and Tag Talk stamp sets.
I used the leaf image from the For All Things stamp set, layering the image in Crushed Curry, Cajun Craze and Cherry Cobbler inks.  The background is embossed using the Perfect Polka Dots TIEF.  The label is from the Tag Talk stamp set and is stamped in Mossy Meadow is and punched with the Bracket Label punch.  I layered it on a 1-3/4" circle in Champagne glimmer paper. 


I added some natural fibres with a bit of burlap ribbon and some linen thread, as well as a Naturals Button.  It needed a bit more bling so I added a few strategically placed gold sequins.  I'm happy with the result...hope the guests at my class are too!

Tuesday, October 14, 2014

Back from our second honeymoon

We're back!  My hubby and I had a lovely weekend getaway celebrating our 10th anniversary.  We visited Niagara-on-the-Lake and Niagara Falls and spent some wonderful quality time together.  Unfortunately I was feeling a little under-the-weather, but we didn't let that ruin our time together.  Yesterday was our Canadian Thanksgiving with way too much food and more family time.  All of this means I didn't even see my craft room this weekend, so I thought I would show you one of the Make-n-takes from the recent Stampin' Up! conference in Kitchener.  Check it out:

Holiday card and gift box featuring the Happy Winter and Petite Pairs stamp sets.
I love this colour scheme!  I think it is the way the Real Red pops agains the cool Coastal Cabana and Whisper White.  The card is a shaker card filled with Frosted Sequins.  The background is embossed using the Lucky Stars TIEF.  The stamped image from the Happy Winter stamp set is coloured using the Coastal Cabana Blendabilities set.  


The little box was made using the Gift Box Punch Board...didn't own that nifty little gadget before, but I sure do now!  It is so quick and easy to make boxes...no more measuring and trial and error!

We added some Real Red 3/8"Satin Woven Ribbon and an All is Calm Snowflake embellishment to pretty it up, not that it needed much...it is so stinkin' cute!  The tag is stamped using the Petitie Pairs stamp set.

The best part about this project was that we all got the Happy Winter set to take home with us...so we can recreate this one again and again!  Love it!

Now for this week's Weekly Deals...don't forget these prices are only good till Monday at midnight.  There are a few items going on my order this week!!

Darling Doily Thinlits Die by Stampin' Up!
Darling Doily Thinlits Die
Price: $30.95 
Sale: $23.21
Decorative Window Gift Box
Price: $5.95  
Sale $4.46
Floral Frames Framelits Die
Price: $32.95  
Sale: $24.71
Mustache Framelits Die by Stampin' Up!
Mustache Framelits Die
Price: $9.95  
Sale: $7.46
Perfect Print Numbers Bigz Die by Stampin' Up!
Perfect Print Numbers Bigz Die
Price: $30.95  
Sale: $23.21
Spooky Treats Designer Template -- Digital Download
Spooky Treats Designer Template - Digital Download
Price: $13.95 
Sale: $8.37
Tiny Triangles Textured Impressions Embossing Folder by Stampin' Up!
Tiny Triangles Textured Impressions Embossing Folder
Price: $9.95  
Sale: $7.46
Truly Grateful Wood Stamp Set
Price: $33.95 
Sale: $25.46
Related Posts Plugin for WordPress, Blogger...