Showing posts with label Good Greetings stamp set. Show all posts

Monday, February 8, 2016

Paper Pumpkin to the Rescue!

Happy Monday! I hope you had a good weekend! Mine was pretty low key, as both I and my husband are suffering from a nasty sinus cold that is making the rounds. Not much fun, and not much stamping happened. However I did manage to get some Valentine's treat holders made for my son's party coming up this Thursday. Because I was feeling so crummy I turned to my January Paper Pumpkin kit for inspiration.  Here is the end result:

I am so happy with the way these turned out, mainly because they were relatively quick and easy to make. Because I needed 30 treat holders, I needed to make my kit stretch as far as possible. So I used the Hearts Collection Framelits to die-cut the scalloped hearts from card stock. I drew the colour scheme from the colours in the kit: Watermelon Wonder, Mint Macaron, Blushing Bride and Smoky Slate. I adhered the patterned-paper hearts that came in the kit to the card stock scalloped hearts I had cut to create a little pocket to hold a treat. Then I decorated each heart with some of the banners that came in the kit, as well as the sequin trim and twine that was also included. The plain wooden mini clothespins came in the kit.  The Watermelon Wonder one in the following photo is from the All Boxed Up project kit and is perfect for this project!

I used the Hello You Thinlits to die cut the word "happy" from coordinating shades of card stock and adhered the die-cut word using the Fine-tip glue pen. The "Valentine's Day" sentiment is from the (retired) Good Greetings stamp set. I stamped it using Watermelon Wonder ink. The little silver glimmer heart is die cut using the Hearts Collection Framelits.

The final touch was a few silver heart sequins from the Metallics Assortment, which I also adhered using the Fine-tip glue pen. Now to get out and buy some treats to fill these pretties!

Have a great week!

Here are the products (besides the Paper Pumpkin kit) used to create this project:

Built for Free Using: My Stampin Blog

Tuesday, October 13, 2015

My Anchor

Last Friday my hubby and I celebrated our 11th wedding anniversary. It was the first time in three years I haven't had to work on our big day. It was wonderful to be able to celebrate and spend some quality time together...it seems to be in short supply these days!  Here is the card I made for him:

Masculine card featuring the Guy Greetings and Work of Art stamp sets.
Since we had an October wedding, I chose a Fall-inspired colour palette. I used one of the brush-stroke images from the Work of Art set and stamped it in Crushed Curry, Cajun Craze and Cherry Cobbler inks. Then I stamped the anchor image from the Guy Greetings set over top using Early Espresso ink and die-cut it using the Lots of Labels Framelits.

The background panel is a piece of Kraft card stock that I embossed using the Woodgrain TIEF and then layered on a slightly larger piece of gold foil sheets. I added some subtle sparkle with single strands of gold metallic thread. The sentiment is also from the Guy Greetings set and is stamped in Early Espresso ink. I die-cut it using the Banners Framelits. The only additional embellishment is a bow made from gold Baker's twine. The card is built on an Early Espresso card base.

On the inside I stamped the heart from the Work of Art stamp set in Cherry Cobbler ink and added a sentiment from the (retired) Good Greeting set in Early Espresso ink.

My hubby loved the simplicity of this project...try it for the man in your life!

Here are the products I used to make this card:


Built for Free Using: My Stampin Blog

Sunday, September 20, 2015

Peace & Joy for Sunday Stamps

Happy Sunday!  It's time for a new sketch challenge over at Sunday Stamps.  Check it out:


Here is my project for the Design Team:

Christmas card featuring the Flurry of Wishes stamp set with sentiment from the Good Greetings (retired) set.
I just can't get enough of the gorgeous Holidays Fancy Foil Designer Vellum!  It sooooo pretty!  I used it here as the background for my design. I layered it on a piece of Whisper White card stock so that the beautiful silver foil snowflakes would show. In the lower right corner I used some silver foil sheets that I embossed using the Softly Falling TIEF. Because I hate seeing seams on my projects, I added a piece of  white 3/8" glitter ribbon...I love the bit of sparkle it adds.


The stamped snowflakes are from the Flurry of Wishes stamp set. I heat embossed the largest one in silver and punched it using the Flower Medallion punch. The medium one is stamped in silver on silver foil sheet and punched using the Snow Flurry punch. The smallest snowflake is stamped in Night of Navy ink and also punched with the Snow Flurry punch. I added a Winter Wonderland embellishment in the centre for some sparkle.  The sentiment is from the Good Greeting set which is, sadly, retired. The entire card is built on a Night of Navy card base.

On the inside I added a Whisper White panel that I stamped with the snowflake images in Night of Navy, as well as a sentiment that is also from the Flurry of Wishes set.

This sketch is super-versatile, as is evidenced by the amazing ideas showcased by my fellow Design Team members. I'll have another project to show you later in the week that also uses this sketch.  In the meantime, why not try your hand at it and share it with us over at Sunday Stamps? We'd love to see what you come up with!

Here are the products used to create this project:


Built for Free Using: My Stampin Blog

Saturday, February 14, 2015

Happy Heart Day!

Happy Valentine's Day!  I hope your day started better than mine!  I ended up in a walk-in clinic to get antibiotics for this crummy sinus infection.  Not the ideal start to the day, but when I came home, my wonderful hubby had vaccuumed and mopped the floors and had a lovely bouquet of flowers waiting for me!  What a keeper!

Today I have a cute little treat box I designed for my Feel the Love Valentine's class last week:

Treat box made with the Simply Scored and Envelope Punch Board.
This cute little design is not my own.  I used a tutorial by Tracey May.  It is super easy to put together, which made it perfect for my class.

Before assembling the box I stamped all the way around with the confetti hearts stamp from the Perpetual Birthday Calendar set using Real Red ink.  I also added some metallic gold spatters using the Gorgeous Grunge set.  The top of the box is punched with the Confetti Hearts Border Punch.  I tied the box closed with some 1/4" Real Red cotton Ribbon.

The tag began with Whisper White card stock punched with the Note Tag punch.  I added a gold foil heart that I embossed using the (retired) Adorning Accents TIEF.  I layered it on a Real Red heart die-cut with the (retired) scalloped heart Embosslit.  I added some gold sequin trim and a little banner heat embossed in gold  using the Good Greeting Hostess set (retired).

I hope you are spending today with the ones you love...make a special one!


Tuesday, February 3, 2015

Sending Love Your Way

Happy Tuesday!  Today feels more like a Monday here...we had a snow day yesterday!!  We got upwards of a foot of snow in just 12 hours, which pretty much ground everything to a halt.  Both my son and I had a day off school...only my poor hubby had to trek through the snow to get to work.  Poor guy :(  I made it up to him with a crock pot full of chilli, a pan of homemade corn bread and fresh-from-the-oven apple crisp for dinner.  I think he enjoyed it ;)
Now for today's project...Valentine's Day is just around the corner and I have a class coming up this weekend where we will be making some projects to let the special people in our lives know just how much we love them.  This is one of the projects we'll be making.

Valentine's card featuring the Perfect Pennants and Celebrate Today stamp sets.
To create the cloudy sky background layer I punched a post-it note with the 2-3/8" circle punch and then used it as a mask to create the puffy clouds.  I started with a piece of Whisper White card stock, adhered the scalloped circle and then sponged with a dauber and Soft Sky ink.  Then I moved the mask and sponged some more, repeating this process until I had covered the entire piece of card stock.  The basket of the balloon is from the Celebrate Today stamp set and is stamped in Basic Black ink.  The balloon is die-cut using the Balloon Framelits from Stacked With Love DSP.  I also die-cut the little banner from silver glimmer paper using the same framelit set.

The words Sending...your way are from the Perfect Pennants set.  I simply omitted the "good thoughts" portion of the stamp by inking the words I wanted with my Basic Black marker.  The blank space left was perfectly-sized for the die-cut "love", cut from Real Red card stock using the Expressions (retired) Thinlits.  The background Real Red mat is embossed using the Happy Heart TIEF.  I added some little silver glimmer hearts, punched with the Confetti Hearts Border punch, spilling out of the basket.  The card base is Soft Sky card stock.

Inside view with sentiment from Good Greetings (retired) stamp set.
On the inside I stamped the sentiment from the Good Greetings (retired) stamp set in Real Red ink and added some little hearts in Soft Sky ink using the Perpetual Birthday Calendar stamp set.


Sunday, February 1, 2015

"Love" this Sketch

Happy Superbowl Sunday everyone!  If you're like me, the best thing about the Superbowl is that everyone in my house is glued to the TV, which means I can escape to my craft cave and stamp the night away!

Today it is time for a new challenge over at Sunday Stamps.  Here is our sketch:


...and here is my project for the Design Team:

Valentine's Card featuring the Countless Sayings 1 photopolymer set and the Hello You Thinlits.
Now, it also happens that this project works with the Valentine's challenge over at Stampin' Royalty...hmmm...you'd think I planned that or something! 

This sketch is so terrific...so many possibilities!  I have other projects planned using it...stay tuned!  As for this card, I pulled out my Countless Sayings 1 photooploymer set...haven't used that one in AGES!  I began by adhering three Washi tape strips along the left edge.  The red tape is retired, but the gold is from the Watercolour Wonder pack and the black is from the Stacked With Love pack.  I stamped the LOVE image in Memento Tuxedo Black ink and then coloured it with the Cherry Cobbler Blendabilities.


I die-cut the word 'you' from Basic Black card stock using the Hello You Thinlits.  The little gold foil hearts are punched with the Confetti Heart punch.  I added some Basic Black Baker's twine and a little black button from my stash and layered the whole card front on a piece of Real Red card stock.  Then I mounted it on a Basic Black card base.

Inisde view with sentiment from Good Greetings (retired).

On the inside I stamped the sentiment from Good Greetings (that awesome hostess promo set from last fall) using Real Red ink.  I added a few more little gold foil hearts, leftover from the front of the card.

So...are you ready to give this one a try?  This sketch is so flexibile...you can do just about anything with it!  Be sure to check out the rest of the Design Team's projects and then give it a go.  Then share it with us over at Sunday Stamps.  Happy Superbowl stamping!

Sunday, November 30, 2014

A New Sketch Challenge!

Happy First Sunday of Advent!  Can you believe it is just over four weeks till Christmas Day?!?It is time for a new sketch challenge over at Sunday Stamps.  Check it out:


Here is the card I designed....

Christmas card featuring the Festival of Trees and Good Greetings stamp sets
As you can see, I flipped the sketch upside down!  I love playing with sketches to find alternate ways to incorporate them into my designs.  Here is how I put this one together:

This sketch is SO versatile!  Check out the projects by the rest of the Design Team and then give it a go.  We'd love to see your take on it!

Friday, November 28, 2014

Merry & Bright Wishes

Happy Black Friday!  Thanks for taking time out from shopping to stop by!  Be sure to check out the amazing deals Stampin' Up! is offering this week.  Click HERE to see what is on sale.
Today I have another sample from my Last Chance Christmas card buffet that is happening tonight.  It features the Endless Wishes stamp set and LOTS of stamping!

Christmas card featuring the Endless Wishes, Good Greetings (retired), and  Gorgeous Grunge stamp sets.
This one is really quick and easy to put together, but does have a lot of stamping on it.  I started by stamping the three sizes of snowflakes from the Endless Wishes set in Cherry Cobbler ink on the Cherry Cobbler card stock panel.  Then I sponged the edges of the panel all the way around in Cherry Cobbler ink.  I stamped the splatter image from Gorgeous Grunge in Metallic Silver Encore ink.  Once that was dry I heat embossed more snowflakes in white...love the way they pop against the red background!  The panel is then matted on Whisper White before being mounted on a Cherry Cobbler card base.

The sentiment, from the Good Greetings (retired) Hostess set, is stamped in Cherry Cobbler on Whisper White card stock.  I added a bit of bling with a silver metallic bow and some Frosted Sequins.

Inside view with sentiment from Endless Wishes.
On the inside I stamped the sentiment from Endless Wishes and then added a couple of small snowflakes in metallic silver.  The finishing touch was a few more Frosted Sequins.  Voila...quick and easy!  Have a wonderful weekend...and happy shopping...may the odds be always in your favour ;)

Thursday, November 27, 2014

Ho Ho Ho!

A very happy Thanksgiving to all my American friends!  I hope you have a wonderful day celebrating with family and friends!

Today I have another project for my upcoming Last Chance Holiday Card Buffet this weekend.  Check it out:

Christmas card featuring the Holiday Home, Many Merry Stars and Good Greetings stamp sets.
The inspiration for this card came from one I saw on Pinterest designed by Teneale Williams.  I began by embossing some Cherry Cobbler Core'dinations card stock using the Lucky Stars TIEF.  I sanded it lightly and adhered it to a Crumb Cake card base.  The star image, from the Many Merry Stars stamp set, is stamped in Cherry Cobbler ink on Crumb Cake card stock.  The Santa image, from the Holiday Home set,  is stamped in Early Espresso ink.  I die cut the star using the Stars framelits.

The focal image is layered on a piece of Under the Tree Specialty DSP that I layered on a slightly wider piece of Champagne glimmer paper.  I added some Champagne glimmer stars, a Vintage Faceted Button and some Cherry Cobbler baker's twine to pull it all together.

On the inside I stamped the sentiment from the Good Greetings (retired) set and added Santa's sleigh, stamped off in Early Espresso ink.
Another quick and easy one...hope my guests like it!

Tuesday, November 25, 2014

The Extravaganza Continues!

The big sale continues all this week!  To view all of the amazing deals click the flyer below!  Remember...sale pricing is only while current stock lasts.  Once it's gone, so are the deals!

http://www.stampinup.com/ECWeb/CategoryPage.aspx?categoryid=2014

Now for a new project!  I still have one of the projects from my November techniques class to share with you.  I saved my favourite for last!  It uses the Stampin' Mist Ghosting Technique as well as the very first stamp set I ever bought:  Lovely as a Tree...

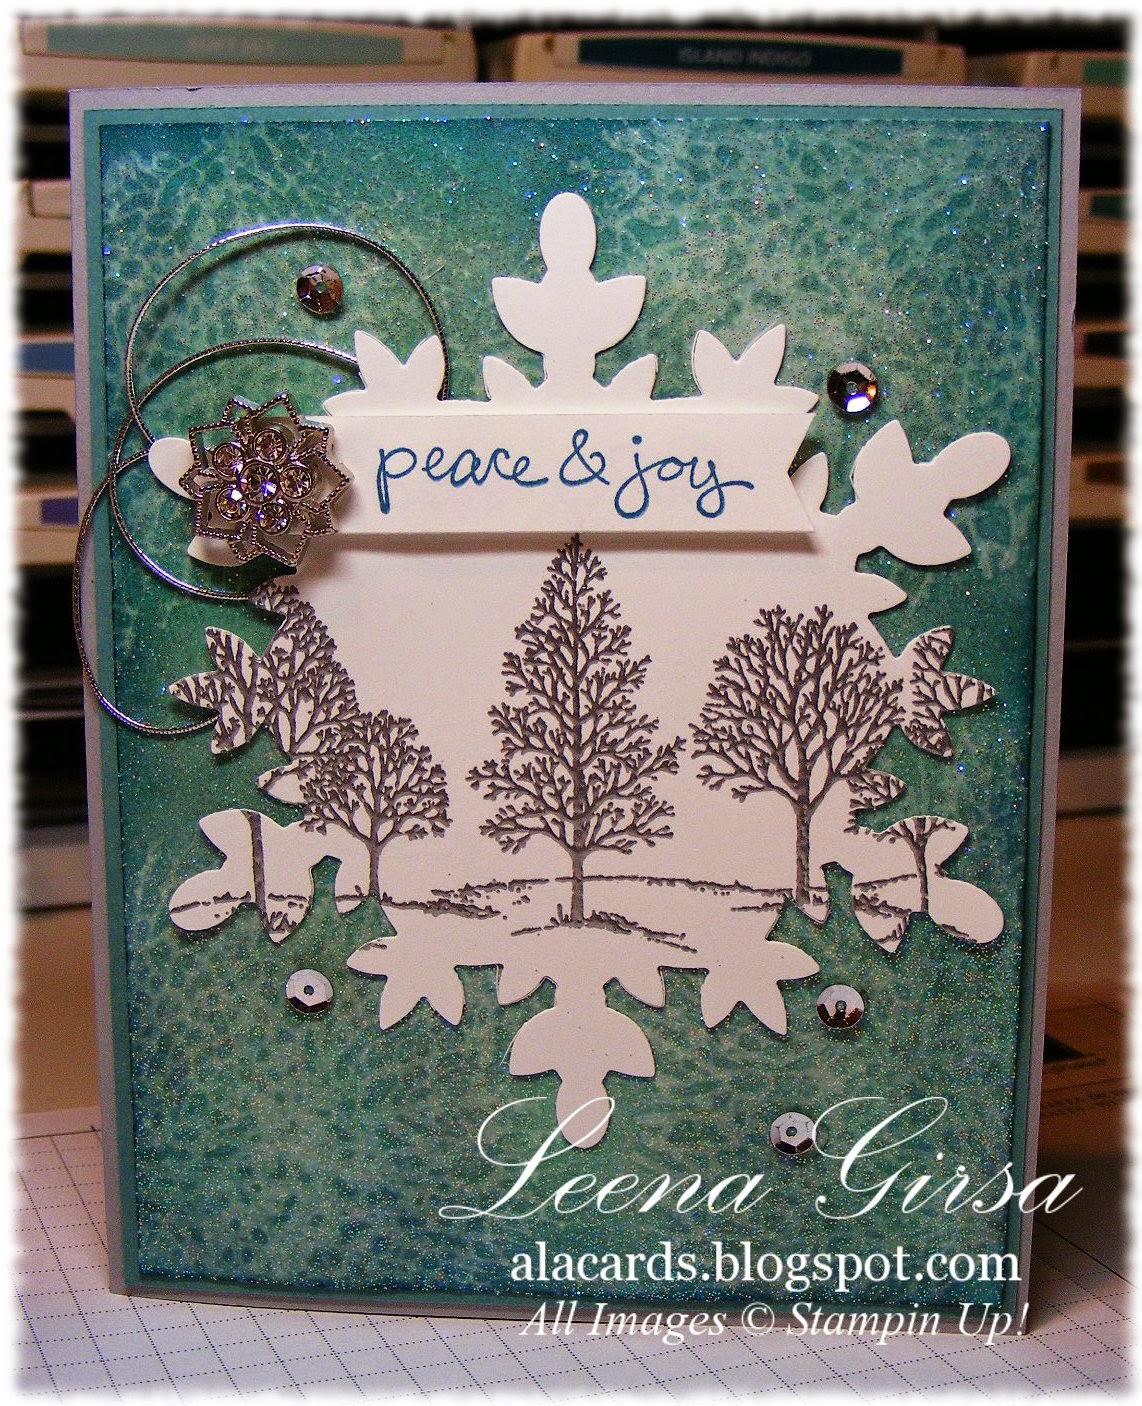
Christmas card featuring the Lovely as a Tree stamp set, along with By the Tide and a sentiment from the (retired) Good Greetings set.
I love that the background on this one looks like frosted glass.  I had originally planned on going a whole different direction with this card, but when I saw the way that background turned out I had to make it a wintry Christmas card.  Here is how I got the look:
 I matted the card front on a piece of Lost Lagoon card stock before adhering it to a Smoky Slate card base.  
The trees, from the Lovely as a Tree set, were heat embossed in silver and then die cut using the largest of the Festive Flurry (retired) framelits.  The sentiment is stamped in Island Indigo ink.  The snowflake embellishment was the last of my stash from last year's Holiday Catalogue...loved those things!  I added some silver cord I have also been hoarding saving, as well as a few Frosted Sequins.

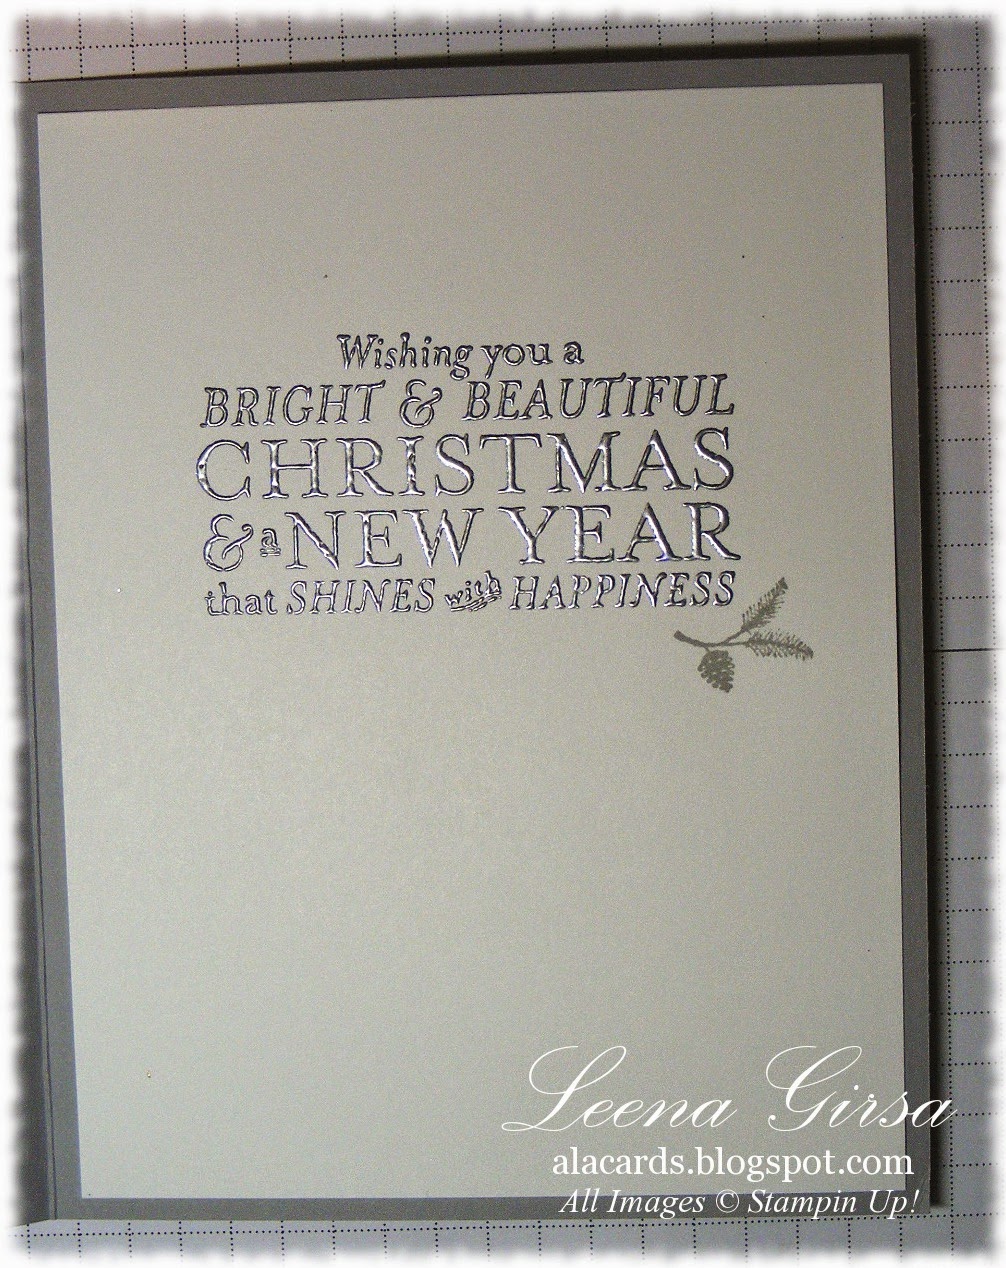
Inside view with sentiment from the Bright and Beautiful stamp set.
On the inside I heat embossed the sentiment from the Bright and Beautiful stamp set in silver and added the week pine branch from Lovely as a Tree, stamped in Smoky Slate ink.
I have to admit that this is one of my favourite cards I've designed in a while.  It is definitely going to someone very special this Christmas!

Monday, November 10, 2014

Whirlwind Weekend!

I'm not quite sure how it can possibly be Monday already.  I don't seem to remember having a weekend!!  What a crazy couple of days!  The good news is that part of my craziness involved designing new projects for various events I have coming up.  The first one I have for you features my beloved Blendabilities...

Christmas card featuring the Christmas Bauble stamp with sentiment from the Good Greetings set.

I designed this one for my Blendabilities Club this month.  They are receiving the Cherry Cobbler Blendabilities set, so I focused on Christmas-themed projects.  To create this look I began by heat embossing the Christmas Bauble image in gold.  Then I coloured the image using the Cherry Cobbler and Old Olive Blendabilities sets.  The top of the ornament is coloured using the gold Stampin' Dazzle Marker.

Once I had finished colouring the image I fussy cut it out using my paper snips and adhered it to a Whisper White card front that I had embossed using the Filigree Frame TIEF.  I added some Cherry Cobbler Seam Binding Ribbon and a bit of long-retired gold elastic cord I had in my stash.  The only bit of bling is a single rhinestone in the centre of the ornament that I coloured yellow using my Daffodil Delight Blendabilities.  The sentiment from the Good Greetings (retired) host promo set is heat embossed in gold.  I used Crumb Cake for my card base.

Inside view with sentiment from the Beauty of the Season stamp set.
On the inside I stamped the sentiment from the Beauty of the Season stamp set and added some holly that I trimmed from the Christmas Bauble image.

I love the way this one turned out...hope my Blendabilities Club members do too!

Sunday, October 19, 2014

Patchwork Pumpkins

Happy Sunday!  I hope you are having a fantastic weekend :)
It's time for a new challenge over at Sunday Stamps...this time it is a colour challenge:


I have to admit I found this challenge tough!  I am in full-on Christmas mode, so working with such summery colours was a big shift for me.  I decided to allow the images in the photo to inspire me and go with a Fall-themed design.

Thanksgiving card featuring the Fall Fest stamp set with sentiment from Good Greetings.
 Now, you're probably thinking I didn't use the colours in the challenge, right?  Wrong!  I stuck to the colours exactly!  The pumpkins were created using the Emerging Colours technique and I used Daffodil Delight, Pumpkin Pie, Cherry Cobbler and Tempting Turquoise to achieve the look.  Here's how I did it:
  • I sponged splotches of Daffodil Delight ink on a piece of Whisper White card stock, making sure to leave lots of white space for the other colours.
  • I added splotches of Pumpking Pie ink in between the Daffodil Delight, overlapping and blending where the colours touched.  I still made sure there was white space left.
  • I filled in the remaining white space with Cherry Cobbler ink, once again blending the colours where they touched.
  • I sponged the entire surface once again with Daffodil Delight ink to allow the colours to blend.
  • Once the ink had dried, I stamped the leaves from the Fall Fest set all over using Versamark ink and then heat embossed using clear embossing powder.
  • Then I sponged the entire surface with Tempting Turquoise ink.  The ink blends differently with each of the other ink colours for a cool patchwork look.  The embossed leaves resist the ink and allow the original colour to show underneath.

Once I had created my patchwork of colour I die-cut the pumpkins using the Fun Fall Framelits.  I also cut some leaves from Champagne glimmer paper because, well...because I like bling!
Then it was just a matter of creating my arrangement.  I added a bit of linen thread and some Autumn Wood Elements for texture and dimension.  The sentiment is from the Good Greetings Host Promo set and is stamped in Cherry Cobbler ink on Very Vanilla card stock.  I layered it on a bit of Burlap ribbon.  The card base is Naturals Ivory card stock and is embossed using the Delciate Designs TIEF.


I hope you'll give this colour challenge a try and join us over at Sunday Stamps.  It is great fun to challenge yourself to step outside your comfort zone...and it does wonders for your creativity!

Wednesday, September 3, 2014

Merry & Bright

Well, we all survived our first day of school, but man am I exhausted!  I'm glad it's only a 4-day week this week!  Today I have another sample from my upcoming Holiday Head-start card buffet using several new products from the Holiday Catalogue:

Christmas card featuring the Good Greetings stamp set.
This project has almost no stamping on it!  The only stamped element is the sentiment from the Good Greetings set, which is the one you can earn for free by hosting a party this fall!  The background is embossed using the On Point TIEF.  I used All is Calm Washi Tape for the stripe across the middle. 


The DSP is from the All Is Calm pack.  I punched the trees using the Tree punch.  The silver tree is punched from Brushed Silver card stock and embossed with the Decorative Dots TIEF.  I added a little glimmer star and some Pool Party baker's twine to complete the look.

On the inside I added another punched DSP tree and glimmer star and stamped the sentiment from the More Merry Messages stamp set (retired) in Pear Pizzazz.

I am having a terrible time lately getting decent photos with my camera.  I think it may be time for a new one!  My apologies for the poor quality images.  Hopefully Christmas will come a little early this year!

Yesterday I was so wrapped up in the first day of school I completely forgot to tell you about this week's Weekly Deals.  Here they are.  As always, prices are good until next Monday at midnight:

Back To School Ensemble -- Digital Download
Back To School Ensemble - Digital Download
Price: $19.95  
Sale: $11.97
Buttons & Blossoms Simply Pressed Molds
Price: $9.95  
Sale: $7.46
Island Indigo Classic Stampin' Ink Refill
Price: $3.75  
Sale $2.81
Pool Party Classic Stampin' Ink Refill
Price: $3.75  
Sale: $2.81
Soft Sky Classic Stampin' Ink Refill
Price: $3.75  
Sale: $2.81
Strawberry Slush Classic In Color Stampin' Ink Refill
Price: $3.75 
Sale: $2.81
White Simply Pressed Clay
Price: $8.95 
Sale: $6.71

Related Posts Plugin for WordPress, Blogger...