Thursday, December 29, 2011

I'm Ba-ack...

Well, here it is nearly the end of 2011 and I FINALLY am back in the photo-taking business.  Thanks to a good repair job my camera is fully functional and ready for action.  Since I've been away Christmas has come and gone in a whirlwind of family visits and big dinners.  The dust has finally settled and I finally have time to catch my breath.  As is always the case, when I finally give myself permission to relax a little, I get sick!  In fact, my whole family is sick with a nasty cough and cold.  My son has another ear infection to go along with the horrible cough, which is making the nights not overly restful in our house!  The poor kid can't get a decent sleep because he is coughing his brains out!  We're hoping he'll be able to nap a little during the day to make up for the lost sleep at night.  This bug can move along any time now!
This morning I had a rather pleasant surprise in my inbox.  It was an email from Pals Paper Arts that two of my designs had been chosen for their "Best Dressed for 2011" list!!  I was chosen for July  and September and I have to say I am absolutely thrilled and humbled.  What a great way to start my day after a rather crummy night!
Now, on to a project...and isn't it about time??  This card is the first one I created when I received my Occasions Mini pre-order goodies.  It is CAS and uses a bunch of new products...check it out:
CAS card using the new Apothecary Art stamp set from the upcoming Occasions Mini
I have to say I did a little happy dance when I saw the new Framelits dies in the Occasions Mini.  Those of you who have received your copy will know what I am talking about, but for those of you who haven't, these dies are along the lines of Nestabilities dies, with several different sizes of the same-shaped die.  They are perfect for layering and are easy to position to cut out images from the coordinating stamp sets.  The Framelits set that I used on this card is the Labels Collection and it coordinates perfectly with the images in the Apothecary Art stamp set.  This card, in fact, used my Big Shot to the max.  I die cut the label after stamping the image on very vanilla in Staz-on ink.  I also die cut a larger-sized label in baja breeze and ran it through again using the perfect polka dots embossing folder.  The background is another piece of very vanilla that I also embossed using the vintage wallpaper folder.  I watercoloured the flowers using my aquapainter and baja breeze ink pads.  The finishing touch on this card is the gorgeous pleated satin ribbon, another new product from the upcoming mini.  I LOVE this stuff...you're going to be seeing more of it in the coming weeks!

Thursday, December 15, 2011

Boxing Day came early!

Stampin' Up is making a lot of holiday dreams come true with some fantastic deals on the online Clearance Rack.  Punches, dies, embellishments all at up to 80% off!!  These deals are while supplies last only, so act fast to get your hands on these fantastic bargains!  Click here to access my online store.

Monday, December 12, 2011

No Camera = No Photos

So you've probably been wondering where the heck I've been for the past week.  I am here, really busy, but still stamping.  My pre-order for the new Occasions Mini and Sale-a-bration came and I had a chance to play for an hour or two.  The problem is my camera isn't working!  We are in the process of determining whether it is more economical to get it fixed or just buy a new one.  The challenge is, with Christmas fast-approaching, Santa may be working on a new camera for me so....no photos for now!  I've tried to let Santa know how urgent it is that I have a functioning camera, so maybe he'll make an early delivery.  In the meantime, happy stamping!  I'll have LOTS to share when I do finally regain the ability to take pictures!

Sunday, December 4, 2011

NOT a Christmas Card!

I am so over Christmas cards.  I've been doing them since August and, quite frankly I am sick of them.  I held my last Christmas card class of the year today and all I can say is bring on Valentine's Day!  The card I have for you today is not a Christmas card.  It is a thank you card I designed for a class I am teaching at an upcoming weekend retreat in January.  The class is on watercolouring and so I chose one of my favourite hostess sets to colour:  Faith in Nature.  See what you think:

Thank you card using the Faith in Nature hostess set

Focal image detail
I just love this pear image.  I don't know why but it just really appeals to me.  I stamped it in versamark on watercolour paper and then heat embossed it in gold.  I watercolored it using my aquapainter and ink pads.  The rest of the card is pretty straightforward and uses more mustard, soft suede and crumb cake cardstock.  I am so looking forward to playing with my preorder items from the upcoming Occasions Mini...there's nothing like new goodies to jump-start the ol' Mojo!

Monday, November 28, 2011

200 Followers!

Wow!  I just realized there are now 200 of you out there in cyberspace following my little blog!  That  absolutely blows be away...that there would be that many people interested in what I create.  Kinda humbling...and it makes me even more determined to do a better job of posting regularly.  I owe it to all of you, so I hereby pledge to make my blog worthy of your time and attention.  The good news is that I am nearing the end of my crazy schedule of holiday classes and workshops.  Hopefully within the next couple of weeks, in the midst of the chaos of preparing for Christmas, I will get some time to just stamp for fun...I miss that!  I SO can't wait for my pre-order for the Occasions Mini...I have so many ideas for how to put the fabulous new products to use!  But more on that later...today I have a really simple Christmas card for you.  This is one we are doing at my LAST Stamp-A-Stack of the season this coming Sunday...

CAS Holiday card using the Easy Events stamp set
I told you it was simple!  I know its not really my style, but I needed something that would come together quickly and this one really does.  The only thing that takes any time at all is colouring in the image with old olive and real red markers.  The rest is quick and easy.  I'm not sure why I didn't photograph the inside of this one...there is a little more colouring inside and a festive sentiment.  I'm also not sure why the photo is so dark...something didn't work properly, apparently!  One little tip I have for you is that whenever I have stamps that have both an image and a sentiment on them, I cut the sentiment off so that I can use them separately without having to use markers to ink only a portion of the stamp.  In this example, I cut the sentiment off, stamped the image without the sentiment first and then stamped the sentiment afterwards.  It allowed me to space the image and sentiment out more than if I had left the stamp intact.  This trick works really well with clear mount stamps, as it is very easy to put the stamp back together again if you ever desire.  I have found that doing this really adds to the versatility of my stamps. 

Ok...I am off to bed...tired out after a day of teaching high school and a monthly class tonight as well as prepping for another class tomorrow evening!  Have a great week, everybody!

Sunday, November 27, 2011

CASE-ing myself!

I have another monthly club meeting tomorrow and as I sat down to prep for it I was fresh out of MOJO!  So, I began looking through my collection of samples from past classes.  I found this card and got busy changing it up to use for my class.  Since I had some leftovers from the Christmas Lane Simply Scrappin' kits I used for my Mini Album class this afternoon, I used some of the DSP to makover my original design.  Here is what I came up with:

Holiday card using DSP from Christmas Lane Simply Scrapping Kit and Pennant Parade stamp set

Detail of 3D tree.

Inside detail.  Sentiments are from the Many Merry Messages set (which is on for 50% off till the 30th!!)
I have to say that I like my CASE'd version better than the original one!  I kept many of the same elements but added the 3D tree and the little jingle bell to the front.  I also popped up and framed the sentiment on the inside.  The colour scheme is based on the DSP:  cherry cobbler, early espresso and lucky limeade.  I like the freshness of these colours together.  I hope my club members like it too!

Wednesday, November 23, 2011

Deja Vu...

You may experience  a little Deja Vu when you see the card  I have for you tonight.  It is a variation on a card I did a couple of weeks ago for a Stamp-A-Stack a customer was hosting.  I used the same layout and switched up the colour scheme and stamp set for my Christmas Club this month.  See what you think...

Elegant Holiday card featuring Bright Hope stamp set and Mocha Morning DSP
Isn't it amazing how you can take one card design and transform it by simply changing up the colours and stamp set?  The original version of this can be seen HERE.  Neither card uses traditional Christmas colours...this one  uses basic gray, basic black, whisper white and cherry cobbler.  The flocked Mocha Morning DSP is just so yummy; rich and elegant...love it!! 
See how easy it is to take an existing design and make it new?  If you are one who finds it  difficult to be creative and come up with original designs on your own, try taking something you've seen and switching it up to make it your own.  It is a great way too spark your creativity and find your own stamping style.  Before long you'll be designing up a storm and wondering who this incredibly creative person is!  Give it a try the next time you sit down to stamp!

Tuesday, November 22, 2011

A Quickie...

Tonight's post will be brief...I am waaaaay too tired to make much sense at the moment, but I wanted to get something up for you all.  This is a card I designed for my Christmas club this month.  This is our last meeting...we've been doing Christmas cards since August(!)...and I wanted to do something kind of fun and playful.  This is what I came up with:
Holiday card using Jolly Bingo Bits stamp set and Frostwood Lodge DSP.
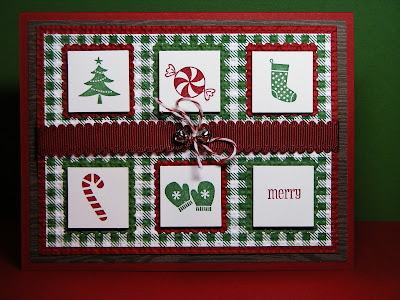
I have had the Jolly Bingo Bits set since last year and have to say it has really been sadly neglected.  I decided to actually put together the stamps (yes, there were many that had yet to be mounted!!) and use 'em!  This card is the result.  The bingo images are popped up with dimensionals and the background is embossed with the square lattice folder.  I drew my colour scheme from the DSP...very warm and traditional.  I chose the scalloped ribbon because I liked the way the scallops worked with the postage stamp punch mats for each image.  The little jingle bells and bakers twine bow add a bit of fun and whimsy.  I sure hope my club members like it...punching all those little postage stamps for their kits took a while!!  Later this week I'll try to post the other projects we're doing...in the meantime happy stamping...and don't forget to check out the deals in the Online Extravaganza!!

Monday, November 21, 2011

Online Extravaganza

There are some terrific deals to be had in my online store, including two 24-hour-only deals featuring two fabulous new products:  Simply Scored and Sweet Pressed Cookie stamps!  Head on over to my online store and check it out...but hurry...these are limited time offers!

Friday, November 18, 2011

Texture Overload

Well, here it is Friday already...and more than half-way through November!  How the heck does that happen??  Time just seems to disappear on me these days.  The card I have for you today is one I made more than a week ago and just haven't had time to post till now.  It uses a bunch of odds and ends I had laying on my stamping table that were begging to be made into a card.

Holiday card using Holly Berry Bouquet DSP with sentiment from Bright Hopes.
This card has a ton of texture.  Starting with the embossed polka dots on the card base and then the vintage wallpaper embossed top note die cut.  I added a strip of the glittery polka-dotted paper from the Holly Berry Bouquet pack and topped it with a bit of real red satin ribbon.  The rosette was also made with paper from the same pack and topped off with an ornament punched out of red glimmer paper.  I added a little vanilla bow and the sentiment from Bright Hopes that I hand-cut.  Not much stamping on this card, but I still quite like the result!

Tuesday, November 15, 2011

Happy Birthday to my Hubby...

Today is my husband's 41st birthday and to celebrate I created a special card that I knew he would love.  With the "help" of my 4 1/2 year old this is what we came up with:
Angry Birds card for my 41-year-old husband

Inside view
So, I mentioned this is for my FORTY-ONE year old husband, right?  He is completely addicted to this game, as is my son, so we knew this  would be the perfect design for him.  The front of the card was inspired by a card I found online HERE.  The inside I came up with myself.  I kind of liked the idea of the piggy hiding beneath the plate of cupcakes...very Angry Birds-esque.  The entire card was created using Stampin' Up punches, cardstock and inks.  There was also a fair bit of trimming of punch shapes involved.  It was a wee bit labour-intensive, but worth the effort...my hubby loved the result!  Inside the card I hid an iTunes gift card...the perfect gift for the man in my life! 
Before I get a zillion requests for instructions, let me say that I am working on putting together a tutorial for these little guys...I'm just swamped with classes and holiday preparations right now.  I likely won't have time to get to it until I am off for the holidays between Christmas and New Year's.  Hopefully you can wait till then, if not perhaps you can figure it out from the photo...if you get stuck let me know and I'll try to help when I can.
In the meantime, I am off to a grown-up dinner out with my hubby at a new restaurant here in Cambridge...can't wait!

Sunday, November 13, 2011

Z-fold Joy

Well, my Christmas class schedule is in full swing!  Last night I ran a Stamp-A-Stack in Dundas for a fun group of scrapbooking friends.  We did 12 cards and had lots of laughs!  Here is one of the cards I designed for that class...
Elegant holiday card using The Sounding Joy, Bright Hopes and Christmas Greetings stamp sets.

Open view.
I have to say I was really happy with the way this one turned out.  I was going for something that would come together fairly quickly and easily but that would still provide the WOW factor.  I turned, once again to that gorgeous Mocha Morning DSP for inspiration, added richness with the cherry cobbler seam binding ribbon and an antique brad and viola...quick and easy Christmas card!
Today is all about the gift tags...I have my class tomorrow night and need to prep 120 tags this afternoon!  I hope your Sunday is a little less busy than mine will be!

Thursday, November 10, 2011

Faux Tile Pines and Poinsettias

Tonight my Stamps-a-Latte group meets and we're going to learn two techniques.  I already posted about one here.  The second one is not exactly new, but it sure is a whole lot easier with the launch of the new Simply Scored. 
Holiday card using the Pines and Poinsettias set with sentiment from Contempo Christmas


Faux tile has been around for ages, but I rarely used it because I had a hard time getting my score lines exactly even.  No more.  It is SO easy with the Simply Scored!  I plan to use this technique a whole lot more now.  I love the vintage look it adds to this card.  Another simple, yet often neglected technique this card uses is crimping.  I added dimension and texture to the patterned eyelet border by running it through my crimper.  A fast and easy way to add visual interest to any project.  Another layer of interest is the lightly stamped and sponged card base.  I'm not sure it shows in the photo, but I lightly stamped the scroll image from the Pines and Poinsettias set all over the card base in crumb cake ink, stamped off once.  I then sponged the edges to distress it ever-so-slightly to provide a suitable background for the vintage look I was going for. 
Once again, I am amazed at how much this whole suite has grown on me in the months since I first laid eyes on it at convention.  It just goes to show you that there is not substitute for hands-on experience!

Wednesday, November 9, 2011

Variation on a theme...

...that's what today's card is.  After making the card I posted yesterday I decided to try  different layout using many of the same elements.  This is what I came up with...
Holiday card using Bright Hopes stamp set.

Inside view...look familiar??
So this time, instead of using the rock and roll technique, I used my markers to be more precise as to where I was using the darker shade.  I inked the stamp with my pool party ink pad and then used my island indigo marker to colour the parts I wanted darker.  I also heat embossed the entire focal image using iridescent ice which gives it a ton of sparkle.  I used many of the same elements as I did on yesterday's card, but instead of rhinestones I used the silver mini brads...love those little guys!  Now my dilemma is which card I like best!  I'd love to hear what you all think!

Tuesday, November 8, 2011

Rock 'n' Roll Hopes

Today's post is one I designed for a Stamp-A-Stack I am doing on Saturday evening.  I wanted something elegant yet clean and so I turned to the Bright Hopes set from the Holiday Mini.  I love this year's in-colours, especially pool party and island indigo, so I decided to combine them using the rock and roll technique.  This simple, yet effective technique is a quick and easy way to get a multi-coloured image...have a look...

Holiday card using the Bright Hopes set from the Holiday Mini

Inside view
I am trying to use a lot of whisper white these days...here's a funny story why...

A couple of weeks ago I was in the midst of prepping for three large Stamp-A-Stacks in a short period of time.  I ran short of some cardstock and needed to place an expedited order to get it here in time.  I was at school (I'm a teacher by day) and was rushing to get my order in by 9:00 am MT so that it would ship that day.  I was distracted and rushed and when I went to enter a quantity of 2 packages of whisper white cardstock I neglected to delete the default quantity of 1.  That meant that when I entered 2 packages it actually registered 12!!  Being too rushed to notice I submitted my order and was rather surprised when my package arrived two days later with a whole lot of whisper white cardstock in it!  So...anybody need any whisper white cardstock???

I do have to say, I am liking the white-on-white background look.  I actually did a variation on this card that I'll post for you tomorrow.  In the meantime I am off to Kindermusik with my son!

Monday, November 7, 2011

Scenic Embossed Season

This week is a busy one!  I have my Stamps-A-Latte club on Thursday, Stamp-A-Stacks on Friday and Saturday and my Gift Tags class next Monday!  Talk about a lot of cutting to do!  Not to mention designing some of the projects!  My Stamps-A-Latte Ladies like to learn techniques, so this month we are doing two.  Today's project uses multi-coloured embossing and I love the way it turned out.  Check it out...

Holiday card using the Scenic Season set and multi-coloured embossing technique

Inside view with image from the Christmas Lodge set.
Isn't that a cool effect???  I used gold, pewter, silver and iridescent ice embossing powder on the trees...I'm not sure if all the variations in colour show up in the photo.  In looks pretty cool in real life.  I kept the rest of the card clean and simple to highlight the image.  The sentiment and the inside of the card are stamped in soft suede.  I used a bit of quilted satin ribbon in cherry cobbler and a neutrals glimmer brad to finish it off.   I sure hope my club ladies like this one as much as I do!

Sunday, November 6, 2011

Christmas Collage

Today's post is one I stamped just for fun!!  Today is the first day in a VERY long time that I've been able to just create for the sake of creating and not with a particular class or event in mind.  This card isn't one I would do in a class...a wee bit too fussy for that...but I sure do like it! 
Vintage-y Christmas Card using Christmas Collage background stamp, Winter Post and sentiment from Bells and Boughs sets.

Inside of view using sentiment from Many Merry Messages and image from Bells and Boughs.
So, whaddya think of the colour scheme?  Not exactly your traditional red and green Christmas card...but I have to say I really like it!  I was inspired by a card by Linda Creech that I saw on our demonstrator forum.  Linda's card also used soft colours and pewter embossing powder...such a great combination!  The colours I used were blushing bride, baja breeze, crumb cake and sahara sand (card base).  The background image was embossed using the pewter embossing powder (sure hope THAT stuff carries over when this mini is done!), as was the deer image from the Winter Post set.  The rest of the images on the inside and the sentiment on the front were stamped in crumb cake.  I finished it off with yet another package-tied ribbon treatment (I seem to be on a roll with that lately!) using very vanilla seam binding ribbon and an antique brad.  I am really pleased with the way this turned out...who would have thought such non-traditional colours would combine to create such a beautiful holiday card?!?

Saturday, November 5, 2011

Its Digital Scrapbooking Day!

Stampin' Up! is celebrating Digital Scrapbooking Day from Nov. 4 -7th.  This event is designed to highlight some of the fantastic projects you can create using My Digital Studio.  Check out the Event page at MyDigitalStudio.net to learn how you can access FREE digital content during this special event.  Hurry...the event ends Monday, November 7th!

Now on to today's post.  This is another card I designed for my Christmas Club last month.  It uses my favourite set from the Holiday Mini, Christmas Lodge, and makes use of the coordinating DSP called Frostwood Lodge.  See what you think:

Rustic Christmas card using the Christmas Lodge stamp set and Frostwood Lodge DSP from the Holiday Mini

Inside of card using sentiment from Christmas Lodge.
I have to say that this is one of my favourite Christmas cards that I've created this year.  I really love the images in this stamp set but have found it a challenge to use them effectively because they are quite large.  I saw a card online where someone had stamped on the birch-bark-patterned DSP and a light bulb went off.  The result was the focal image on this card.  I added the quilted satin ribbon for richness and embossed the background for additional texture.  I absolutely love the  way Stampin' Up's products all coordinate.  It makes it so easy to put together a cohesive project with very little effort.  The products in the Frostwood Lodge Suite are a perfect example of this (and my  current favorites!)

Thursday, November 3, 2011

Pines and Poinsettias for Christmas

I am off on our annual Arts Retreat at school but I was on the ball enough to pre-schedule this post...are you impressed???  Given my posting track record the past couple of months, I sure am!
Today's card is one I designed for my Christmas Club last month.  It uses a set that I initially wasn't crazy about but that has grown on me as I've started to use it.  The same goes for the coordinating DSP...didn't like it much at first but now really quite enjoy creating with it.  Its funny how that happens, no?  Anyhow, here's the card:

Christmas card featuring the Pines and Poinsettias stamp set and Holly Berry Bouquet DSP.

Inside of card with sentiment from Petite pairs

Kinda pretty, huh?  I have to admit I was dead wrong about the use of wild wasabi for Christmas.  It just works so well in this paper I almost don't notice that its a colour I really don't care for!  I really love the glittery polka dotted paper in this pack...so fun and festive!  The real red satin ribbon adds just the right amount of richness to balance out the bling and keep things elegant.  The mini jingle bell adds just a touch of whimsy...can you tell I'm loving those things??  All in all a card design I will certainly use again and one my club members liked too!

Wednesday, November 2, 2011

New Month...new Promotion!

Now that the Halloween hoopla is over its time to gear up for the next big holiday which, for us Canadians, is Christmas!  Stampin' Up is giving an early Christmas gift to all who host a $450 or more workshop in the month of November in the form of an extra $45 in FREE product on top of the already terrific hostess benefits.  That means $115 in FREE STUFF for a workshop with $450 in sales...that could be the Big Shot you've always wanted for only $5!!  The best part is that there is no shipping or handling charged on hostess benefits, so its an even BETTER deal!  If you haven't already done so, call or email your favourite demonstrator to schedule your workshop and start planning your shopping spree!
Continuing in a gift-giving theme, today's project is a collection of gift tags for my upcoming Gift Tags class.  Check these out...
Assortment of gift tags for my upcoming class.

More tags for my upcoming class
I really like making tags...they are so quick and easy and add so much to even the simplest of gifts.  These are the ones we'll be doing on Monday, November 14th at my Holiday Gift Tags class.  Details are under the Upcoming Events tab if you are interested in joining us.  If not, I hope these little projects have inspired you to pull out your scraps and start creating some tags of your own!

Monday, October 31, 2011

Happy Halloween!

Well, the big night is finally here!  My little guy has been SO excited to go trick-or-treating this year...a far cry from the kid who wouldn't even put on a costume last year!  Yesterday afternoon was spent carving pumpkins...here is a photo of my DH's latest masterpiece:  Lightening McQueen...
This year's CARS character:  Lightening McQueen. 
This evening, right after supper we suited up our little Mario and headed out to collect some loot. 
Our little Mario...ready for Movember tomorrow!

Heading out to collect the goods.

We did just enough houses to fill his bucket with candy and still got home before dark...my kinda Halloween!  He had fun and was thrilled when we let him "exchange" the candy he didn't like for Kit Kats from our stash!  All in all a great night!  
Speaking of great things...Stampin' Up has just announced an extension to the Free Big Shot promotion!!  You now have until November 11th to purchase your starter kit and receive your free Big Shot or $125 in extra product.  Don't miss out on this fabulous deal!  Click on over to my website for more information or to order your kit.  Be sure to stop by tomorrow to see what is new for the month of November...till then have a happy Halloween!

Sunday, October 30, 2011

Another Quiet Sunday...

...that's two in a row!  I feel spoiled.  Today marks the second Sunday in a row that I've been able to spend with my family.  We are heading to church and then this afternoon its all about the pumpkin carving!  Max is super excited about Halloween this year...a huge switch from the boy who wouldn't even put on a costume last year!  Of course, it helps that his pre-school has been hyping Halloween since the beginning of October.  He is dressing as Mario (appropriate since his life is all about Mario Galaxy for the  Wii these days) and he sure looks cute in that big black mustache!  I'll post photos of his big night on Tuesday. 
In the meantime I have another project I designed for the mega-Stamp-A-Stack  I did last weekend.  See what you think...
Cute, vintage-inspired Christmas card using the Snow Much Fun set with sentiment from Petite Pairs

Inside view
Now, I am not generally a "cute" Christmas kinda gal.  I love all things vintage and my home is decorated in a Victorian style during the holidays.  But I have to say that this set has really grown on me.  If I have to do a cutesy Christmas card this is my go-to choice.  I was faced with a challenge on this card, in that I couldn't have 12 ladies all colouring their snowmen at the same time, so I had to design a card that didn't require colouring!  I stamped the snowmen in early espresso on crumb cake cardstock...and I quite like the look!  With a bit of distressing and some sponging one of the ladies commented that it almost looked like leather!  The rest of the card is pretty straightforward.  The colours I used are always artichoke and riding hood red.  I used the snowburst embossing folder on the cardbase and added the little ribbon treatment with some of those cute little mini jingle bells to finish it off.  The ladies at my SAS really like this card and I do too...I surprised even myself!

Thursday, October 27, 2011

Bright Hopes for Christmas

Tonight my Christmas Club meets and before they arrive I thought I'd do a quick post to show you one of the projects we'll be doing.
Holiday card using the Bright Hopes set from the Holiday mini
I also used this card for a Stamp-A-Stack I did for a large group of 12 ladies on Saturday.  It is simple and comes together quite easily, yet is rather elegant...a perfect SAS project!
I'm not sure if you can tell in the photo, but I used the Fancy Fan letterpress plate to give my real red background a hint of texture.  I embossed the tree image using the pewter embossing powder...it truly is my new go-to favourite for heat embossing.  The cardbase is very vanilla which I preferred over whisper white as it adds a level of richness without the stark contrast that whisper white would give.  For my SAS tonight I am actually using very vanilla ribbon instead of the old olive...I ran out of old olive after my big class on Saturday!  It actually does look just as elegant with the vanilla satin ribbon.  I hope my Christmas Club folks like this one as much as I do!

Sunday, October 23, 2011

Finally...a family day!

Today has been the BEST day!  It is the first day in weeks that I have been able to spend entirely with my family.  I got to sleep in until 10:00 (!!) am this morning and then we took our little guy to see The Backyardigans Live this afternoon.  It was so good to just spend time together without feeling like I am on a deadline.  This is what every Sunday should be like!  I actually (almost) feel ready to go back to work on Monday.  
Today's post is a card I designed for the Stamp-A-Stack I did on Wednesday.  It was the only card that wasn't chosen ahead of time by the ladies.  They requested a snowman card using traditional Christmas red and green.  See what I came up with:

Holiday card using the Snow Much Fun set and Frostwood Lodge DSP

Inside of card with sentiment from Many Merry Messages
You know, when I first saw this snowman set in the new catty it really didn't do much for me.  Perhaps it was because I was in the midst of planning swaps for convention during the heat of July, but whatever the reason I just wasn't all that excited about it.  I am happy to say that I was DEAD WRONG about this set!  It is just the cutest and all the many amazing designs I have seen featuring these images are just so inspiring!  In designing this card I tried to keep it simple, knowing that my ladies would be doing three other designs in the same evening.  In the interest of time, I avoided watercolouring the snowmen, though they would look even cuter with a little colour added.  The early espresso baker's twine wrapped around the cardfront and tied in a bow with the tiny little jingle bell as the perfect finishing touch reminds me a little of a package wrapped up ready to go under the tree.  I actually used this design as the inspiration for a card I designed for another SAS I did yesterday afternoon.  I'll show you that one later this week.  In the meantime I'm going to go spend some more quality time with my family!

Tuesday, October 18, 2011

Its Time...

...for me to stop commenting on how fast time is flying by these days, I know; but really, where is the month going?  Here it is the 18th and I'm still on the 4th in my head!  It sometimes scares me just how fast our lives can pass by.  This week is another busy one...and so I again have had little time to stamp; however I did whip up a cute little card last night for a stamp-a-stack I am teaching tomorrow evening.  More on that later...for now I have a card I made a while back that my SAS hostess also requested we make tomorrow night.  Have a look...

Holiday card using Letters to Santa DSP and the Tree Trimmings stamp set.  The sentiment is from Teeny Tiny Wishes.

Inside of card using the sentiment from the Christmas Greetings stamp set.
I designed this card intending to use it for a techniques class on masking.  I stamped the green ornament on the front of the card and then masked it while I stamped the red and brown ones.  The result gives the illusion of depth.  The rest of the card is fairly straightforward as it features some of the gorgeous patterns on the Letters to Santa DSP.  I finished it off with a bit of old olive satin ribbon and a real red glimmer brad to add a bit of sparkle.
On a completely different note, I just wanted to remind everyone of my upcoming Mini Album class on Saturday, October 29th at 9:30 am.  This little album makes a beautiful Christmas gift for just about anyone, but is especially appreciated by grandmas (my mom gets one with photos of my son ever year).  There is still room remaining if you would like to join us.  For further details click HERE.

Tuesday, October 11, 2011

A Walking Zombie...

...that's what I am today!  I am SOOOO tired after my crazy weekend at the Rockton Fair!  It was really busy, but SO much fun!  I met a ton of new people and introduced some who had never stamped before to this wonderful hobby of mine.  It was a very tiring weekend too...a total of 40 hours at the fair will wear a person out and having to get up at 5:00 am this morning for band practice was NOT easy!  Let's just say I will sleep VERY well tonight!  I am excited to share some photos of my booth with you...check 'em out:
Here I am in my little booth...not looking too tired yet...this was taken after we set up on Friday!

My display samples

My class samples and sign up lists

My promo table.  After Friday, I actually decided this wasn't getting enough attention and changed it to a Make-n-Take area instead...great call!  Lots of folks stopped and stamped with me!
I can honestly say this event was terrific!  As tired as I am, I had such fun and was thrilled to meet so many new people.  I also got to reconnect with many people from my childhood, as I grew up just outside of Rockton, and ran into past teachers, principals, baby sitters and neighbours.  What a fantastic event and a great way to spend such a gorgeous weekend!

Friday, October 7, 2011

Rockton Fair, here I come!

Well, so much for doing a better job of keeping up with my posting this week!  Between getting ready for my booth at the fair, teaching full time and dealing with my sick child (which included a trip to the emergency room on Wednesday night), I've had no time to sleep, never mind blog!  So you'll all just have to come and visit my booth at the fair this weekend to check out what I've been up to!  To hold you over till I come back up for air (whenever that may be), here is another project I created for my Gift Boxes for the Holidays class coming up in November:

Cute little box created using the matchbox die and some Pines and Poinsettias DSP. 

Top view
This is part of a class in which we will be making 6 different gift boxes of varying sizes.  I'll have samples for this class and all of my other holiday offerings on display at the fair.  Plus if you sign up for a class at the fair, you'll be entered in a draw to win your class for free!  For more information about my holiday classes click on the Upcoming Classes and Events tab at the top of this page.
Have a Happy Thanksgiving, all my Canadian readers...see you at the fair!

Sunday, October 2, 2011

All Stamped out!

I never thought I would ever say this, but I am truly stamped out!  I have inked more rubber this weekend than I ever have in my life!  My fingers actually hurt!  It was a very productive weekend, though!  I got a ton done in preparation for my booth at the Rockton Fair next weekend.  I have lots to show you but I need to pace myself...I likely won't have much stamping time this week and DEFINITELY won't have any next weekend!  So, for now, I have this cute little box to show you.  It is really just one of our Kraft gift boxes from the Mini that I dressed up a little...see what you think:

Christmas gift box using a Kraft box from the Holiday Mini and Frostwood Lodge DSP as well as the Christmas Lodge stamp set.

EASY paper bow...I'm definitely making more of these this year!
 Cute, huh?  This was so quick and easy to do and that bow...a piece of Christmas cake!  I used a tutorial from Splitcoast Stampers but changed it a bit.  Instead of using a different brad to assemble each layer, I used one long one and added all the layers but the final loop in the middle to it.  It made for less bulk and super-easy assembly.  I also changed the width of the centre loop, increasing it to 1 1/4" so that it filled in the centre more.  I LOVE this...my hubby and four-year-old were even impressed!  Here's hoping the fairgoers will like it and sign up to take my class!

Friday, September 30, 2011

...ok...so what happend to the week???

I think I have a problem.  I seem to be losing long stretches of time.  I could swear it was just Sunday night and now here it is Friday already!  Not that I'm complaining...I love it when the work week flies by; but I am a little concerned over just how quickly time is passing these days.  Tomorrow is October first, for goodness sake!!  How the heck did that happen??  Tomorrow is also World Card-making Day and though I am not holding an event to mark the occasion, I will most certainly be busy making cards!  I have exactly one week to get my booth ready for my debut at the Rockton World's Fair.  Talk about a ton to get done!  My To-Do list is literally a page and a half long!!  Tomorrow is all about getting my display projects done, so the rubber will be burning in my house tomorrow!  For now I have a cute little giftcard holder I created for a recent class.  Check this out:
Giftcard holder featuring the Snow Much Fun set and the Top Note die.
Cute, huh?  I love this Snow Much Fun set!  That chubby little snowman is the cutest!!  I designed this project for a class on watercolouring with aquapainters I did earlier in the month.  My ladies loved it!  This is certainly one of those lots-of-bang-for-not-much-effort projects.  I used the top note die to cut the base, and was able to cut all the layers at once...gotta love the Big Shot!  I used lots of new product too:  Dazzling Details on the hat and buttons, a mini jingle bell as the pompom on the hat and the new snowburst embossing folder on the inside pocket to add some texture and interest to the inside of the card.  The whole thing pivots on the brad that holds it together at the top.  Such a simple design, yet so cute! 
I am going to try really hard to be more consistent in my posting this next week, but I honestly can't make any promises.  I have SO much to do to get ready for the fair I almost need to take the week off work to get it all done!  I will try to keep you updated on my progress and post photos of projects as I complete them.  In the meantime, enjoy the weekend!
Related Posts Plugin for WordPress, Blogger...