Tuesday, April 30, 2013

Last Day!

Can you believe it is the end of April already?!?  This month has just flown by and as it draws to a close I have a couple of reminders for you:

1)  Today is the last day to order the Sent With Love stamp set and coordinating DSP.  After today it will be gone forever, so don't delay and get your order in before midnight tonight.  (Tip:  There is a FANTASTIC new stamp set in upcoming 2013-14 Annual Catalogue that coordinates perfectly with the Sent With Love stamps and paper...you'll kick yourself if you don't pick them up now, believe me!)

2)  Today is also the last day to order the new This and That line of products as a bundle for 15% off.  These fabulous new products will appear in the upcoming 2013-14 Catalogue, but the bundled discount will not.  Don't miss the chance to get these great products for a deal!

Now for a project!  Today I get to show you this month's bonus project from Craft Project Central.  Check it out:

Oh Whale Boxed Card Set designed by Sharon Burkert
This adorable set would make a wonderful shower gift for a mom-to-be.  Imagine the squeals of delight when the new mommy opens these beautifully handmade cards and then the effusive thanks you'll receive for the time and effort you put into such a thoughtful gift!  To learn more about how you can access the tutorial for this and all of this month's projects visit Craft Project Central.  Don't forget to stop by Sharon's blog to show her some appreciation for her work.

I'll be back tomorrow with some samples from my Retirement Party coming up this Friday,  where we'll pay homage to my most-beloved retiring stamp sets.  If you haven't already registered, there is still time!  Just confirm your attendance no later than Thursday, May 2nd.

Monday, April 29, 2013

Seriously Loving My Paper Pumpkin!

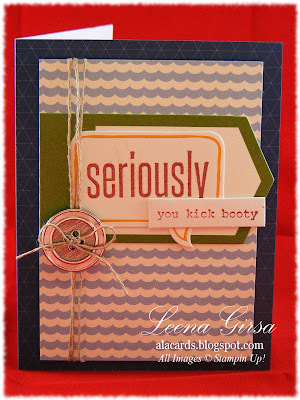
I did a little happy dance when the FedEx truck dropped off this month's Paper Pumpkin box!  This was the first month that was truly a surprise project for me and I was so excited to see what was inside that magical box!  I wasn't disappointed....so LOVED the project this month!  Check out what I did with it:

This is the card that the instructions tell you to make :)

A slight variation


This one is going to my hubby...I say "Seriously" all the time...but its usually in a not-so-nice-way when he's really getting on my nerves!  This will be a refreshing change!  :)

Selective colouring with markers to change the sentiment

Inside of IOU card!
 The kit included three stamps, a Cherry Cobbler ink spot, four card bases, four printed card stock layers, two sheets of card stock sstickers, four LONG pieces of twine and 4 silver buttons. I really loved playing with this month's kit to come up with different designs and uses for the supplies. It really is a wonderful little escape from my day-to-day work, prepping for classes and designing projects.  With this the design work is already done for me and I just get to be creative!  Who knew My Paper Pumpkin would  be such a wonderful little way to treat myself!? 
If you'd like to get in on next month's project be sure to sign-up by the 10th of May.  You'll receive your magical little box around the 20th...and then the fun begins!!

Sunday, April 28, 2013

A Kid-friendly Project

Happy Sunday!  I hope you have a day filled with rest, relaxation and time with family.  I know our household will be puttering arouund in the yard and just enjoying time together.  Today I have a new post for you from Craft Project Central.  This one is for the Doc McStuffins fan in your life (if you don't have little ones you likely have NO idea what I'm talking about LOL!)

Doc McSTuffins Gift Ensemble designed by Niki Toll
My son was invited to a Doc McStuffins birthday party a few months ago...I only wish I had had this tutorial then!  This new TV show is all the rage with kids and who doesn’t love a little punch art?  Create these simple "Doc" inspired creations for your little cutie for party favors or as get well gifts!!  To access the tutorial for this project visit Craft Project Central and subscribe to April.  Then stop by Niki's blog to let her know how much you like her work.
Have a happy Sunday...see you tomorrow!

Friday, April 26, 2013

Bridal Congrats

Now that I've finally inked up my Fabulous You stamp set, I'm on a bit of a roll with it!  Today I have a card I designed for a private class I held last night.  Check it out:

Bridal Congrats card featuring the Fabulous You stamp set with sentiment from Sweet Essentials

Inside view with image from Creative Elements and sentiment from Love & Laughter.


Have I mentioned how much I love this shoe image?  It is especially yummy embossed in peweter and blinged up with a strip of rhinestones.  I added some gorgeous embossing with the Elegant Lines TIEF (get this one NOW...it is on the Retiring List!) and made it even more bridal with some organza ribbon.  So pretty and elegant!
Just a reminder that today is the last day to sign up for my Scrapbook in a Day class coming up on May 4th.  There is A LOT of prep involved on my end for this one, so I need the extra lead time.  If you want to attend haven't yet confirmed your spot please do so ASAP so I have the weekend to prep the materials.

Wednesday, April 24, 2013

Going, Going Gone...


Today is the day!!  We demonstrators get full online access to the new Annual Catalogue and we all get to see the lists of retiring stamps and accessories.  Some fantastic items are even on sale for as much as 40% off!  Get them while you can! 

Click HERE to check out the full selection of retiring products!

While you may be sad to see some of your favourites go, rest assured the new catty is chock-full of fantastic new products that will be sure to inspire and delight you!  I so wish I could link you to the online version of the new catty but that is a great BIG NO, NO!  I would get into serious trouble so you'll just have to wait until May 31st (or join my team...then I can show you everything NOW plus you'll get $195 worth of products of your choice - including new catty pre-order items - for just $125).  Now is the BEST time to take the plunge and join my Tri-City Stampers team!!

A couple of reminders about the products on these lists.  The stamp sets are guaranteed to be available until June 3rd (the last day for the 2013-14 Catty).  All other accessories are while supplies last.  That means that when they're gone, they're gone.  No more, never to be seen again.  Are you getting my point?  If there is something you want from the Accessories list get it NOW before it is too late!

Now before you head off to look at the retirement lists and compile your order, I want to show you today's project from CPC.  It is designed by Chris Galbraith.

Car Coupon Keeper Gift Set designed by Chris Galbraith
I so need one of these!  I am forever clipping coupons and then losing them or forgetting to bring them with me when I shop.  This cute project is the solution to my problems!  To access the tutorial for this project visit Craft Project Central and subscribe to April...then stop by Chris' blog and show her some inky love!

Tuesday, April 23, 2013

I Finally Inked It Up!

With the new 2013-14 Annual Catalogue being released to demonstrators tomorrow, I figured it was about time I used all of the stamps from the current catalogue that had yet to see ink!  Today's project uses a stamp set I absolutely love but just never quite got round to using.  Check it out:

Friendship card featuring the Fabulous You stamp set
I love that shoe image!  And what fun to colour!!  I stamped it in Versamark and heat embossed it in black (to make staying inside the lines easier) and then coloured it with my markers. Colours I used were Melon Mambo, Rich Razzleberry, Lucky Limeade, Daffodil Delight and Pool Party.  I kept the rest of the design really simple so that the gorgeous shoe would shine. Such fun...who wouldn't love to receive this card??

Don't forget to stop by tomorrow to check out the lists of retiring stamps and accessories.  I'll have it all here for you...see you soon!

Monday, April 22, 2013

Blooming Thanks

Monday again!  Why do they always seem to roll around so quickly??  The weekend just flew by!  Not much time for stamping this weekend but I do have a project to show you that I created a while back. 

Thank You card featuring the Blooming With Kindess stamp set
Pretty simple, huh?  But still pretty, I think.  I started by staming the flower in Wisteria Wonder ink on Whisper White card stock.  I then stamped the sentiment in Elegant Eggplant and sponged the edges in Wisteria Wonder.  I layered that on a piece of Lucky Limeade card stock, off-setting it.  I embossed the background with the Vintage Wallpaper TIEF and matted it on a piece of Elegant Eggplant card stock which I then adhered to my  Wisteria Wonder card base.  I adhered the matted focal image with dimensionals and added th pearls.  Easy peasy! 

If you haven't yet registered for my Family Canvas class, but  sure to do so by the end of the day.  Click the Upcoming Classes and Events tab  at the top of the page  for details.

Only two more days till the retiring lists post...be sure to stop by to check them out...there is a lot that is leaving, based on what I saw in the sneak peek on Saturday evening.  Thanks for stopping by...hope your Monday is a happy one!

Sunday, April 21, 2013

New Catty tidbits and a new project

Well, last night I got my first glimpse at the new 2013-14 Annual Catalogue.  All I can say is WOW!!  You are going to be blown away with all of the fabulous new products:  punches, Framelits, stamp sets to coordinate with both, embellishments, DSP...every page contains another fabulous new item!  The catalouge itself is fresh, and vibrant and really easy to read.  I can't wait to show it to you all, but first we have to say good-bye to some beloved products to make room for all the new!  The retiring lists post on Wednesday...be sure to check back here as I will have links to both for you to browse.  The most important thing to remember is that anything on the Accessories list will only be available while supplies last, so you'll want to take get the items on your wishlist sooner than later.  Stamps are guaranteed to be available until June 3rd.
Now for something new from CPC.  Have a look:

Floral scrapbook Wall-Hanging designed by Christy Fulk
Do you have an extra special family picture that you’d like to display, but are getting tired of the plain-frame look?  Here’s a way to show off your family picture and your creativity!  This is a 10" x 10" scrapbook page inserted into a shadow box.  Putting it into a shadow box also enables you to use a lot of dimension that would normally be too thick for a scrapbook album!  This project can easily be customized to the colors of the room you want to display it in. To access the tutorial for this project, visit Craft Project Central and subscribe to April.  Then stop by Christy's blog and let her know how much you like her project!

Saturday, April 20, 2013

Cheers!

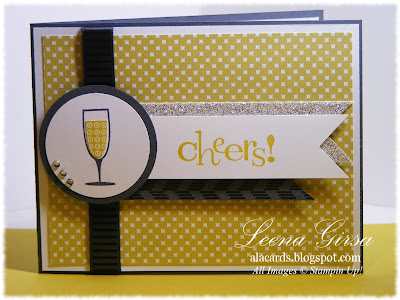
Any-occasion card featuring the Happy Hour stamp set


I am SO excited!  Tonight at 8:00 pm I get a sneak preview of the new 2013-14 Annual Catalogue a full four days before the general population of demonstrators do!  I was successful in earning this wonderful perk as a result of a recent incentive event offered by Stampin' Up.  I can't wait!!!  I will share some inside info with you tomorrow...as much as I am allowed to...and I'll have a good idea of which stamp sets and accessories will be retiring.  The actual retirement list comes out on Wednesday of next week and, as always, items on it are while supplies last, so it is sure to be a busy time for all of us!  The card above is one I designed a while back and I am confident that the stamp set I used will be back for another year.  Happy Hour was new in this year's catty and it is a great one!  So versatile and fun.  On this design I used some Birds of a Feather DSP, as well as some Howlstooth and Scaringbone DSP I had leftover from the fall.  The satin ribbon is also left over from the Holiday catalogue, but works perfectly on this card.  I couldn't resist adding a touch of sparkle with the Silver Glimmer Paper and a few rhinestones.  The liquid in the glass is paper-pieced, much easier than trying to ink with markers!  The colour scheme is Summer Starfruit, Basic Gray, Basic Black and Whisper White.
On another note, I want to remind you that time is running out to register for my Family Canvas class coming up this Friday, April 26th at 6:45 pm.  In case you missed it, here is the project we'll be creating:


Perfect for displaying treasured family photos, this project would make a lovely gift for Mother's Day, a new baby or just to keep for yourself to display in your home.  The class fee of $20 includes all materials and supplies to create one of the canvases pictured above, including the wooden easel to display it on!  Please indicate yoru colour choice when you register.  If desired, bring three photos with you to class to complete your project.  You'll need one 4"x6", one 3-1/2"x5" and one 2"x3".  Be sure to contact me to reserve your seat before the 23rd.

Thursday, April 18, 2013

Done with Mario!

Well, I can honestly say I am DONE with Mario!  I finally finished the thank you cards for my son to send to his friends for his birthday gifts and am I ever glad!  I have had enough  of those characters for a while!  Here is the card I designed:

Yoshi Thank you card with sentiment from Just Believe
I am so glad I saved my Big Top Birthday DSP after it retired last year.  I just had a feeling it would come in handy, having a little boy in my house...and I was right!  The background is from that DSP pack and it is perfect for Marioland!  I cut the layer behind Yoshi from Daffodil Delight card stock with my Window Frames Collection Framelits and then embossed it with my Perfect Polka Dots TIEF.  Yoshi himself is put together using a variety of punches...here is what I used:

Nose:  1-3/4" circle punch (Old Olive)
Cheeks: XL Oval cut in half (Whisper White)
Eyes:  L Oval (Old Olive), Small Oval (retired) (Whisper White), Word Window (Basic Black)

All of the Old Olive pieces were sponged with ink of the same colour and I added the highlights to the eyes and nostrils with my white gel pen.  The sentiment is stamped in Real Red and die but with my Itty Bitty Banners Framelits.

Today also marks a new project over at Craft Project Central.  This one is from Heidi King.

Baby Gift Pail and Thank you notes designed by Heidi King
This cute project is the perfect gift for a Mom-to-be.  Fill the pail with baby supplies and give it along with the thank you notes.  What a cute project!  To access the tutorial simply subscribe to April at Craft Project Central.
Now I'm off to help my son write all those thank you notes!

Wednesday, April 17, 2013

More Sketch Inspiration

Happy Hump Day!  I always feel such a sense of relief when Wednesday hits, knowing there are only two more days till the weekend!  I am super excited today because I just booked my trip to Salt Lake City for Stampin' Up's 25th Anniversay Convention happening in July.  The best part?  My registration was FREE (one of the many perks I've earned as a demonstrator) and my flight was FREE too (I booked using Airmiles!!).  Can't wait till July!

Today I have another card I designed using this month's Sketch Inspiration.  In case you missed it, here is the sketch:

 And here is another, very different take on it:

Any-occasion card featuring the Circle Circus stamp set with sentiment from Sweet Essentials.

For this card I turned the sketch sideways and moved the sentiment so that it balanced.  I used some of the Sent With Love DSP for the background and stamped the sentiment in Versamark and heat embossed it in  Pool Party.  I changed the colour of the Designer Builder Brad by embossing it also with Pool Party...it makes for a lovely focal point paired with a couple of images from the Circle Circus stamp set.  I added lots of bling with Rhinestone Basic Jewels.  Stay tuned next week for another project using this sketch.  To view past sketchs and samples click the Monthly Sketch Inspiration tab at the top of this page.

Tuesday, April 16, 2013

A Winner and A New Project

Whew, lots to show you today!  Firstly, I have another card I designed for my techniques group this month:

Any-Occasion card featuring the Best of Flowers and En Francais stamp sets with sentiment from Itty Bitty Banners

 I really love the softness of this card.  It looks so worn and weathered, thanks to lots of sponging and distressing.  The only thing that doesn't look worn is the beautiful Builder Brad that I recoloured using Pool Party embossing powder.  The flower image is from last month's 25th Anniversary set called Best of Flowers.  The layer behind the flower is one of the labels from the Pop-up Posies Designer Kit.  It fits perfectly behind the oval I cut using my Ovals Collection Framelits.  The background is some homemade DSP I made using Very Vanilla card stock, the En Francais background stamp, Soft Suede, Crumb Cake and Pool Party ink and the Lacy Brocade TIEF.  I just couldn't find any DSP that worked with the focal image, so I made my own!  It's been a while since I got down and inky...it felt good to crack out my sponges and dig in!

Now it's time to announce the winner of the free month's subscription to Craft Project Central.  ~insert drum roll here~...

Hofkissed

Congratulations!  I'll be in touch to tell you how to claim your subscription.  Now to show you the latest offering for this month at CPC.  This is one I LOVE:

Framelit and Embossing Folder Storage Solution designed by Kris McIntosh
If you're anything like me you have *ahem* a LOT of Framelits and embossing folders.  Kris has designed a functional and beautiful way to store them!  I most definitely will be making a few of these!  To access the tutorial for this project head over to Craft Project Central and subscribe to April.
Have a great week everyone!

Monday, April 15, 2013

Embossed Builder Brads

Happy Monday!  I hope you had a great weekend!  Today I have a card I designed for my monthly techniques group.  Unfortunately the weather last week was most uncooperative and I had to cancel my class due to a major ice storm!  One of the techniques we were going to learn was how to change the colour of brads using embossing powder.  Check this out:

Birthday card featuring the Circle Circus, Itty Bitties and Sweet Essentials stamp sets
Notice the brad?  It is one of the gorgeous Builder Brads from the Spring Catalogue that I recoloured using Tempting Turquoise embossing powder.  Cool, huh?  The rest of this note card is pretty simple...I wanted the brad to shine!  I do so love the Circle Circus stamp set...sure hope that one makes it into the new Annual Catalogue...I will miss it if it retires!  The colours I used here were Tempting Turquoise, Tangerine Tango, Daffodil Delight, Melon Mambo and Lucky Limeade.  I embossed the backgound layer with my Argyle TIEF and added some bling with some Rhinestone Basic Jewels.
The only upside to having to cancel this month's techniques class is that I have next month's all planned and ready to go!!  Be sure to stop by tomorrow...I'll have another card I did using this same technique and I'll announce the winner of the free month subscription to Craft Project Central!  Don't forget to leave a comment on this or any other posed dated since April 1st, 2013.  Good luck in the draw!

Sunday, April 14, 2013

For the Owl Lover

Today I have a cute project from Craft Project Central to show you.  Check it out:

Owl Box and Card Set designed by Amanda Corbett
 Do you have a friend(s) that loves owls or need a fun and funky gift set in a hurry? This Owl Box with six different card designs and matching envelopes is bright enough to cheer up anyone’s day!  Make it for yourself or as a fun gift.  To access the tutorial for this project just visit Craft Project Central and subscribe to April...then stop by Amanda's blog and let her know how much you love her work!
Don't forget to enter my draw for a free month's subscription by leaving a comment on any post dated April 1st - 15th (yep, tomorrow's your last chance to enter!).  I will post the lucky winner on Tuesday...good luck!

Friday, April 12, 2013

Loving the new Photopolymer Stamps!


I have to admit that when Stampin' Up! first announced they were entering the world of truly clear photopolymer stamps I was a little bit skeptical.  I have used "clear" stamps from other companies before and was never really satisfied with the quality of the image I got; hence my love of Stampin' Up!'s wonderful red rubber stamps.  I decided I just had to give SU's version a try and am I ever glad I did!  These photopolymer stamps are terrific!!  No problems at all with getting a clear crisp image!  Plus the fact that I can see right through them makes placement a snap.  No Stamp-a-ma-jig required!  I was so excited about these stamps I just had to share it with my Tri-city Stampers team, so I created a Make-n-Take for our team meeting this week that uses the Typeset Alphabet set.  Have a look:

Any-occasion card featuring the Typeset Alphabet Photopolymer stamp set.
The original design concept for this card came from Penny Smiley, a fellow demonstrator who posted her sample on our demonstrator forum.  I changed up her original design by adding texture along the bottom of the card with the Honeycomb TIEF.  I also added a bit more colour with the stamped-off Island Indigo speech bubbles in the  background and the Crumb Cake card base, as well as the use of DSP instead of card stock on the horizontal strip.  The best thing about creating this card was the stamps themselves.  They work beautifully, are super-sticky when adhering to the clear blocks and are so easy to place.  I can't wait to get my hands on the latest photopolymer offering called Bombs Away Birthday:

Bombs Away Birthday Stamp Set
Item #133411


I SO love the fun images in this set!  There are a ton of great project ideas floating around in my head already.  You really need to give these new stamps a try...I think you'll be as pleasantly surprised as I was!

Thursday, April 11, 2013

My Turn for April!

Today I get to show you my project for April at Craft Project Central.  Check it out:

Family Canvas and Card designed by Yours Truly!
I also did this same project in Midnight Muse and I am offering both options in a class on April 26th.  Click the Upcoming Classes and Events tab at the top of this page for additional details.  If you can't make it to my class (or even if you can!), you can subscribe to April over at Craft project Central to get the full-colour step-by-step tutorial.  Just $10 gets you 10 great projects...lots to keep you busy all month long!  I am also giving away a free subscription.  To enter the draw just leave a comment on any post dated April 1-15th, 2013.  I will post the winner on the 16th.  Good luck and happy stamping!

Wednesday, April 10, 2013

Epic This and That and Bombs Away

 I am so in love with the new products from the This and That line!  I just can't get enough of the fabulous Epic Day DSP and coordinating Washi Tape!!  I used both to create the first sample for this month's sketch inspiration.  First of all, here is the sketch:

April's inspiration sketch


and here is my first sample:

Thank you card featuring the new Epic Day DSP and Washi Tape as well as the Round Array and Essentials stamp sets
What's not to love about these products?  I chose to showcase the DSP on this card using a bit of just about every pattern in the package!  We made this at my Team meeting this week and my team agree that This and That is where it's at!  The best part is that they - and you!- can order the entire bundle of products from the This and That line at a 15% discount until the end of April.  Sa-weet!!

Now for another great new product announcement!  Introducing the latest addition to Stampin' Up's Photopolymer stamp line:  Bombs Away.  Check out the fun images in this set:

Bombs Away Photopolymer stamp set (Item #133411)
 For more information about this fabulously cheeky stamp set click HERE.  I can't wait to get my hands on this one!!

Tuesday, April 9, 2013

Welcoming a New Team Member!

Last night at my monthly Tri-City Stampers team meeting we welcomed a new member who has joined our Stampin' Up family.  Today I want to show you the card I made for her...have a look:

Welcome card featuring the Friendly Phrases stamp set with new products from the This & That product line
I kept the design on this card fairly CAS as I was wanting to showcase the fabulous new products from the This & That product line.  The DSP is just gorgeous...lots of fantastic on-trend patterns with a wonderful array of colours.  I think my favourite new product is the Washi Tape!!  I am in love with that stuff!  Such a quick and easy way to add colour and texture to a project!  SO excited to see more it in the upcoming Annual Catalogue!  All of the products in the This & That line are available for purchase as a discounted bundle until the end of the month.  After that they will appear in the upcoming catalogue but the bundled price will not.  Get it while you can! 
The sentiment I used is from the Friendly Phrases set and I added a bit of Pool Party Baker's Twine and a button I had leftover from Sale-a-bration.  Don't you love it when a project comes together easily?  Our coordinating projects make designing a breeze!  I know my new team member is going to love working with Stampin' Up products as much as I do!  To learn more about the benefits of joining my Stampin' Up team click the Join My Team tab at the top of this page.  I would love to make a card just for you too!!

Monday, April 8, 2013

A Super Duper Super Mario Bash!

 TODAY IS THE LAST DAY OF THE FREE SHIPPING PROMO!  DON'T MISS OUT!!

Last Saturday my baby boy turned 6!!  I have no idea how that happened...it can't possibly have been 6 years since he was born!  To celebrate his big day we threw a Super Mario themed extravaganza for 14 of his nearest and dearest friends!  YIKES!
Unbeknownst to me, there is NOTHING available locally in the way of decorations...who knew that Mario was old-school?  So, I set about making my own...Stampin' Up style, of course!  I used some templates I found online but also had fun creating my own  designs.  Have a look:

My Birthday Boy!

Wall Mural:  The backdrop is a plastic table cloth.  I used Daffodil Delight for the question blocks and Gunball Green for the pipe.  The clouds are hand-cut from copy paper.  The bricks are patterned bulletin board paper I found at a local store.

Luigi and friends!

I made a bunch of these guys to decorate the party area in the basement.  The kids loved it!

Goomba, powerup mushrooms and fire flower

I wrapped boxes to look like bricks and question blocks and set up this little vignette on the landing on the stairs.  The pipes were on clearance at a local hardware store and my DH spray painted them green.  I made the Pirhana Plant using felt and a styrofoam ball.  The Chomp is just a black balloon with copy paper teeth and eyes and and black card stock chain.  We finally found a practical use for all of Max's Mario stuffies!

The table before the mob arrived!  I found the ball caps at our local dollar store and then added the "M" with felt I die cut using the Typeset Alphabet Bigz dies.  The kids got the hats to keep in place of party hats.

A better shot of the pirhana plant!
Unfortunately I don't have a photo of the cake!  Daddy was too busy videotaping the whole thing to think to take still photos.  I made a question mark block cake and hid Loonies (our Canadian $1 gold-coloured coins) inside.  The kids were thrilled to find coins in their cake and when I told them it was REAL MONEY they were especially excited!  In case any of you are ever thinking of holding your own Mario-themed party, here are a couple of game ideas:

Bean Bag Toss - I made the board using foam core and images I found online and then enlarged using Blockposters.com.  The numbers represent the number of chocolate coins each hole was worth.  This one was a BIG hit!
Pin the Mustache on Mario - Again the board was made using foam core, online images and the help of Blockposters.com - sorry the board isn't more visible...I am standing by the board giving instructions...my DH is the (not-so-great) photographer!
We also played Hot Potato using a stuffed Bowser...nobody wanted to be caught holding him!  I used the Mario theme song for the music.  We did a Find the Mushroom game:

Mushroom Hunt game - Kids are blindfolded and then have 20 seconds to find as many mushrooms in the bowl of marbles as they can.  They get 1 chocolate coin for each mushroom they find.

Hard to believe but, we actually ran out of time for all of the games I had planned.  I had a fun craft for them to make too, but we didn't get to it either!  Here is a shot of the little project I had for them: 

Pirhanna Plant craft - closed
Pirhanna Plant craft - open
I'm kinda bummed that we ran out of time for this little project because I think they would have had fun with it.  Here is what I used:
Real Red  - 2-1/2" circle with a "v" cut out of it
Whisper White - Word Window for lips
Whisper White - Slot punch for teeth (retired)
Whisper White - Itty Bitty punch pack circle for spots
Garden Green - Blossom Builder punch for leaves.

As for the other decorations, here is a quick run down of their parts:

Mushroom:
Ovals collection framelits ( largest non-scalloped oval) for top of mushroom
1" circle for spots
Word Window repunched for eyes
3" x 1-1/4" rectangle for body, round corners
Colours I used were Real  Red, Gumball Green and Tempting Turquoise

Fire Flower:
Ovals collection framelits - smallest die in Whisper White, next largest in Daffodil Delight and next largest again in Tangerine Tango
Slot punch (retired) for eyes
Garden Green - 3/4" strip for stem
Garden Green - Blosom Builder punch for leaves

Goomba:
I used a template I found online HERE.  To save some hand-cutting I used die cuts for some parts:  The  colours I used were:
Chocolate Chip for head
Crumb Cake for body
Early Espresso for feet ( I used the 4th largest die from the Ovals Collection framelits for these(, eyebrowns and mouth
Whisper White for eyes and teeth - I used the 3rd smallest die from the Ovals Framelits to cute the eyes and the Pennant Builder punch for the teeth
Basic Black for pupils (I used the small oval punch for these)

Koopa Troopa:
I used part of the template found HERE but didn't like the look of the head and face so I redesigned it using dies.  Here is what I did:
Shell - Gumball Green or Tangerine Tango
Feet, detail on shell - Daffodil Delight
Head - (all using  Daffodil Delight card stock) largest non-scalloped oval die from Ovals Collection framelits, muzzle 3rd largest die.
Eyes 3rd smallest die in Daffodil Delight, 2nd smallest in Whisper White, small oval punch in black for pupil
Nostrils - circle from Itty Bitty Punch pack in Basic Black
The neck was from part of the template that I just cut down to work with the redesigned head.  I also added a tail that I drew by hand.

Whew...this is a long post...if you're still reading you MUST be a Mario fan!  I hope this helps in planning your next Mario-themed event!

If you like, leave a comment and be  entered in my draw for a free month's subscription to Craft Project Central.  I'll announce the winner on April 16th!


Sunday, April 7, 2013

The latest from CPC

I am exhausted!  Entertaining and corraling 14 5-year olds for two hours is a bit of a chore!  SO glad I don't teach elementary school...I'll take sullen teenagers any day!  Max's birthday bash was a resounding success yesterday and I will post photos for you tomorrow.  Today I am busy cleaning up my house and trying to restore order to the post-party chaos, but I do have the latest project from Craft Project Central to show you.  Have a look:

Tea for Two Desk set by Regina Andari
Isn't that a darling set?  There are some things that every desk needs, and they definitely should look good!  This desk set includes a postage stamp dispenser, tissue box, and a frame that can be used for a photo, favorite quote, or a calendar!  Use your favorite designer series paper collection to create the items in this desk set!  These three items are so easy to make that you will probably look forward to making a set for each season!  Great for a class or club project as well!  To access the tutorial for this project visit Craft Project Central and subscribe to April.  OR leave a comment for me on any post dated April 1st - 15th to enter my draw for a free month's subscription.  I will select one lucky winner and post his/her name on April 16th.  Good luck!!

Friday, April 5, 2013

Sweet

I have to admit that when I read about the upcoming Colour Refresh I did a little dance of joy!  I am so happy that Pool Party and Calypso Coral are going to be part of the core colour families!  I love those colours together as well as in combination with other colours and today I have a perfect example of just how wonderful they look together!  Have a look:

Baby card featuring the Hearts A Flutter and Itty Bitties stamp sets with sentiment from Itty Bitty Banners
Isn't that the perfect gender neutral colour combo for a baby card??  So sweet and those little feet are just the cutest thing ever!  I love the teeny little images in the Itty Bitties stamp set!  The fact that they fit perfectly in the circle from the Itty Bitty Punch Pack is an added bonus.  It makes them so easy to add as little accents on projects like this. It is definitely a must-have for me!
Now for a couple of reminders:
Firstly, don't forget to leave a comment on any post dated April 1st - 15th.  I'm giving a way a free month's subscription to Craft Project Central and it will go to one of my faithful readers!  I'll post the winner's name on the 16th.
Secondly, don't forget about the free shipping offer coming up this weekend.  Starting tomorrow at 12:00am Mountain Time (2:00 am Eastern) Stampin' Up is offering free shipping on every order.  Make sure to get your order in before midnight on Monday to take advantage of this terrific offer.  You can place your order directly through me or through my website and have it shipped directly to you for FREE!! 
Tomorrow is my son's 6th birthday bash, so I'll be a wee bit busy with it all day.  I hope you have a terrific weekend...I'll see you on Sunday with highlights from the Super Duper Super Mario party!

Thursday, April 4, 2013

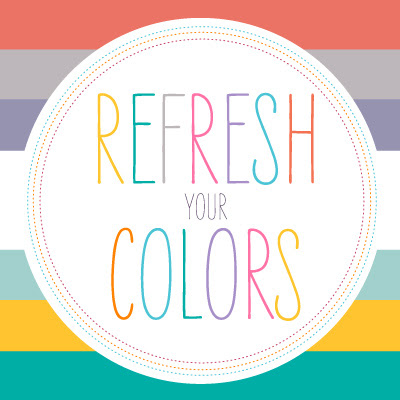
Just announced...a Colour Refresh!


Big news today from Stampin' Up!!  Effective with the release of the new Annual Catalogue, Stampin' Up will be refreshing their core colour families!  Several former In-Colours are coming back to the core colour families as well as a brand new, never-before-seen addition to the Neutrals family!  To make room for these new additions, some existing colours will be either retired or moved to different families.  Check out the chart below to see just how the colour families will look moving forward:

So, how does this affect you?  Beginning today, supplies in the retiring colours will be available on a while-supplies-last basis, so if there are items you wish to order to build your stock in your favourite retiring colours you will want to place your order sooner than later!  History has shown that reinkers and card stock in retiring colours sell out fast, so don't wait...you may be disappointed!!

Now, here is a dilemma for you...order today or wait for...

FREE SHIPPING
APRIL 6-8!!!

That's right, Stampin' Up is offering free standard shipping on all orders placed April 6th-8th, 2013.  That is like getting a 10% discount on everything in the catalogue!!!  This is not a joke...this promotion applies to all orders, whether placed directly through me or through my online store.  So put together your wish list and get that order in starting Saturday and running through midnight on Monday!  Don't miss out on this terrific offer!!

Love this one!

Today I have a fantastic project from Craft Project Central for you.  I SO love this one!

Shadowbox and Greeting card set designed by Monika Davis
I really love this project!  The colour combination and choice of images are just wonderful!  Monika Davis has done a fabulous job designing this one!  To access the tutorial for this project, visit Craft Project Central and subscribe to April or take your chances in my draw for a free month's subscription by leaving a comment on any posted dated April 1st -15th.  Good luck!!
Related Posts Plugin for WordPress, Blogger...