Showing posts with label Itty Bitty Banners stamp set. Show all posts

Sunday, April 12, 2015

Spring has Sprung at Sunday Stamps!

Happy Sunday...and happy spring!  The weather here is FINALLY warming up and there is a definite feeling of spring in the air.  The new colour challenge over at Sunday Stamps is perfect to welcome the new season...

Here is my Design Team project:

Thank you card featuring the Butterflies Thinlits and the Embossed Embossing technique, with sentiment from Itty Bitty Banners
I actually designed this project to do double duty!  Not only is it for this week's challenge, we also made it at my montly techniques class last week.  I used the Embossed Embossing technique to create the background.  I embossed a piece of Whisper White card stock using the Spring Flowers TIEF.  Then, after rubbing the Embossing Buddy all over it, I inked a brayer with Versamark and lightly ran it over the raised pattern.  I sprinkled it with Blushing Bride embossing powder, shook off the excess and then heated it.  I love the result!

The butterflies are die cut from Wisteria Wonder and Blushing Bride card stock using the Butterflies Thinlits.  The little vines are punched from Pear Pizzazz card stock using the Bird Builder punch.  I anchored them to the design using half of a Tea Lace doily.  The sentiment is from the Itty Bitty Banners set and is stamped in Wisteria Wonder ink and then die cut using the Bitty Banners Framelits.  I added a Vintage Faceted button and a bit of Wisteria Wonder (retired) baker's twine.  The card front is matted on a piece of Wisteria Wonder card stock and adhered to a Pear Pizzazz card base.

Inside view with sentiment from Painted Petals.
On the inside I stamped the large and small floral butterflies from the Papillon Potpourri set in Blushing Bride and Wisteria Wonder ink, respectively.  The sentiment is from the Painted Petals set and is stamped in Pear Pizzazz ink.
Be sure to check out the rest of the design team's sample projects and the new, fresh look over at Sunday Stamps.  Then give this challenge a go and play along!

Tuesday, March 3, 2015

Sweet Baby Bokeh

I seem to be on a roll with baby cards lately.  It must be because so many people I know are expecting or have just had little ones.   Today I have a baby card I designed for my techniques group this month.

Baby card featuring the Celebrate Today and Itty Bitty Banners stamp sets and using the Bokeh background technique
The cool thing about this design is that people who don't need a baby card can easily change it to a birthday card by simply switching out the sentiment...gotta love versatility!
I have been wanting to play with my new Colorbox Chalk inks (available in the Stampin' Up! Occasions catalogue) for ages and I finally got my chance.  To create my Bokeh background I began by sponging a piece of Whisper White card stock using the Aquamarine, Rose Coral and Yellow Citrus chalk inks.  I love how easily this ink goes on and the fact that it takes longer to dry gives more time to move the ink around and blend it nicely.  I actually used my heat tool to set the ink once I was finished.  Then I used a circle template I created with some scrap window sheets and the Circles Collection Framelits, a sponge dauber and Whisper White Craft ink to add my light points.  The effect is almost like irridescent bubbles...LOVE it!

To create the balloon, I heat embossed the confetti stars image from the Celebrate Today stamp set in gold on a piece of vellum.  I then die-cut the image using the Balloon Framelits...what an easy way to make a pretty focal image!  I embellished it with gold baker's twine and sequin trim.  The sentiment is from the Itty Bitty Banners stamp set, is heat embossed in gold and die-cut using the Bitty Banners Framelits.  The card front is matted on a piece of Crushed Curry card stock and mounted on a Coastal Cabana card base.

Inside view with sentiment from Cuddles and Kisses (retired)
On the inside, I stamped a couple of the banners from the Celebrate Today set using the Rose Coral and Yellow Citrus chalk inks.  The sentiment is from the (retired) Cuddles and Kisses set and is also stamped in Yellow Citrus.  I have to say I really enjoyed playing with the chalk ink...can't wait to play some more!

Now for this week's Weekly Deals...as always prices are good until Monday at midnight :)

A Little Sumthin’ Sumthin’ Gift Box by Stampin' Up!
A Little Sumthin’ Sumthin’ Gift Box Kit
Price: $19.95 
Sale: $14.96
Decorative Window Gift Box
Price: $5.95  
Sale: $4.46
Extra Large Gift Boxes
Price: $4.95  
Sale: $3.71
Gusseted Cellophane Bags by Stampin' Up!
Gusseted Cellophane Bags
Price: $5.95 
Sale: $4.46
Lucky You Ensemble -- Digital Download
Lucky You Ensemble - Digital Download
Price: $8.95  
Sale: $5.37
Natural Filter Paper by Stampin' Up!
Natural Filter Paper
Price: $3.95  
Sale: $2.96
Polka Dot Tag A Bag Gift Bags by Stampin' Up!
Polka Dot Tag A Bag Gift Bags
Price: $4.95 
Sale:  $3.71
Sweet Treat Embellishment Cups
Price: $3.95 
Sale:  $2.96

Monday, February 24, 2014

Baby Shower Success!

Well Operation Baby Shower was a huge success.  The Mommy-to-be had a wonderful time and received some lovely gifts.  I know I said I would post photos of the decor items last Friday, but honestly, I was just too busy getting ready for the actual event (and then cleaning up afterwards) to sneak in a post.  My apologies for keeping you waiting...here they are!

Baby shower Banner and garland.
 I made the banner using the largest of the Banners Framelits, cutting a folded piece of  textured Smokey Slate card stock so that the fold was just below the cutting edge.  This created tent-fold pennants that I could then just drape over the Summer Starfruit stitched satin ribbon, allowing me to reuse the almost-8-foot-long piece of ribbon!  The white circles were cut using the Starburst Framelits and embossed with the Argyle TIEF.  The Summer Starfruit letters were die cut using the retired Serif Essentials Alphabet dies.  I love these because they cut big 2" letters which are perfect for projects like this.  I added a bit of bling to the banner with some small hearts punched from silver glimmer paper.


The garland in each of the above photos was made by punching (a lot!) of hexagons from Smokey Slate, Summer Starfruit, Crisp Cantaloupe and Silver Glimmer paper using the Hexagon punch.  It was then just a matter of sewing them all together.  I did them in strands of 100 hexagons each, which made the length quite manageable.  The one on the chandelier was shorter, made from the leftovers.  Those garlands were a huge hit with everyone...in fact, the Mommy-to-be asked if she could keep them for baby's first birthday party!  Of course I said yes!

Heart confetti
Instead of throwing out the scraps when I was finished punching all of those hexagons, I punched as many small hearts as I could from what was left and used them as confetti on the tables.  It was a great way to carry the colour scheme to the tables and use up scraps at the same time!

Cupcake toppers
I made little toppers for the yummy cupcakes using the Itty Bitty Banners stamp set and Bitty Banners Framelits. 


Favour wrapper made using the Scalloped Tag Topper punch...so loving that thing!
 For the favours I packaged up pairs of yummy-smelling votive candles in some small cello bags and then created a wrapper using the Scalloped Tag Topper punch.  I simply cut a 10" x 2" strip of Smokey Slate card stock and punched both ends.  I scored each strip at 4-1/4 and 5-3/4" and folded along the score lines.  I embossed each strip with the Perfect Polka Dots TIEF.  I added a strip of Sticky Strip between the score lines to hold the bag of candles in place and then tied the wrapper closed with some Summer Starfruit Stitched Satin Ribbon.  The label is cut using the Chalk Talk Framelits from Summer Starfruit Core'dinations card stock, embossed with the Argyle TIEF and then lightly sanded.  The sentiment is from the A Fitting Occasion stamp set.  It is punched with the 1" circle and layered on a 1-1/4" scalloped circle.  The tiny heart is from the Owl Builder Punch.


Thank you card featuring the Cuddles and Kisses stamp set.
As part of my gift for the Mommy-to-be I made a set of 20 of these thank you cards.  I kept many of the same elements I used on the invitations, but made these much simpler.  It didn't take long to whip them up!

I have to say that this colour scheme was a huge hit!  Everyone commented on how nicely the colours (Smokey Slate, Summer Starfruit, Crisp Cantaloupe and Whisper White) work together for a gender-neutral shower.  The bling is a bit girlie, but it was more for Mommy-to-be than for baby...she is a real girlie girl!  Here is a shot of the guest of honour:

I can't wait to meet her little one!!

Friday, August 2, 2013

One more Sketch Inspiration project

I have one more project inspired by last month's sketch.  Here is the sketch...


I took some significant liberties with this one...

Birthday shaker card featuring the Birthday Basics DSP.
As you can see, the only element I really kept was the three panels.  I created an envelope using a window sheet, Birthday Basics DSP and the Envelope Liner Framelits from the new Holiday Catalogue.  I punched heart and star confetti, layered it between the DSP and window sheet and then held it all together with some Epic Day This and That Washi Tape.  The Bermuda Bay background is embossed using the Alphabet Press TIEF which I sanded and sponged lightly.  The card base is Naturals Vanilla card stock.
Although this project bears little resemblance to the sketch, it goes to show how one sketch can be a jumping-off point for your own creativity.  If you haven't tried working from a sketch before I encourage you to give it a try...you'll amaze yourself with the results!

Tuesday, May 7, 2013

Up and Away and Good-bye

I had such fun creating the telescoping card I showed you yesterday that I decided to try again with another stamp set.  Check this out:


Birthday card featuring the soon-to-be-retired Up, Up and Away stamp set with sentiment from Itty Bitty Banners
This card was created in the say way yesterday's project was.  I wanted the focal image to stand out so I skipped the embellies and kept the design very CAS.  The only little touch was the tiny mini silver brads on the sentiment banner.  Going to keep playing with this technique...we're doing it at my techniques class this week!  I'll show you that project later...till then happy stamping!

Tuesday, April 16, 2013

A Winner and A New Project

Whew, lots to show you today!  Firstly, I have another card I designed for my techniques group this month:

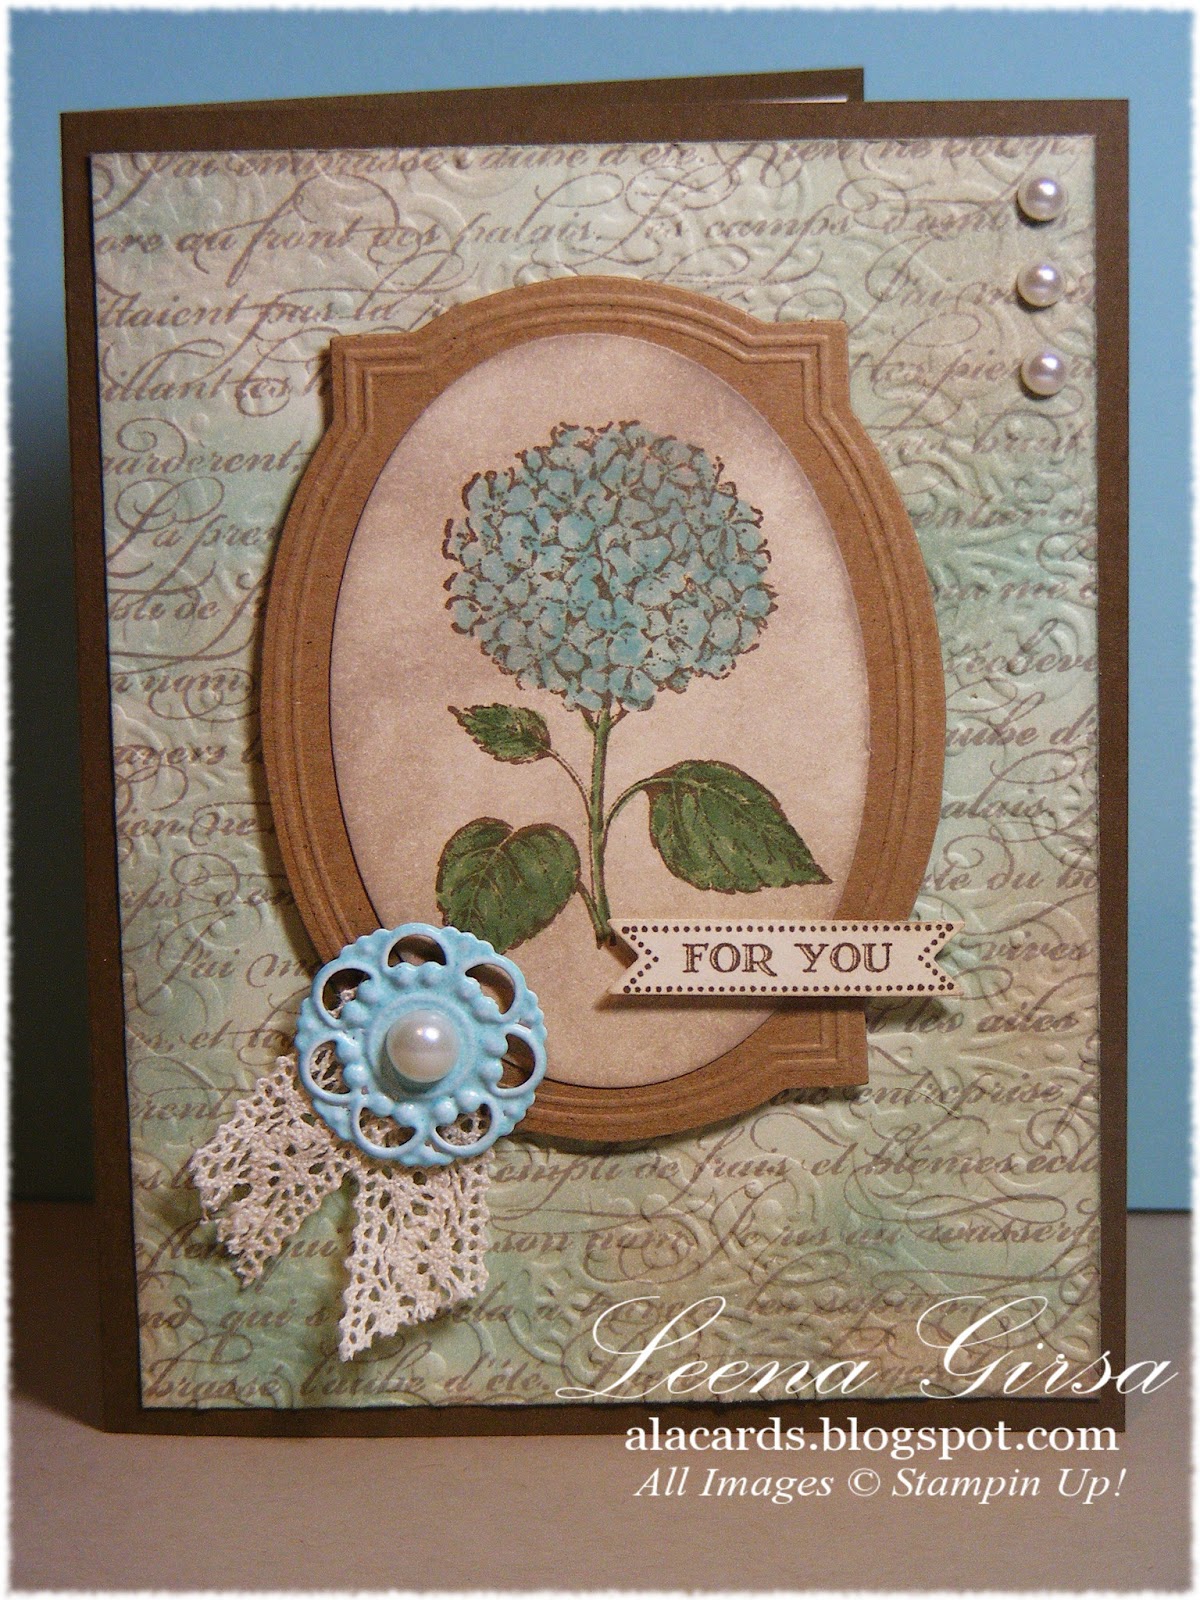
Any-Occasion card featuring the Best of Flowers and En Francais stamp sets with sentiment from Itty Bitty Banners

 I really love the softness of this card.  It looks so worn and weathered, thanks to lots of sponging and distressing.  The only thing that doesn't look worn is the beautiful Builder Brad that I recoloured using Pool Party embossing powder.  The flower image is from last month's 25th Anniversary set called Best of Flowers.  The layer behind the flower is one of the labels from the Pop-up Posies Designer Kit.  It fits perfectly behind the oval I cut using my Ovals Collection Framelits.  The background is some homemade DSP I made using Very Vanilla card stock, the En Francais background stamp, Soft Suede, Crumb Cake and Pool Party ink and the Lacy Brocade TIEF.  I just couldn't find any DSP that worked with the focal image, so I made my own!  It's been a while since I got down and inky...it felt good to crack out my sponges and dig in!

Now it's time to announce the winner of the free month's subscription to Craft Project Central.  ~insert drum roll here~...

Hofkissed

Congratulations!  I'll be in touch to tell you how to claim your subscription.  Now to show you the latest offering for this month at CPC.  This is one I LOVE:

Framelit and Embossing Folder Storage Solution designed by Kris McIntosh
If you're anything like me you have *ahem* a LOT of Framelits and embossing folders.  Kris has designed a functional and beautiful way to store them!  I most definitely will be making a few of these!  To access the tutorial for this project head over to Craft Project Central and subscribe to April.
Have a great week everyone!

Friday, April 5, 2013

Sweet

I have to admit that when I read about the upcoming Colour Refresh I did a little dance of joy!  I am so happy that Pool Party and Calypso Coral are going to be part of the core colour families!  I love those colours together as well as in combination with other colours and today I have a perfect example of just how wonderful they look together!  Have a look:

Baby card featuring the Hearts A Flutter and Itty Bitties stamp sets with sentiment from Itty Bitty Banners
Isn't that the perfect gender neutral colour combo for a baby card??  So sweet and those little feet are just the cutest thing ever!  I love the teeny little images in the Itty Bitties stamp set!  The fact that they fit perfectly in the circle from the Itty Bitty Punch Pack is an added bonus.  It makes them so easy to add as little accents on projects like this. It is definitely a must-have for me!
Now for a couple of reminders:
Firstly, don't forget to leave a comment on any post dated April 1st - 15th.  I'm giving a way a free month's subscription to Craft Project Central and it will go to one of my faithful readers!  I'll post the winner's name on the 16th.
Secondly, don't forget about the free shipping offer coming up this weekend.  Starting tomorrow at 12:00am Mountain Time (2:00 am Eastern) Stampin' Up is offering free shipping on every order.  Make sure to get your order in before midnight on Monday to take advantage of this terrific offer.  You can place your order directly through me or through my website and have it shipped directly to you for FREE!! 
Tomorrow is my son's 6th birthday bash, so I'll be a wee bit busy with it all day.  I hope you have a terrific weekend...I'll see you on Sunday with highlights from the Super Duper Super Mario party!

Monday, February 25, 2013

Time for more Sketch Inspiration

I am in misery.  My cold of last week has morphed into what I'm sure is a sinus infection.  Ugh!  Taking today off work isn't an option, so the doctor will have to wait until tomorrow and I'll have to make do with over-the-counter decongestants.  Since I spent most of the weekend feeling crummy I didn't get much stamping done, but I do have a couple of projects to show you this week.  Today I have the last in my series of cards using this month's inspiration sketch.  In case you missed it, here is the sketch:

And here is my last design for this month:

Any-occasion card featuring the Itty Bitty Banners stamp set.
I kept this one CAS, electing to use the fantastic  Sycamore Street Sale-a-bration DSP as my focal point.  I embossed using the new Honeycomb TIEF and then cut little hexagons from the DSP to fit inside.  I also used some coordinating ribbon and a button, also from the Sale-a-bration brochure.
I hope you've enjoyed this month's sketch.  I'll have a new one next weekend as March (and hopefully warmer weather) begins. In the meantime I'm going to do my best to get rid of this nasty infection!

Wednesday, January 9, 2013

Mashed up Valentine


Happy Thursday everyone...just one more day till the weekend!  Why is it always so hard to get back to a full 5-day week after the holidays?? 
Today I have a little Valentine's ensemble I created for this week's Friday Mash-up challenge.  Here is the sketch:


I decided to "mash it up" and do the sketch using hearts as one of my elements.  Here is what I came up with:

Valentine's ensemble for FM91 featuring the Hearts A-flutter stamp set and More Amore DSP.

Close up of card...sentiment is from Teeny Tiny Wishes

Inside view of card with sentiment from You Are Loved

Treat holder made using the Petite Pocket die, More Amore DSP with sentiment from Itty Bitty Banners

So I got a little carried away with the hearts!  I just couldn't stop adding them LOL...I used pretty much every heart die and punch I own on this project.  I even used the heart-patterned Adorning Accents TIEF to add texture.  I did manage to stay pretty much true to the sketch, though it was tempting to add a few extra embellishments!  There isn't a stitch of ribbon or bling anywhere on the card!!  I remedied that when I designed the treat holder, using some of the gorgeous SAB ribbon to tie the box closed.  Thanks for stopping by...have a great day!

Thursday, September 6, 2012

Fall Foliage

Today I get to show the project I designed this month for Craft Project Central.  I used one of my very favourite Fall stamp sets and some of my favourite colours.  Have a look:

French Foliage Any Occasion Cards and Portfolio featuring the French Foliage and Itty Bitty Banners stamp sets
 I am so pleased with the way this turned out.  It really captured the look I was going for.  The portfolio holds four cards and coordinating envelopes.  The sentiments are mounted  so that they can be removed and adhered to a card  as needed.  It is the perfect set to keep on-hand for those times when you need a last-minute card.  To access the tutorial for this project, head on over to Craft Project Central and subscribe to September.  It is only $10 and you'll get 10 full-colour tutorials that you can access for a full year.  You can also earn your subscription FREE from me by hosting a stamping event in the month of September.  It can be in my home or yours and all it takes is a minimum of 3 guests.  Call or email today to schedule your Girls' Night Out and earn your FREE subscription!

Monday, July 2, 2012

Up, Up and Away

We have several family birthdays at this time of year, so I've been busily designing cards to send to various family members.  Today I have a masculine card for you that uses a stamp set that isn't really new (it was new in last year's catalogue), but that I haven't used a whole lot as of yet. 

Masculine birthday card featuring the Up, Up and Away stamp set with sentiment from Itty Bitty Banners
Even though this stamp set isn't new, there sure are lots of new products to talk about with this card!  I embossed the Basic Gray background piece using the new Argyle embossing folder...L-O-V-E it!  I chose my DSP from the aptly named World Spectacular pack.  It truly is spectacular with tons of wonderful patterns and rich colours.  Lots of options for masculine cards in there, but I chose this particular pattern so that it would coordinate with the argyle background.  My little clouds were made using the Cupcake builder punch and then embossed with the new Fancy Fan embossing folder...I think it makes them look like fluffy little clouds, no?  The balloons were stamped using Daffodil Delight, Tangerine Tango and Island Indigo inks, cut out and then popped up using dimensionals.  The little banner is stamped using the Itty Bitty Banners set (my most-used new set thus far!) and cut out with the Bitty Banners framelits.  The most significant thing about this card is what is missing:  embellishments!!  Not a brad or ribbon in sight!!  I think I can count on one hand the number of cards I've made without a single embellishment, but I really thought this card had enough going on without adding anything extra.  What do you think?

Before I go, just reminder about my give-away for a free month's subscription to Craft Project Central.  Leave a comment on any (or every) post on this blog between July 1st and 7th for a chance to win.  The winner will be announced on Sunday, July 8th.

Tuesday, June 12, 2012

Emerging Butterflies

Today I have a card I designed for my monthly techniques group that meets this week.  It uses a technique sometimes known as Emerging Colours or Joseph's coat.  Whatever you call it, it is gorgeous!  Have a look:
Pretty any-occasion card featuring the Emerging Colours technique and the Creative Elements and Itty Bitty Banners stamp sets.
Once again, I couldn't resist pulling out some of my new catty goodies!  The DSP in the background is from the Patio Party pack...lots to love in there, but my favourite pattern is definitely these little bitty butterflies. To get the multi-coloured butterflies on the focal image I sponged Summer Starfruit, Baja Breeze and Primrose Petals ink on a square of whisper white randomly.  I then stamped the butterfly image from Creative Elements in Versamark and clear embossed them.  I then brayerd on Midnight Muse ink, covering the sponged colour.  The embossing resists the ink, so I wiped off the excess with a paper towel and voila...butterflies that pop out in vibrant colour.  I added some stitched satin ribbon in Summer Starfruit and a butterfly punched, with the new Elegant Butterfly punch, in Primrose Petals.  I added a rhinestone body to the butterfly, as well as a little banner and one of the to-die-for little In-Colour Dahlias.  Gotta love new stuff!!

Sunday, June 3, 2012

Note Tote and Cards

Whew!!  I'm pooped!  Yesterday was a whirlwind of a day as I held my open house and retired product yard sale.  Lots of guests stopped by and took advantage of the great deals I was offering.  Everyone LOVES the new catty...I heard lots of comments about the layout and how easy it is to find everything.  Kudos to Stampin' Up! for a fabulous new design...it's a hit! 
If you weren't able to make it yesterday I have great news for you!  My yard sale is going digital!!  Check out the "Retired Product Yard Sale" tab at the top of this page for some great deals on retired stamp sets.  Later in the week I'll also add some DSP and Simply Scrappin' Kits once I inventory what I have left.
Now for today's project...I designed this cute little note tote to hold 3x3 cards and envelopes with gifts for Max's teachers in mind.  He is graduating from preschool at the end of the month and he adores his teachers so I wanted to make something special for them both.  Have a look...
Cute Note Tote and coordinating cards featuring products from the new Summer Smooches Suite.
Close up of the box which is made using two scalloped envelope die cuts and two tag die cuts. 

Close up of the cards...there are two of each design in the box.
This little box really is super easy to make.  We made it at my Big Shot club this month and it took no time to put together.  I love finding new ways to use dies beyond what they were originally designed for...makes them that much better an investment!  Stay tuned for a tutorial on how to put the box together...

Sunday, May 27, 2012

Are you coming...

...to my New Catalogue Open House?  It's going to be a great time!  Today I have one of the two make-n-takes you'll be able to do at my Open House...have a look...

Clean and Cute birthday card featuring the Bright Blossoms and Itty Bitty Banners stamp sets as well as Summer Smooches DSP.

I absolutely love this stamp set and the combination of Island Indigo and the new Gumball Green In-Colours.  They are so crisp and fresh looking.  Paired against Whisper White, they just pop.  Sooo...have I convinced you yet??  Check out the details of my event in the left sidebar and then drop me a line or leave me a comment to let me know you're coming this Saturday!  See you then!!

Wednesday, May 16, 2012

Oval Accents Treat Holder

Last week at our monthly Jammin' Stampers team meeting, fellow demonstrator Christine Kokiw did a fun make'n'take with us using the Petite Purse die.  Here is a photo of the finished project:


As I was preparing for my own Tri-City Stampers team meeting this past Monday, I came up with a tweak on Christine's design using the new Oval Accents die...check it out...

Petite Purse treat holder using the Oval Accents die
Cute, eh?  I used the new Gumball Green In-Colour as well as a bit of the new Chock full of Cheer DSP.  It works for more than just Christmas!  Here is a rundown of all the new products I used on this project:

Oval Accents die
Bitty Banners Framelits
Apothecary Accents Framelits
Itty Bitty Banners stamp set
Gumball Green cardstock, stiched satin ribbon and ink
Primrose Petals cardstock.

I am loving this new die!  Tomorrow I'll have a card I designed using it...gotta love getting new toys to play with!

Friday, May 11, 2012

Make a Cake

...no baking required!  Today I have another sneak peek for you from the upcoming Annual Catalogue from Stampin' Up!  It uses a new set called Make a Cake...

Cute Wedding card featuring the new Make a Cake and Itty Bitty Banners stamp set as well as the new Apothecary Accents and Bitty Banners Framelits.

Cute, eh?  This one uses a bunch of new products you'll see in the new catty...here's a list, in case you want to start your wishlist early:
Make A Cake stamp set
Itty Bitty Banners stamp set
Patio Party Designer Series Paper
Apothecary Accents Framelits
Bitty Banners Framelits

I think of all the new products the ones I am most excited about are the Framelits!  I fell in love with them in the Occasions Mini and am thrilled there are more in the upcoming catalogue.  Here's hoping SU keeps 'em coming in the Holiday Catalogue when it is released in August!!

Speaking of the new catalogue, I am holding a launch party!!  My New Catty Open House will take place on Saturday, June 2nd from 1-4 pm and all are welcome!   Details of the event may be found HERE.  The party is FREE, the Make-n-takes are FREE...and you'll leave with a brand spankin' new FREE catalogue!  And who doesn't like FREE??  PLUS, as part of this event, I'll be holding my annual" Out With the Old Yard Sale", where I'll be selling retired product at 50-60% off catalogue prices.  Making purchases at the yard sale will get you a discount on your first order from the new catty.  The more retired product you buy, the more you'll save on your first order of new product.  Can't ask for better than that, now can you??  If you plan to attend (and why wouldn't you??) drop me a quick email by the end of May so I know how many to expect.

Related Posts Plugin for WordPress, Blogger...