Showing posts with label Papillon Potpourri stamp set. Show all posts

Wednesday, June 24, 2015

Big Butterfly Congrats

Happy Wednesday!  Have you missed me?  Sorry I've been AWOL the past few days...I am up to my eyeballs in end-of-year marking, exams, report cards and clean-up at school.  I can't wait for Friday at 3:00...ahhhh freedom!!
With the end of the school year come the requisite good-byes as we say farewell to various staff members who are leaving for a variety of reasons.  I am typically charged with making the cards for everyone to sign, which means I need to think BIG!  Today's project is an over-sized 5-1/2" x 8" retirement card...

Retirement card featuring the Watercolour Wings and Awesomely Artistic stamp sets with sentiment from Sassy Salutations
For this one I pulled out two of my favourite new stamp sets:  Watercolour Wings and Awesomely Artistic.  I also used the Bokeh technique to create my background.  I began by sponging  Whisper White card stock all over with Lost Lagoon, Wisteria Wonder and Mint Macaron inks.  I really like the way those three shades blend and complement each other.  Then I used Whisper White Craft ink and a template I created with various-sized circle punches to create my points of light.  Once that was completely dry, I heat embossed the floral image from the Awesomely Artistic stamp set in silver.  Such a gorgeously delicate imge!  The final touch on the background was some silver ink spatters, which are also from the Awesomely Artistic set.

I layered my Bokeh background on a piece of Lost Lagoon card stock, on which I had heat embossed, in silver, the sentiment from Sassy Salutations and embellished it with some (retired) Blackberry Bliss stitched satin ribbon.  To create the butterflies, I stamped the solid butterfly images from the Watercolour Wings stamp set in Wisteria Wonder ink and then stamped the detail images in Blackberry Bliss.  I die-cut the stamped butterflies using the Bold Butterfly Framelits and Butterflies Thinlits.  The top layer on each butterfly is die-cut from Dazzling Diamonds Glimmer paper (on sale this week!).  I embellished each butterfly with a 
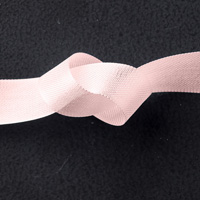
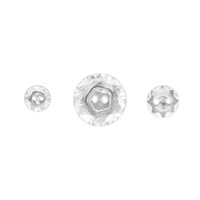
Vintage Faceted button (also on sale this week!) and some Silver Metallic Thread.
The background panel is a piece of Blackberry Bliss card stock that I embossed using the Elegant Dots TIEF.  The panel was larger than would fit in the folder, but I was able to carefully match the pattern so that the seam wasn't obvious.  The card base is Basic Gray card stock

Inside view with sentiment from the Wild About Flowers set and butterfly images from the Papillon Potpourri set.
On the inside I added Whisper White panels to allow lots of room for our staff to wish the retiree well and then added some stamped flowers in Blacknerry Bliss.  The sentiment is from the Wild About Flowers set and is heat embossed in silver.  I die cut the labels using the Lots of Labels framelits.  The butterflies, from the Papillon Potpourri set, are heat embossed in silver on vellum and then punched using the Bitty Butterfly and Elegant Butterfly punches.

Now, I was so busy yesterday I fogot to post this week's Weekly Deals!  Here they are...prices are good until Monday at midnight :)

Dazzling Diamonds Glimmer Paper by Stampin' Up!


Price: $6.25  
Sale: $4.69
Gold 1/8 Ribbon by Stampin' Up!


Price: $6.25  
Sale: $4.69
Lucky Stars Textured Impressions Embossing Folders by Stampin' Up!


Price: $9.25  
Sale: $6.94
Mini Treat Bag Thinlits Dies by Stampin' Up!


Price: $49.00  
Sale: $36.75
Pink Pirouette 1/2 Seam Binding Ribbon by Stampin' Up!


Price: $8.75  
Sale: $6.56
Polka Dot Textured Impressions Embossing Folder by Stampin' Up!


Price: $9.25  
Sale: $6.94
Silver Glimmer Paper by Stampin' Up!


Price: $6.25 
Sale:  $4.69
Vintage Faceted Designer Buttons by Stampin' Up!


Price: $7.50  
Sale: $5.63

Sunday, April 12, 2015

Spring has Sprung at Sunday Stamps!

Happy Sunday...and happy spring!  The weather here is FINALLY warming up and there is a definite feeling of spring in the air.  The new colour challenge over at Sunday Stamps is perfect to welcome the new season...

Here is my Design Team project:

Thank you card featuring the Butterflies Thinlits and the Embossed Embossing technique, with sentiment from Itty Bitty Banners
I actually designed this project to do double duty!  Not only is it for this week's challenge, we also made it at my montly techniques class last week.  I used the Embossed Embossing technique to create the background.  I embossed a piece of Whisper White card stock using the Spring Flowers TIEF.  Then, after rubbing the Embossing Buddy all over it, I inked a brayer with Versamark and lightly ran it over the raised pattern.  I sprinkled it with Blushing Bride embossing powder, shook off the excess and then heated it.  I love the result!

The butterflies are die cut from Wisteria Wonder and Blushing Bride card stock using the Butterflies Thinlits.  The little vines are punched from Pear Pizzazz card stock using the Bird Builder punch.  I anchored them to the design using half of a Tea Lace doily.  The sentiment is from the Itty Bitty Banners set and is stamped in Wisteria Wonder ink and then die cut using the Bitty Banners Framelits.  I added a Vintage Faceted button and a bit of Wisteria Wonder (retired) baker's twine.  The card front is matted on a piece of Wisteria Wonder card stock and adhered to a Pear Pizzazz card base.

Inside view with sentiment from Painted Petals.
On the inside I stamped the large and small floral butterflies from the Papillon Potpourri set in Blushing Bride and Wisteria Wonder ink, respectively.  The sentiment is from the Painted Petals set and is stamped in Pear Pizzazz ink.
Be sure to check out the rest of the design team's sample projects and the new, fresh look over at Sunday Stamps.  Then give this challenge a go and play along!

Wednesday, February 4, 2015

Painted Blooms Birthday

Happy Hump Day...it's all downhill to the weekend from here!
Today I have another of the projects that was available for a card buffet I held a couple of weeks ago. 

Birthday card featuring the Painted Blooms DSP with sentiment from Simply Sketched (retired).
This one has some retired products as well as some brand new ones from the Occasions catalogue.  The Whisper White background layer is embossed using the new Spring Flowers TIEF and is layered on a Rose Red card base.  The beautiful floral focal point is a piece of the Painted Blooms DSP...it is SOOO pretty!  I also layered that on a piece of Rose Red card stock, but not before embellishing it with some Rose Red Seam Binding Ribbon (retired) and a Something Borrowed Embellishment, which I used as a ribbon slide.

The sentiment, from the retired Hostess-exclusive set Simply Sketched, is heat embossed in silver and die cut using the Banners Framelits.  The little butterfly, from the Papillon Potpourri set, is heat embossed in silver on vellum and punched with the Bitty Butterfly punch.  I added some rhinestones for a little extra sparkle.

Inside view with sentiment from the Bloom With Hope Hostess-exclusive set.
On the inside I added another narrow strip of Painted Blooms DSP and then stamped the sentiment from the Bloom With Hope Hostess set in Rose Red ink.

Now, I totally forgot to post the Weekly Deals yesterday, so here they are...something for everyone this time!  Remember, prices are good until Monday at midnight.  My order goes in on Sunday evening :)

Boys Will Be Boys Clear Stamp Set by Stampin' Up!
Boys Will Be Boys Clear-Mount Stamp Set
Price: $21.95 
Sale: $16.46
Dazzling Diamonds Glimmer Paper by Stampin' Up!
Dazzling Diamonds Glimmer Paper
Price: $5.95  
Sale: $4.46
Fine Print Coupons Swatchbook -- Digital Download
Fine Print Coupons Swatchbook - Digital Download
Price: $13.95  
Sale: $8.37
Hamburger Box Bigz Xl Die by Stampin' Up!
Hamburger Box Bigz Xl Die
Price: $52.95 
Sale: $39.71
Hearts Border Punch
Hearts Border Punch
Price: $20.95 
Sale: $15.71
Ornate Tag Topper Punch by Stampin' Up!
Ornate Tag Topper Punch
Price: $31.95 
Sale: $23.96
Sweetheart Punch
Sweetheart Punch
Price: $21.95 
Sale: $16.46
Tag A Bag Accessory Kit
Price: $9.95  
Sale: $7.46

Saturday, March 1, 2014

Faux Frame Challenge

Happy Saturday and happy March!  I hope you have some stamping planned this weekend!  We have a fun new challenge over at The Technique Twist for you to play along with.  We're all about the Faux Frames this week!  Now, do a quick online search and you'll find TONS of variations on this technique.  That is our challenge...find a new way to create a faux frame.  Here is my take on it:

Birthday card featuring the Faux Frame technique with the Summer Silhouettes, Secret Garden, Papillon Potpourri and Sweet Essentials stamp sets.
For my faux frame I used Simply Pressed Clay in my Woodgrain TIEF!  I went for a faded driftwood kinda look.  I love the effect and am so going to try it with other patterns.  Here is how I created my frame:
  • Press Simply Pressed Clay onto the open Woodgrain TIEF, making sure it is fairly thick...too thin and it will tear when you run it through the Big Shot.
  • Close the folder and run it through the Big Shot with no tabs on the multipurpose platform.
  • Set the folder, with clay inside, aside to dry for at least 24 hours.
  • Carefully remove the dried clay from the folder, taking care not to tear the clay.  (Don't worry if it does tear...mine did (several times) and I just put it back together when I glued the frame to my project.
  • Using the Squares Collection Framelits, die cut a square frame from the embossed clay.  You can play with the width of the frame by trying different sizes of framelits until you're happy with the look of it.
  • Sponge the entire frame with Smokey Slate ink, following the grain of the "wood".  Be sure to get into the grooves to eliminate any white clay showing through.  Be sure to also sponge the inside and outside edges so they are no longer white.
  • Sponge the entire frame again with Basic Gray ink, but this time go against the grain to highlight the texture.
  • Sponge lightly one more time, against the grain, with Basic Black ink to add more depth and texture.


Once I had my frame made the rest of the card was a piece of cake.  I stamped the floral images from the Summer Silhouettes set on a 3-1/4" square piece of card stock using Basic Gray, Island Indigo and Pool Party inks.  To glue the frame to the card stock I used Sticky Strip.  Tombow will also work with Simply Pressed Clay but I didn't want to wait for the liquid glue to dry ;)
The leaves on the frame are from the Secret Garden stamp set, are heat embossed in silver and are die cut with the coordinaring Framelits.  I glued them to the frame using Tombow.  The little butterfly is stamped in Basic Gray ink on vellum and punched with the Bitty Butterfly punch.  It is also adhered with Tombow.
The background is a piece of Pool Party card stock that I embossed using the Pretty Print TIEF...sure hope that one comes back in the new Annual Catty!  I left a smooth strip at the bottom so that I could stamp the sentiment from Sweet Essentials in Basic Gray.

Inside view with sentiment from Simply Sketched.
On the inside I stamped the same floral images I used on the front and added the sentiment from the Simply Sketched hostess set.

I hope you'll make time this weekend to try creating a faux frame.  There are SO many possibilities!  Check out the projects by my fellow design team members over at The Technique Twist and then give it a go.  We'd love to see what you create!
Related Posts Plugin for WordPress, Blogger...