Showing posts with label butterfly thinlits. Show all posts

Monday, July 6, 2015

Wonderful Watercolor Wings

Happy Monday!  I hope you had a fantastic weekend.  Mine was terrific...perfect weather, quality family time and lots of stamping :)
Today I have one of the projects we'll be making at my Watercolor Wings class this week.  It uses one of my favourite techniques...

Thank you card featuring the Watercolor Wings stamp set and using the Emerging Colours technique
To create the background panel, I began with a piece of Whisper White card stock on which I sponged patches of Lost Lagoon, Rich Razzleberry and Mint Macaron ink.  Then I stamped the solid small butterfly image from the Watercolor Wings set several times using Versmark ink and heat embossed using clear embossing powder.  Then I sponged Night of Navy ink all over the panel.  The embossed areas resist the dark ink and allow the lighter shades to show through the clear embossing.  I love this technique, but even moreso with the butterfly images.  I completed the front panel of the card with a piece of Rich Razzleberry card stock that I embossed using the Fluttering TIEF and layered it on a card base in Mint Macaron.


To create the focal image I first stamped the solid butterfly in Mint Macaron ink.  Then I stamped the outline image in Lost Lagoon and finally the detail image in Blackberry Bliss ink.  I die cut the stamped butterfly using the Butterflies Thinlits.  The top layer of the butterfly is die-cut from Dazzling Diamonds glimmer paper using the Bold Butterfly framelits.  The sentiment, also from the Watercolor Wings set, is stamped in Night of Navy ink.  I used some silver metallic thread behind the butterfly and some rhinestones coloured with alcohol markers to add even more sparkle. The ribbon is the 3/8" Silky Taffeta that is currently available on the Clearance Rack.


On the inside I stamped more butterflies using the same inks I did for the focal image on the front of the card.

I wasn't too sure about this colour combination, but am really liking the way this unusal combo works together! 


Monday, May 4, 2015

Did you miss me??

Happy Monday!  Long time, no post, huh?  Last week was a bit of a whirlwind with a trip out of town that involved four flights in two days, including one trans-continental red-eye.  I was just a little bit exhausted by the time Friday evening rolled around!  Thank goodness for weekends and time to recouperate!  I've almost figured out what time zone I'm in :)
Today I have another take on this week's sketch from Sunday Stamps.  Last week I showed you a couple of relatively predictable takes on it, but this one is a bit of a stretch.  First of all, here is the sketch:


...and here is my upside-down take on it:

Any-occasion card featuring the Butterfly Basics stamp set and the Dictionary background stamp.
Do you see what I did there?  I flipped the sketch upside down and used the ferns to replace the banners.  Kinda different, huh?  I love playing with sketches to create something different!
I used the Dictionary background stamp on a piece of Whisper White card stock with Sahara Sand ink.  I masked off the bottom section with a post-it note before I started stamping so that it would remain pristine white.  Then I stamped images from the Butterfly Basics stamp set:  the ferns in Mossy Meadow ink and the little flowers in Blackberry Bliss ink.  I added a couple of butterflies in Lost Lagoon, as well as the postmark image in Soft Suede and the honeycomb in metallic gold.  I sponged the whole thing lightly with Sahara Sand ink to soften the images and take the brightness out of the white card stock.

The butterflies are die-cut using the Butterflies Thinlits.  I used Hello Honey card stock for the smaller one and gold foil for the larger.  I layered them with glue dots and then added a little button in Blackberry Bliss and some thick Baker's Twine in Hello Honey.  Because the twine was too thick to fit through the holes of the button, I separated the strands...I kind of like the look!  The final touch was some Hello Honey stitched satin ribbon before adhering the card front to a Blackberry Bliss card base.

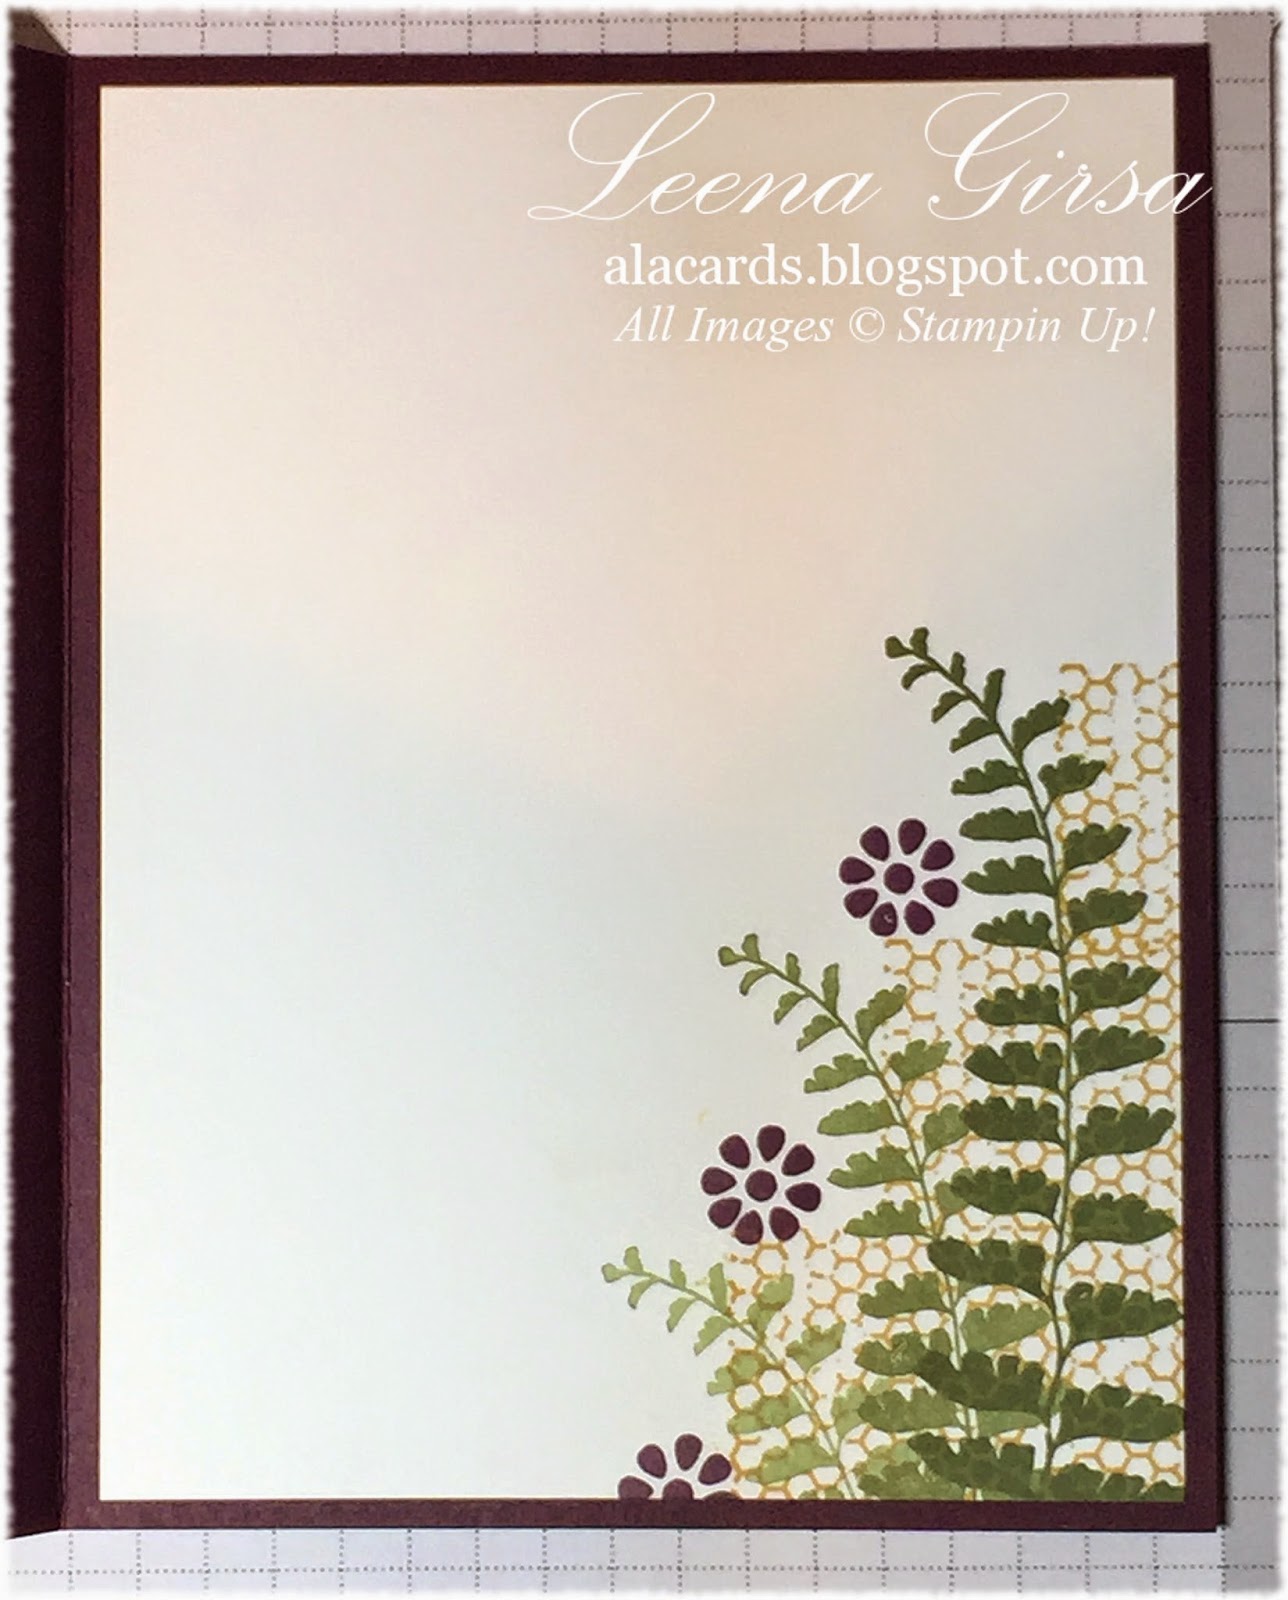
On the inside I stamped the ferns again in Mossy Meadow, added some flowers in Blackberry Bliss ink and the honeycomb in metallic gold.  If you haven't yet give this sketch a try, there is still time!  The challenge doesn't close until Friday, so get busy and give it a go.  Then be sure to link up over at Sunday Stamps!  Have a great week!

Thursday, April 23, 2015

Butterflies are Back!

In case you missed the news, the Butterfly Thinlits, which have been out-of-stock for ages are FINALLY available for order again.  I, for one, am very excited about this, as they are one of my favourite tools.  What's even better, is that you can get these Thinlit dies until the end of April for 15%!!  Woohoo!!

Today's project is one I made a while back, but haven't posted because of the delay in availability. 

Birthday card featuring the Butterfly Basics stamp set and coordinating Butterflies Thinlit dies.
To create this card, I began with a piece of Very Vanilla card stock, which I stamped using images from the Butterfly Basics stamp set.  My colour palette included Pear Pizzazz, Blushing Bride, Crumb Cake and Metallic Gold.  I layered the stamped panel on a piece of Blushing Bride card stock and then onto a Crumb Cake card base.  The sentiment is stamped in Versamark and heat embossed in gold.  I layered the sentiment panel on a piece of Blushing Bride card stock and highlighted it with half of a Tea Lace Doily.

 The butterfly is die cut using the Butterflies Thinlits from Blushing Bride card stock.  I used the direct-to-paper technique with the metallic gold Encore ink pad to add some shimmer to the die-cut butterfly before adhering it to the front of the card.  I added a rosette, made using Simply Pressed Clay and the Buttons and Blossoms molds (SO sorry to see these are retiring!).

Inside view
On the inside, I stamped more of the images from the Butterfly Basics set, using the same colour palette I did for the front.

Now, in case you missed it, the Retirement List has posted and it features some great deals on retiring products.  Check it out HERE, but hurry...all accessories are available only while supplies last!

Sunday, April 12, 2015

Spring has Sprung at Sunday Stamps!

Happy Sunday...and happy spring!  The weather here is FINALLY warming up and there is a definite feeling of spring in the air.  The new colour challenge over at Sunday Stamps is perfect to welcome the new season...

Here is my Design Team project:

Thank you card featuring the Butterflies Thinlits and the Embossed Embossing technique, with sentiment from Itty Bitty Banners
I actually designed this project to do double duty!  Not only is it for this week's challenge, we also made it at my montly techniques class last week.  I used the Embossed Embossing technique to create the background.  I embossed a piece of Whisper White card stock using the Spring Flowers TIEF.  Then, after rubbing the Embossing Buddy all over it, I inked a brayer with Versamark and lightly ran it over the raised pattern.  I sprinkled it with Blushing Bride embossing powder, shook off the excess and then heated it.  I love the result!

The butterflies are die cut from Wisteria Wonder and Blushing Bride card stock using the Butterflies Thinlits.  The little vines are punched from Pear Pizzazz card stock using the Bird Builder punch.  I anchored them to the design using half of a Tea Lace doily.  The sentiment is from the Itty Bitty Banners set and is stamped in Wisteria Wonder ink and then die cut using the Bitty Banners Framelits.  I added a Vintage Faceted button and a bit of Wisteria Wonder (retired) baker's twine.  The card front is matted on a piece of Wisteria Wonder card stock and adhered to a Pear Pizzazz card base.

Inside view with sentiment from Painted Petals.
On the inside I stamped the large and small floral butterflies from the Papillon Potpourri set in Blushing Bride and Wisteria Wonder ink, respectively.  The sentiment is from the Painted Petals set and is stamped in Pear Pizzazz ink.
Be sure to check out the rest of the design team's sample projects and the new, fresh look over at Sunday Stamps.  Then give this challenge a go and play along!

Thursday, March 12, 2015

Butterfly Bokeh

The Bokeh technique is certainly trendy right now, so I figured it was time I got on the Bokeh Bandwagon and taught it in my monthly techniques class.  Here is one of the cards we'll be making tonight...

Any-occasion card featuring the Butterfly Basics stamp set and using the Bokeh Background technique.
Now, there are a couple of ways to do this technique.  I showed a sample last week where I sponged the colour on for the background before adding my white stenciled circles.  On this one I used watercolour paper and watercoloured my background colours of Lost Lagoon and Blackberry Bliss.  Not sure which one I prefer...both are pretty!  I will say, thought, that if using watercolour, make sure your paper is completely dry before sponging on the circles...or the Whisper White ink will change colour (like my pale mauve circles??)  Unless that's the look you're going for, make sure things are completely dry ;)
On this project I created my Bokeh background and then stamped the fern and larger butterfly images from the Butterfly Basics stamp set in Basic Gray ink.  I also stamped the honeycomb image in silver metallic ink.  For the bottom layer I used Brushed Silver card stock that I embossed using the Delicate Designs TIEF. 


The sentiment is heat embossed in silver and die-cut using the Banners Framelits.  The Butterfly is die-cut from Whisper White card stock, using the Butterflies Thinlits and then sponged with Lost Lagoon and Blackberry Bliss inks.  I then lightly dabbed my silver metallic ink pad all over the butterfly to give it a sheen.  I used some silver satin ribbon and a single large rhinestone (retired) to embellish.  The entire card is built on a Lost Lagoon card base.
I may actually give this card to one of the secretaries from my school who is retiring on Friday after 30 years.  Somehow the idea of a caterpillar becoming a butterfly seems suitable for someone about to experience freedom from the working world!

Thursday, March 5, 2015

Faux Silk Butterfly

Man, I am SOOOO ready for Spring!  It seems I can't sit down to stamp a card these days that doesn't include flowers or butterflies...or both!  Bring on the sunshine and warmer weather!
Today I have another of the projects I'll be creating with my monthly techniques group next week.  It uses the Faux Silk technique...an oldie, but one many of my newer members haven't seen.

Spring-themed card featuring the Painted Petals and From the Garden stamp sets, Butterflies Thinlits and using the Faux Silk background technique.
I remember learning the Faux Silk technique at a techniques class when I was a new stamper...I loved it!  Who would have thought that crumpled tissue paper could look so good!  To create the background panel on this card I began with a piece of white tissue paper slightly larger than the size of panel I wanted to create.  I stamped all over the tissue with images from the Painted Petals stamp set, using Soft Sky ink for the flowers and Pistachio Pudding for the leaves.  Ensuring the ink had dried, I then crumpled up the tissue paper, taking card not to tear it.  I applied a thin layer of Multipurpose Liquid Glue all over a piece of Whisper White card stock cut to the size of the panel I wanted.  I uncrumpled the tissue paper, taking care not to completely smooth out the wrinkles, and then pressed the tissue lightly onto the gluey card stock.  I gently tapped the paper into the glue and then wrapped the excess around the back side of the card stock and adhered it in place.  I then adhered the panel to a slightly large piece of Soft Sky card stock. 

With the background panel complete, I embossed the Whisper White layer behind it using the Spring Flowers TIEF and adhered it to a Soft Sky card base.  I die cut a small butterfly from scrap Soft Sky card stock using the Butterflies Thinlits and layered it behind a larger butterfly die-cut from Dazzling Diamonds glimmer paper.  The sentiment, from the From the Garden set, is stamped in Pistachio Pudding ink and trimmed into a pennant using the Banner punch and then embellished with a bit of Pistachio Ruffled Ribbon (retired).  The finishing touches were the Simply Pressed Clay moulded flower and a scattering of pearls.

Inside view with sentiment from the Indescribable Gift stamp set.
On the inside I used a die-cut butterfly as a stencil and daubered some Soft Sky ink over it to get a subtle stenciled butterfly.  I then stamped the sentiment, from the Indescribable Gift set, using Pistachio Pudding ink.
I have to say, even though this technique is an old one, I love the way this card turned out!  Sometimes the tried-and-true can surprise us!

Wednesday, February 25, 2015

Faux Rusted Metal Butterfly

Happy Hump Day...we're halfway to the weekend!  Woohoo!

Today I have one of the projects I did with my techniques group last month.  We were focusing on faux
metal last month...this one uses the Faux Rusted Metal technique...

Birthday card featuring the Butterfly Basics stamp set and the Faux Rusted Metal technique
For this faux rusted metal butterfly I switched it up a little bit.  Before layering the die-cut butterflies, I heat embossed the corresponding butterfly image from the Butterfly Basics stamp set in white and die-cut it out using the Butterflies Thinlits.  I glued that on the top of my stack of die-cuts.  You can see a hint of the lacy-patterned image in this close-up:

I love the extra texture that added step gives to the finished piece.  For more information on how to do the Faux Rusted Metal Technique click HERE.  To create the background piece for my butterfly, I began by stamping the fern image using Old Olive ink.  I added the script text from the By The Tide stamp set using Crumb Cake ink, stamping off before stamping on my card stock.  Then I stamped the honeycomb image using gold metallic ink.  I also sponged the edges of the Very Vanilla panel lightly with Crumb Cake ink.  The background Blushing Bride panel is embossed using the Pretty Print (retired) TIEF.  The sentiment is heat embossed in gold and die cut using the Apothecary Accents Framelits.  I added some gold baker's twine, gold sequins and a rosette from the Artisan Embellishment Kit.  I used a Baked Brown Sugar card base.

On the inside I stamped the fern, the script and the honeycomb in the same manner I did on the front of the card.  The little butterfly is stamped in Blushing Bride ink and the sentiment is is Baked Brown Sugar ink.

Thanks for stopping by...have a great day!

Wednesday, February 18, 2015

Quick Birthday Card

Last week a friend of mine celebrated her birthday and today I want to share the card I made for her.  It is a super quick project featuring one of my favourite stamp sets...

Birthday card featuring the Butterfly Basics stamp set and coordinating Thinlits.
What I love about the Butterfly Basics stamp set is how easy it is to create a collage look.  For this card I simply stamped the various images in the Butterfly Basics set using a colour scheme of Crumb Cake, Blushing Bride, Pear Pizzazz, Soft Suede and metallic gold.  The gold spatters are from the Gorgeous Grunge stamp set.  I stamped some images full strength and others stamped off to create depth.  I matted the stamped panel with Pear Pizzazz card stock and mounted it on a Crumb Cake card base.

The butterfly is die-cut from Brushed Gold card stock using the Butterflies Thinlits.  I added some pearls to the body of the butterfly and adhered it to the card using glue dots.


On the inside of the card I stamped another Very Vanilla panel with the same images I used for the front.  Talk about quick and easy!  If the Butterfly Basics set isn't already on your wishlist it should be!

Wednesday, December 17, 2014

Another Sneak Peek...

Yesterday I showed you a sneak peek of a couple of products that will be available for Sale-a-bration this year.  Today I have some items to share from the Occasions catalogue, which goes live on January 6th.  This stamp set and coordinating Thinlits actually made me squeal with delight at the catalogue premiere a couple of weeks ago!  Check it out:

Occasions catalogue sneak peek featuring the Butterfly Basics stamp set and coordinating Butterflies Thinlit dies.
Isn't that gorgeous???  I am in love with these Thinlits!!  I have longed for a detailed, semi-realistic looking butterfly die for ages!  I also love the Butterfly Basics stamp set.  It features 7 images and three sentiments that work beatifully together...and make creating layered collages a breeze.  For this project, which is one of this month's designs for my Blendabilities Club, I chose to use just the single floral image.  I coloured it using the Melon Mambo and Old Olive Blendabilities assortment.  The sentiment, which is also from the Butterfly Basics set, is heat embossed in gold.

The butterfly is die-cut from gold foil paper.  The dies cut quite easily, so long as you follow the instructions on the package insert.  As instructed, I ran the die back and forth through the Big Shot three times so as to ensure the image cut completely.  Using waxed paper layered over the card stock makes popping the butterfly out of the die a piece of cake.

On the inside I stamped another of the sentiments from the Butterfly Basics set in Baked Brown Sugar ink and added a butterfly frame that I punched with the Bitty Butterfly and Elegant Butterfly punches.
Related Posts Plugin for WordPress, Blogger...