Showing posts with label butterfly basics stamp set. Show all posts

Tuesday, January 5, 2016

Oh, Happy Day!

Today is the day!  Sale-a-bration is here...along with the brand-spankin'-new Occasions Catalogue!! Let the celebration begin! There is SO much to love in this new catalogue AND who doesn't love free Sale-a-bration products?? Wondering what all the fuss is about? Here is low-down on Sale-a-bration:
Earn FREE products!
 Here's the deal: for every $60 you spend (before tax and shipping), you get a FREE Sale-A-Bration product. That means it's the perfect time to purchase those products you've had your eye on while earning more products for free. 

Extra Rewards!
Need another excuse to get together with friends? Just host a qualifying party with at least $330 in sales during Sale-A-Bration and you'll earn $35 more in Stampin' Rewards! You can even apply your Stampin' Rewards toward a Starter Kit and become a demonstrator yourself!
Join the Fun! 
It's the best time of year to join Stampin' Up! During Sale-A-Bration, you can become a demonstrator for just $125 and choose $40 more of FREE products for your Starter Kit. Plus, the kit ships for free!


Want more to get excited about? Check out this project I made using the new Rose Garden Thinlits dies and coordinating Rose Garden stamp set...

Birthday card featuring the Rose Garden Thinlits dies and Rose Wonder stamp set.

Isn't that die cut gorgeous??  I used plain old Whisper White card stock, but it sure looks beautiful! Do you like that watercolour wash background? That is from the Perfectly Artistic Sale-a-bration DSP pack.  It is my new favourite paper because one side of each sheet is a marbled-looking pattern and the other is a subtle watercolour wash. So useful for so many projects! Now, take note! This gorgeous paper is only available until Feb. 15th, then it will go away forever. You don't want to miss the chance to pick up this paper for free, so don't wait. This is a new feature for Sale-a-bration this year...there will be a selection of NEW products released half-way through the promotion! Wahoo!


I added some silver shimmer to the DSP with some (retired) silver metallic encore ink and the spatter image from the Gorgeous Grunge stamp set. The sentiment is from the Rose Wonder stamp set, as is the label frame. The die I used to cut the label out also comes with the Rose Garden Thinlits. Both the sentiment and the frame are heat embossed in silver. I added more shimmer with some silver metallic thread and a few rhinestones.

Inside view with sentiment from the Butterfly Basics set.
On the inside I heat embossed the sentiment from the Butterfly Basics set in silver and added another die-cut rose in Rose Red card stock.

If you haven't yet received a copy of the Occasions Catalogue and/or the Sale-a-bration brochure, send me a quick message and I will get one out to you right away. You don't want to miss out on these fabulous new products!

Here are the products I used to create this project:
Built for Free Using: My Stampin Blog

Monday, May 4, 2015

Did you miss me??

Happy Monday!  Long time, no post, huh?  Last week was a bit of a whirlwind with a trip out of town that involved four flights in two days, including one trans-continental red-eye.  I was just a little bit exhausted by the time Friday evening rolled around!  Thank goodness for weekends and time to recouperate!  I've almost figured out what time zone I'm in :)
Today I have another take on this week's sketch from Sunday Stamps.  Last week I showed you a couple of relatively predictable takes on it, but this one is a bit of a stretch.  First of all, here is the sketch:


...and here is my upside-down take on it:

Any-occasion card featuring the Butterfly Basics stamp set and the Dictionary background stamp.
Do you see what I did there?  I flipped the sketch upside down and used the ferns to replace the banners.  Kinda different, huh?  I love playing with sketches to create something different!
I used the Dictionary background stamp on a piece of Whisper White card stock with Sahara Sand ink.  I masked off the bottom section with a post-it note before I started stamping so that it would remain pristine white.  Then I stamped images from the Butterfly Basics stamp set:  the ferns in Mossy Meadow ink and the little flowers in Blackberry Bliss ink.  I added a couple of butterflies in Lost Lagoon, as well as the postmark image in Soft Suede and the honeycomb in metallic gold.  I sponged the whole thing lightly with Sahara Sand ink to soften the images and take the brightness out of the white card stock.

The butterflies are die-cut using the Butterflies Thinlits.  I used Hello Honey card stock for the smaller one and gold foil for the larger.  I layered them with glue dots and then added a little button in Blackberry Bliss and some thick Baker's Twine in Hello Honey.  Because the twine was too thick to fit through the holes of the button, I separated the strands...I kind of like the look!  The final touch was some Hello Honey stitched satin ribbon before adhering the card front to a Blackberry Bliss card base.

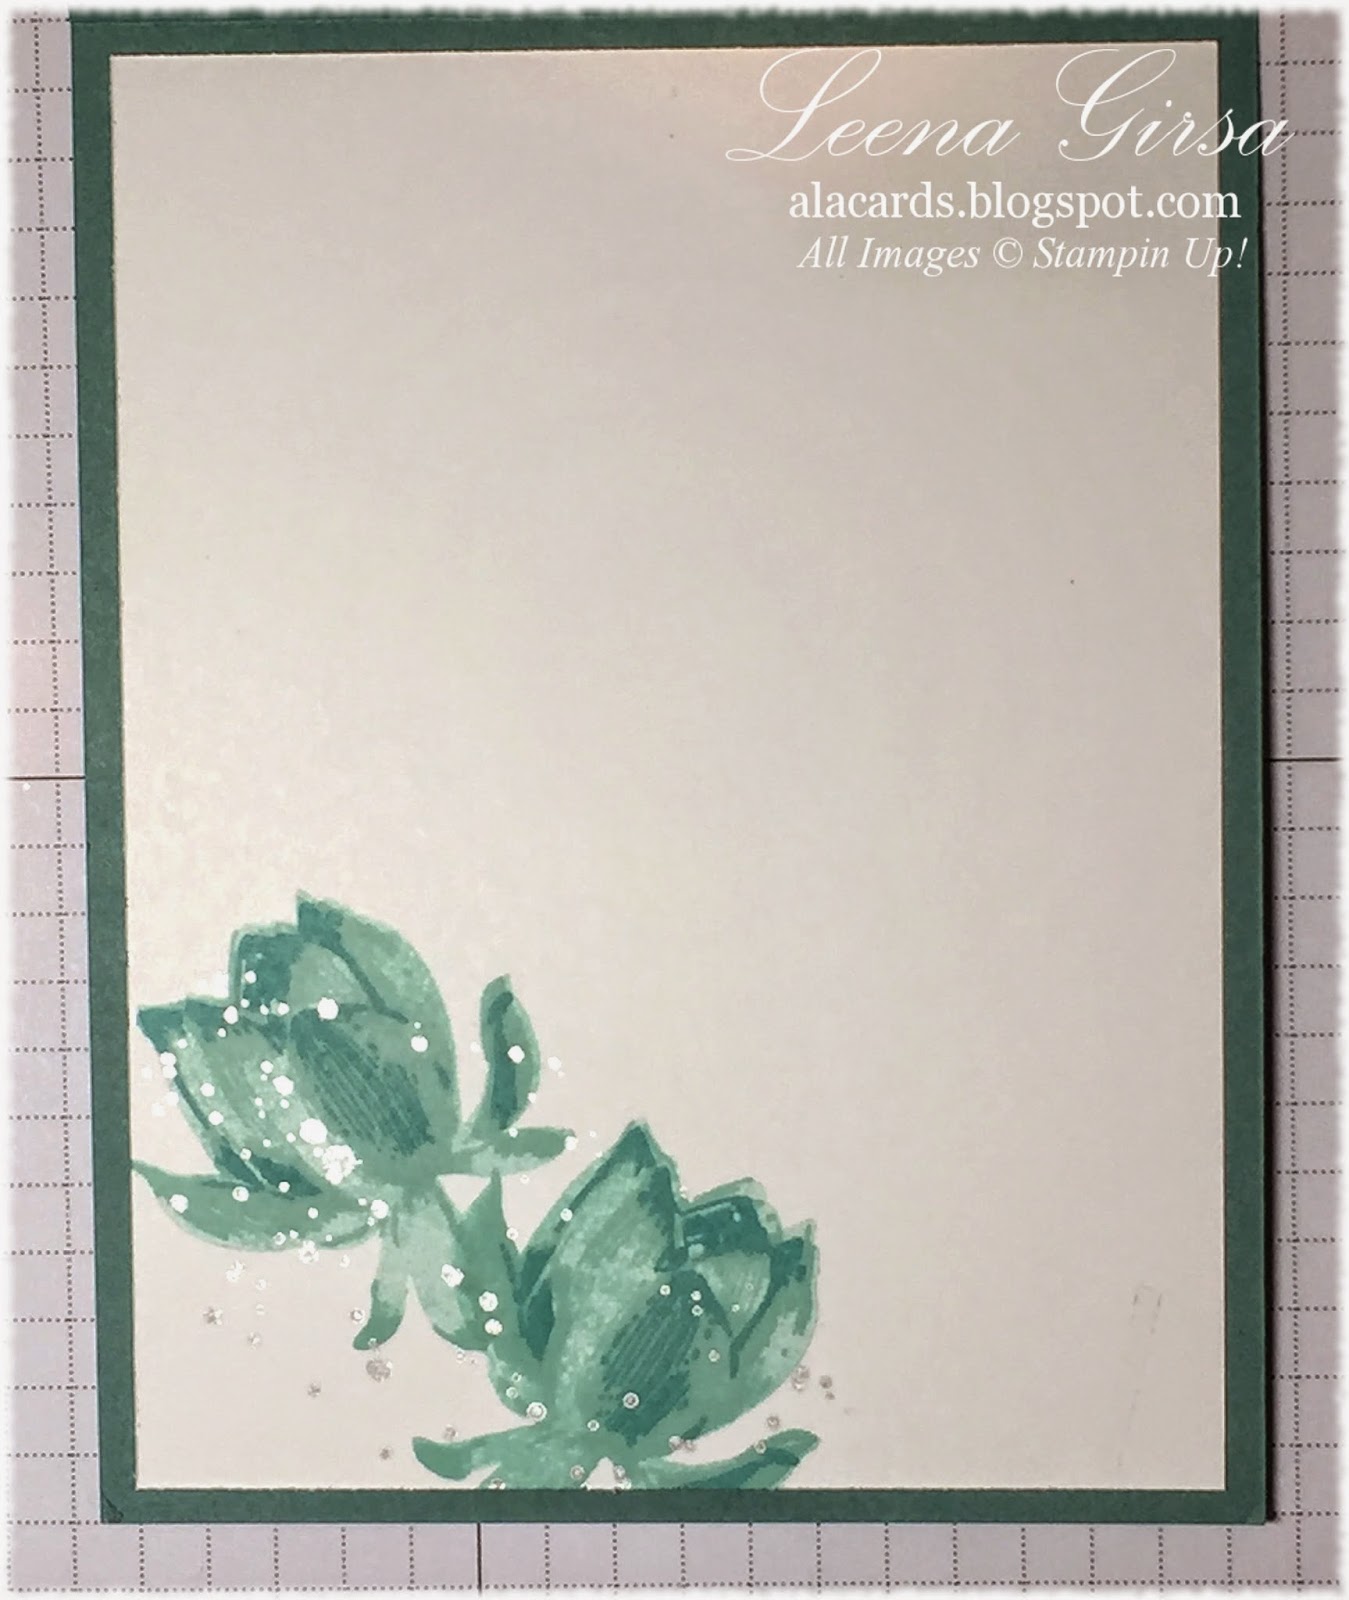
On the inside I stamped the ferns again in Mossy Meadow, added some flowers in Blackberry Bliss ink and the honeycomb in metallic gold.  If you haven't yet give this sketch a try, there is still time!  The challenge doesn't close until Friday, so get busy and give it a go.  Then be sure to link up over at Sunday Stamps!  Have a great week!

Thursday, April 23, 2015

Butterflies are Back!

In case you missed the news, the Butterfly Thinlits, which have been out-of-stock for ages are FINALLY available for order again.  I, for one, am very excited about this, as they are one of my favourite tools.  What's even better, is that you can get these Thinlit dies until the end of April for 15%!!  Woohoo!!

Today's project is one I made a while back, but haven't posted because of the delay in availability. 

Birthday card featuring the Butterfly Basics stamp set and coordinating Butterflies Thinlit dies.
To create this card, I began with a piece of Very Vanilla card stock, which I stamped using images from the Butterfly Basics stamp set.  My colour palette included Pear Pizzazz, Blushing Bride, Crumb Cake and Metallic Gold.  I layered the stamped panel on a piece of Blushing Bride card stock and then onto a Crumb Cake card base.  The sentiment is stamped in Versamark and heat embossed in gold.  I layered the sentiment panel on a piece of Blushing Bride card stock and highlighted it with half of a Tea Lace Doily.

 The butterfly is die cut using the Butterflies Thinlits from Blushing Bride card stock.  I used the direct-to-paper technique with the metallic gold Encore ink pad to add some shimmer to the die-cut butterfly before adhering it to the front of the card.  I added a rosette, made using Simply Pressed Clay and the Buttons and Blossoms molds (SO sorry to see these are retiring!).

Inside view
On the inside, I stamped more of the images from the Butterfly Basics set, using the same colour palette I did for the front.

Now, in case you missed it, the Retirement List has posted and it features some great deals on retiring products.  Check it out HERE, but hurry...all accessories are available only while supplies last!

Sunday, March 29, 2015

Single-layer Sympathy

Happy Sunday!  It's time for a new sketch challenge over at Sunday Stamps.  This time we are all about single-layer simplicity.  Check it out:


...and here is my project for the Design Team:

Sympathy card featuring the Butterfly Basics, Gorgeous Grunge and Everything Eleanor stamp sets with sentiment from the Best of Greetings (retired) set.
This card was fun to create!  As someone who LOVES to add lots of layers to my designs, it was a huge challenge to work with a single layer.  So, I set out to create the illusion of layers by using the masking technique.  I die cut a flower-shaped mask from a scrap of card stock using the Floral Frames Framelits.  Laying that over my Whisper White card stock panel, I then stamped several images from the Butterfly Basics stamp set using Crumb Cake and Soft Suede inks.  Then I sponged the entire area with Crumb Cake ink to soften and blend the images. 


After removing the mask, I heat embossed the flourish image from the Everything Eleanor stamp set in gold.  I also used gold heat embossing to add the sentiment from the retired Best of Greetings 25th Anniversary set.  I added some specks of gold with the splatter image from the Gorgeous Grunge set and metallic gold ink and then finished the design with a few strategically placed pearls.  The completed panel is adhered to a Baked Brown Sugar card base.

As I said, this card was a real challenge for a layer-lover like me.  Why not stretch your own creativity a little and give this one a try?  We'd love to see your work, so be sure to share it with us over at Sunday Stamps!

Thursday, March 12, 2015

Butterfly Bokeh

The Bokeh technique is certainly trendy right now, so I figured it was time I got on the Bokeh Bandwagon and taught it in my monthly techniques class.  Here is one of the cards we'll be making tonight...

Any-occasion card featuring the Butterfly Basics stamp set and using the Bokeh Background technique.
Now, there are a couple of ways to do this technique.  I showed a sample last week where I sponged the colour on for the background before adding my white stenciled circles.  On this one I used watercolour paper and watercoloured my background colours of Lost Lagoon and Blackberry Bliss.  Not sure which one I prefer...both are pretty!  I will say, thought, that if using watercolour, make sure your paper is completely dry before sponging on the circles...or the Whisper White ink will change colour (like my pale mauve circles??)  Unless that's the look you're going for, make sure things are completely dry ;)
On this project I created my Bokeh background and then stamped the fern and larger butterfly images from the Butterfly Basics stamp set in Basic Gray ink.  I also stamped the honeycomb image in silver metallic ink.  For the bottom layer I used Brushed Silver card stock that I embossed using the Delicate Designs TIEF. 


The sentiment is heat embossed in silver and die-cut using the Banners Framelits.  The Butterfly is die-cut from Whisper White card stock, using the Butterflies Thinlits and then sponged with Lost Lagoon and Blackberry Bliss inks.  I then lightly dabbed my silver metallic ink pad all over the butterfly to give it a sheen.  I used some silver satin ribbon and a single large rhinestone (retired) to embellish.  The entire card is built on a Lost Lagoon card base.
I may actually give this card to one of the secretaries from my school who is retiring on Friday after 30 years.  Somehow the idea of a caterpillar becoming a butterfly seems suitable for someone about to experience freedom from the working world!

Wednesday, February 25, 2015

Faux Rusted Metal Butterfly

Happy Hump Day...we're halfway to the weekend!  Woohoo!

Today I have one of the projects I did with my techniques group last month.  We were focusing on faux
metal last month...this one uses the Faux Rusted Metal technique...

Birthday card featuring the Butterfly Basics stamp set and the Faux Rusted Metal technique
For this faux rusted metal butterfly I switched it up a little bit.  Before layering the die-cut butterflies, I heat embossed the corresponding butterfly image from the Butterfly Basics stamp set in white and die-cut it out using the Butterflies Thinlits.  I glued that on the top of my stack of die-cuts.  You can see a hint of the lacy-patterned image in this close-up:

I love the extra texture that added step gives to the finished piece.  For more information on how to do the Faux Rusted Metal Technique click HERE.  To create the background piece for my butterfly, I began by stamping the fern image using Old Olive ink.  I added the script text from the By The Tide stamp set using Crumb Cake ink, stamping off before stamping on my card stock.  Then I stamped the honeycomb image using gold metallic ink.  I also sponged the edges of the Very Vanilla panel lightly with Crumb Cake ink.  The background Blushing Bride panel is embossed using the Pretty Print (retired) TIEF.  The sentiment is heat embossed in gold and die cut using the Apothecary Accents Framelits.  I added some gold baker's twine, gold sequins and a rosette from the Artisan Embellishment Kit.  I used a Baked Brown Sugar card base.

On the inside I stamped the fern, the script and the honeycomb in the same manner I did on the front of the card.  The little butterfly is stamped in Blushing Bride ink and the sentiment is is Baked Brown Sugar ink.

Thanks for stopping by...have a great day!

Wednesday, February 18, 2015

Quick Birthday Card

Last week a friend of mine celebrated her birthday and today I want to share the card I made for her.  It is a super quick project featuring one of my favourite stamp sets...

Birthday card featuring the Butterfly Basics stamp set and coordinating Thinlits.
What I love about the Butterfly Basics stamp set is how easy it is to create a collage look.  For this card I simply stamped the various images in the Butterfly Basics set using a colour scheme of Crumb Cake, Blushing Bride, Pear Pizzazz, Soft Suede and metallic gold.  The gold spatters are from the Gorgeous Grunge stamp set.  I stamped some images full strength and others stamped off to create depth.  I matted the stamped panel with Pear Pizzazz card stock and mounted it on a Crumb Cake card base.

The butterfly is die-cut from Brushed Gold card stock using the Butterflies Thinlits.  I added some pearls to the body of the butterfly and adhered it to the card using glue dots.


On the inside of the card I stamped another Very Vanilla panel with the same images I used for the front.  Talk about quick and easy!  If the Butterfly Basics set isn't already on your wishlist it should be!

Wednesday, January 28, 2015

Faux Rusted Hammered Metal

Happy Hump Day!  It's all down hill to the weekend from here!  Yippee!

Today I have one of the project for my techniques class next month.  It is a twist on the Faux Rusted Metal technique...

Masculine birthday card featuring the Faux Rusted Metal technique...with a twist!
Did you notice the extra bit of texture on the star?  I added that by running the top layer of card stock through the Big Shot with the Decorative Dots TIEF (which just happens to be on sale this week!!) before applying the ink and embossing powders.  It makes for a hammered-metal effect.  Kinda cool, no?  The rest of this one is pretty straightforward...I used the Dictionary background stamp with Soft Suede ink to stamp the Crumb Cake card base and then sponged it with Crumb Cake ink to grunge it up.  I also added some gold metallic spatters with the Gorgeous Grunge stamp set.


The sentiment is from the And Many More stamp set and is also stamped in Soft Suede ink.  I added some Burlap ribbon, as well as some Very Vanilla Seam Binding Ribbon and a bit of black striped 1-1/4" grosgrain ribbon from my scraps bin.  Of course a bit of bling was required, so I added some gold sequin trim.


On the insde I stamped the sentiment from the Butterfly Basics stamp set in Soft Suede and added a few more gold metallic splatters and sequins.
Thanks for checking in...have a great day!!

Tuesday, January 6, 2015

It's Time...

...to Sale-a-brate!!  Woohoo!  My favourite promotion of the year is here AND the new Occasions Catalogue goes live today!  It doesn't get much better than this!!  I am simply in love with just about everything in the Occasions catty, but I think I've mentioned that before ;)  If you haven't yet seen a copy of all the crafting goodness in this new book, click the image below to view the catalogue online.  Then once you've made your wishlist, click the Sale-a-bration brochure to see what fabulous freebies you can earn.

http://su-media.s3.amazonaws.com/media/catalogs/2014-2015/2015_occasions/20150106_Occasions_en-CA.pdf


http://su-media.s3.amazonaws.com/media/catalogs/2014-2015/2015_SAB/20150106_SAB_en-CA.pdf
Click the catalogues to view them online!
Now for a project featuring some of the fantastic new products.  Check this out:

Any Occasion card featuring the Lotus Blossom Sale-a-bration-exclusive stamp set and the Gorgeous Grunge stamp set with sentiment from the new Butterfly Basics set.
This is one of the make-n-takes we'll be doing at my Sale-a-bration Kick-off Open House this weekend.  It uses two Sale-a-bration exclusive items:  Best Year Ever DSP and the Lotus Blossom stamp set.  I love the Bokeh effect created by the DSP and that stamp image?  Simply stunning!
The stamp set is a Two-Step Stamping set that really requires three different layers to get the depth of colour in the blossom.  I used Bermuda Bay and Coastal Cabana inks to stamp the blossom and Basic Gray and Smoky Slate inks for the stem.  I love stamping on DSP...especially this beautiful stuff!  It provides the perfect backdrop for that lovely image.  I layered the stamped DSP on a mat of Brushed Silver card stock.

I added a few silver metallic splatters with the Gorgeous Grunge set for just a little shimmer.  The sentiment is from the new Butterfly Basics set and is stamped in Lost Lagoon ink and punched with the Decorative Label punch.  

On the inside of the card I added a couple more of those beautiful blooms and a bit of silver shimmer.  Thanks to the ease of the Two-step Stampin' system this card is a breeze to create!

Now, as if the new Occasions catalogue and the start of Sale-a-bration weren't enough to make your Tuesday, here is the latest round of Weekly Deals!  Some super deals on DSP here...prices are good until Monday at midnight

All Abloom Designer Series Paper Stack by Stampin' Up!
All Abloom Designer Series Paper Stack
Price: $8.50  
Sale: $6.38
Book Of Birthdays Swatchbook Template -- Digital Download
Book Of Birthdays Swatchbook Template - Digital Download
Price: $13.95  
Sale: $8.37
Border Chevron Punch
Price: $29.95 
Sale: $22.46
Envelope Punch Board
Price: $24.95 
Sale: $18.71
Gold Soiree Specialty Designer Series Paper
Price: $15.95 
Sale: $11.96
Moonlight Designer Series Paper by Stampin' Up!
Moonlight Designer Series Paper Stack
Price: $8.50  
Sale: $6.38
Note Tag Punch by Stampin' Up!
Note Tag Punch
Price: $22.95 
Sale: $17.21
Specialty Typeset Designer Series Paper by Stampin' Up!
Typeset Specialty Designer Series Paper
Price: $15.95 
Sale: $11.96


Wednesday, December 17, 2014

Another Sneak Peek...

Yesterday I showed you a sneak peek of a couple of products that will be available for Sale-a-bration this year.  Today I have some items to share from the Occasions catalogue, which goes live on January 6th.  This stamp set and coordinating Thinlits actually made me squeal with delight at the catalogue premiere a couple of weeks ago!  Check it out:

Occasions catalogue sneak peek featuring the Butterfly Basics stamp set and coordinating Butterflies Thinlit dies.
Isn't that gorgeous???  I am in love with these Thinlits!!  I have longed for a detailed, semi-realistic looking butterfly die for ages!  I also love the Butterfly Basics stamp set.  It features 7 images and three sentiments that work beatifully together...and make creating layered collages a breeze.  For this project, which is one of this month's designs for my Blendabilities Club, I chose to use just the single floral image.  I coloured it using the Melon Mambo and Old Olive Blendabilities assortment.  The sentiment, which is also from the Butterfly Basics set, is heat embossed in gold.

The butterfly is die-cut from gold foil paper.  The dies cut quite easily, so long as you follow the instructions on the package insert.  As instructed, I ran the die back and forth through the Big Shot three times so as to ensure the image cut completely.  Using waxed paper layered over the card stock makes popping the butterfly out of the die a piece of cake.

On the inside I stamped another of the sentiments from the Butterfly Basics set in Baked Brown Sugar ink and added a butterfly frame that I punched with the Bitty Butterfly and Elegant Butterfly punches.
Related Posts Plugin for WordPress, Blogger...