Showing posts with label By the Tide stamp set. Show all posts

Wednesday, February 25, 2015

Faux Rusted Metal Butterfly

Happy Hump Day...we're halfway to the weekend!  Woohoo!

Today I have one of the projects I did with my techniques group last month.  We were focusing on faux
metal last month...this one uses the Faux Rusted Metal technique...

Birthday card featuring the Butterfly Basics stamp set and the Faux Rusted Metal technique
For this faux rusted metal butterfly I switched it up a little bit.  Before layering the die-cut butterflies, I heat embossed the corresponding butterfly image from the Butterfly Basics stamp set in white and die-cut it out using the Butterflies Thinlits.  I glued that on the top of my stack of die-cuts.  You can see a hint of the lacy-patterned image in this close-up:

I love the extra texture that added step gives to the finished piece.  For more information on how to do the Faux Rusted Metal Technique click HERE.  To create the background piece for my butterfly, I began by stamping the fern image using Old Olive ink.  I added the script text from the By The Tide stamp set using Crumb Cake ink, stamping off before stamping on my card stock.  Then I stamped the honeycomb image using gold metallic ink.  I also sponged the edges of the Very Vanilla panel lightly with Crumb Cake ink.  The background Blushing Bride panel is embossed using the Pretty Print (retired) TIEF.  The sentiment is heat embossed in gold and die cut using the Apothecary Accents Framelits.  I added some gold baker's twine, gold sequins and a rosette from the Artisan Embellishment Kit.  I used a Baked Brown Sugar card base.

On the inside I stamped the fern, the script and the honeycomb in the same manner I did on the front of the card.  The little butterfly is stamped in Blushing Bride ink and the sentiment is is Baked Brown Sugar ink.

Thanks for stopping by...have a great day!

Tuesday, November 25, 2014

The Extravaganza Continues!

The big sale continues all this week!  To view all of the amazing deals click the flyer below!  Remember...sale pricing is only while current stock lasts.  Once it's gone, so are the deals!

http://www.stampinup.com/ECWeb/CategoryPage.aspx?categoryid=2014

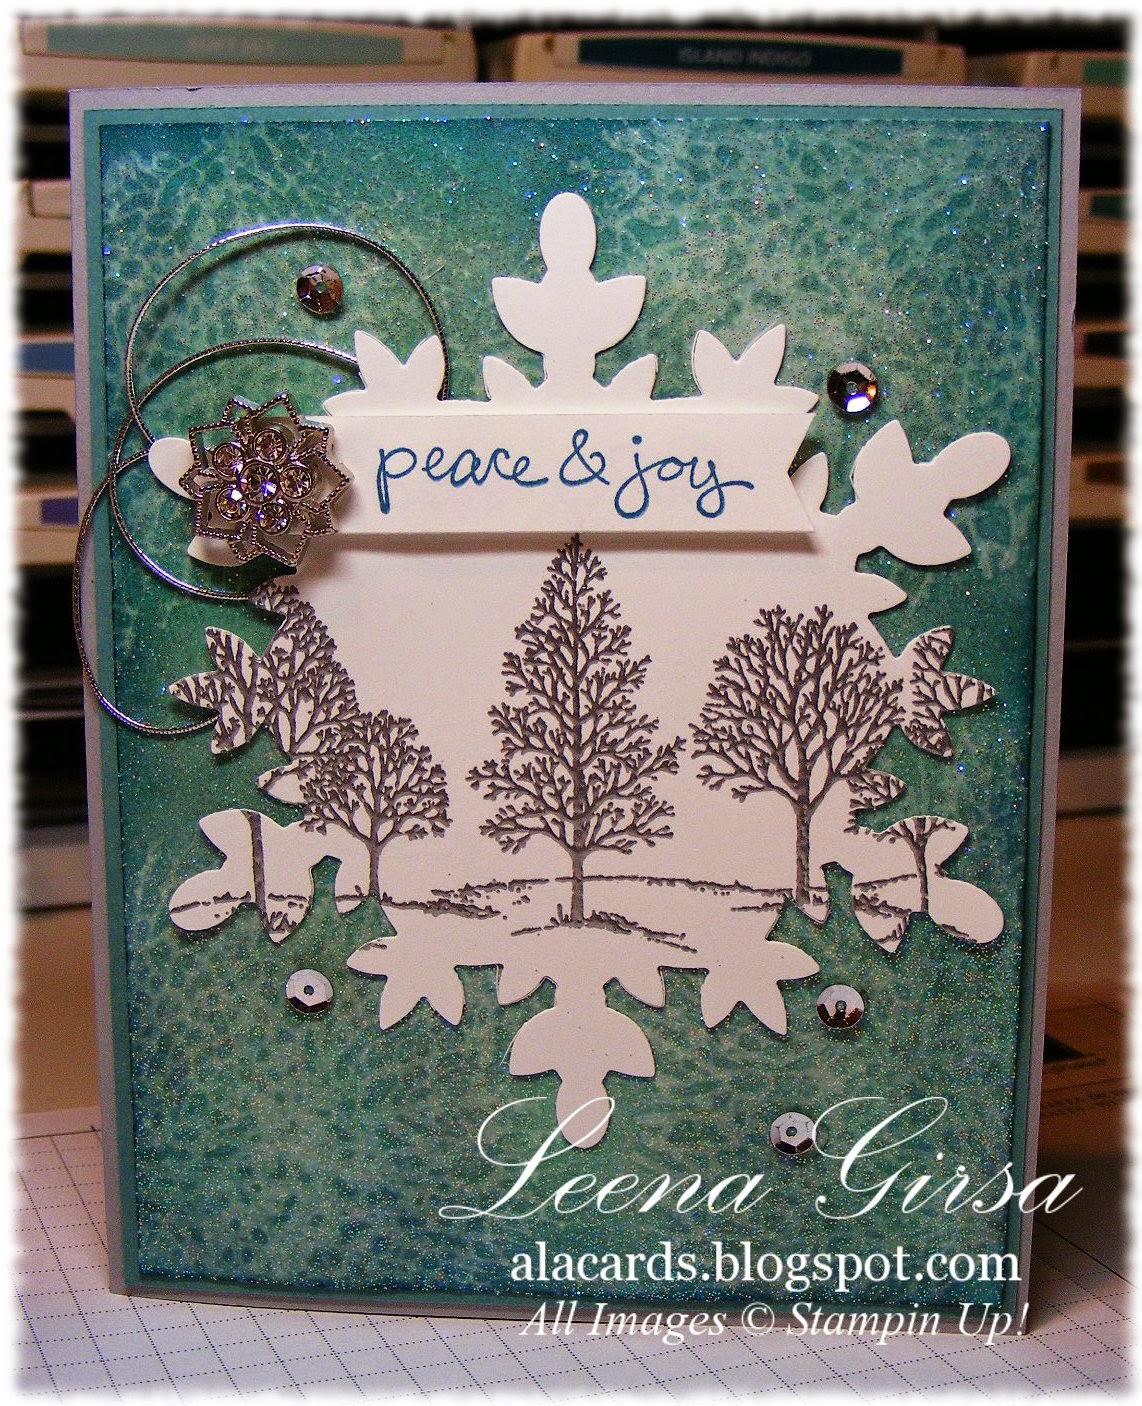
Now for a new project!  I still have one of the projects from my November techniques class to share with you.  I saved my favourite for last!  It uses the Stampin' Mist Ghosting Technique as well as the very first stamp set I ever bought:  Lovely as a Tree...

Christmas card featuring the Lovely as a Tree stamp set, along with By the Tide and a sentiment from the (retired) Good Greetings set.
I love that the background on this one looks like frosted glass.  I had originally planned on going a whole different direction with this card, but when I saw the way that background turned out I had to make it a wintry Christmas card.  Here is how I got the look:
 I matted the card front on a piece of Lost Lagoon card stock before adhering it to a Smoky Slate card base.  
The trees, from the Lovely as a Tree set, were heat embossed in silver and then die cut using the largest of the Festive Flurry (retired) framelits.  The sentiment is stamped in Island Indigo ink.  The snowflake embellishment was the last of my stash from last year's Holiday Catalogue...loved those things!  I added some silver cord I have also been hoarding saving, as well as a few Frosted Sequins.

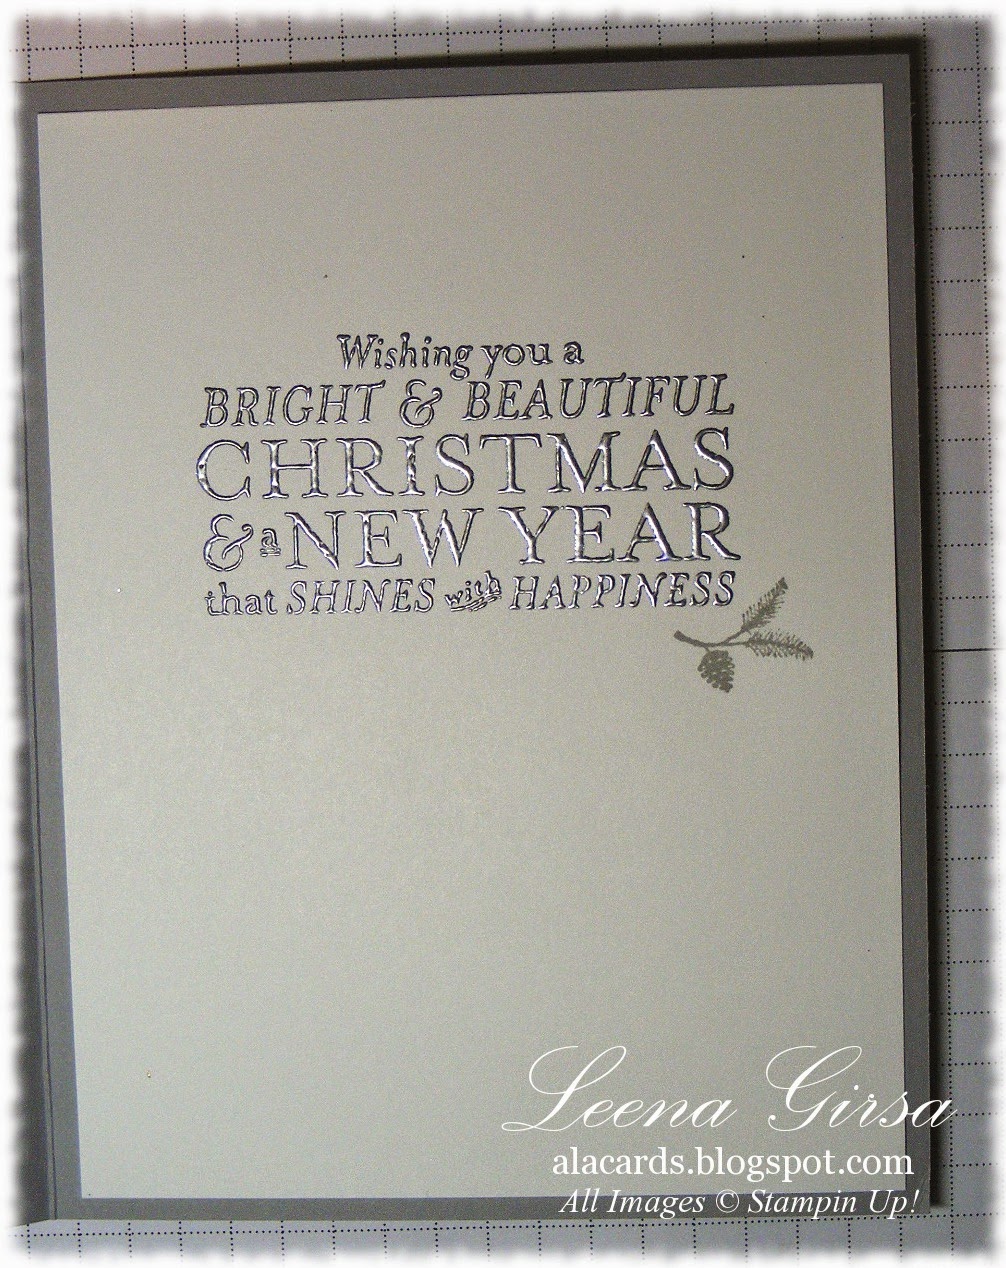
Inside view with sentiment from the Bright and Beautiful stamp set.
On the inside I heat embossed the sentiment from the Bright and Beautiful stamp set in silver and added the week pine branch from Lovely as a Tree, stamped in Smoky Slate ink.
I have to admit that this is one of my favourite cards I've designed in a while.  It is definitely going to someone very special this Christmas!
Related Posts Plugin for WordPress, Blogger...