Showing posts with label Bokeh technique. Show all posts

Thursday, May 26, 2016

Technique Overload

I was about to type happy Wednesday, when I realized that it is actually Thursday! This short week has me seriously confused! I spent some time last night playing with my new favourite set...

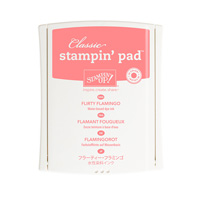
Now, could I have used any more techniques on this one?  I have been away from my studio pretty much all month, so I guess I subconsciously felt like I needed to make up for lost time. I began by creating an ombre effect, sponging a piece of Whisper White card stock with Peekaboo Peach, Calypso Coral, Watermelon Wonder and Flirty Flamingo inks...I love the way these four shades are made for each other!


Then I used the Stampin' Mist ghosting technique (see my video tutorials for more on this one) to stamp the subtle, bleached out swirls. I then stamped using the same swirl image, with Peekaboo Peach to add the watermark look. Next I created a bit of a Bokeh look with some Whisper White Craft ink and various-sized circles. I love the way these different techniques combine to add depth and interest the to background. The final touch on the background panel was some embossed gold spatters.

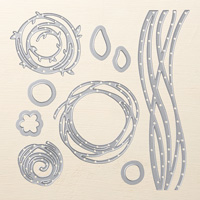
I die-cut the scribbly swirl from gold foil sheets using the Swirly Scribbles Thinlits. I added the die-cut "you" in gold glimmer and a stamped sentiment from the new Thoughtful Banners set. The only embellishments are a few gold sequins.


On the inside I stamped a few more swirls that I inked with Peekaboo Peach ink and then daubered with a bit of Calypso Coral. The sentiment is again from the Thoughtful Banners set and is punched with the new Duet Banner punch.

Can you believe the new catty goes live in less than a week?? If you don't yet have your own copy and don't already have a Canadian demonstrator, be sure to drop me a line and I'll send one out to you free of charge. In the meantime, start saving...you are going to have a LONG wishlist!


Product List
Heat Tool
[129053]
$37.00
Big Shot
[113439]
$136.00

Thursday, March 12, 2015

Butterfly Bokeh

The Bokeh technique is certainly trendy right now, so I figured it was time I got on the Bokeh Bandwagon and taught it in my monthly techniques class.  Here is one of the cards we'll be making tonight...

Any-occasion card featuring the Butterfly Basics stamp set and using the Bokeh Background technique.
Now, there are a couple of ways to do this technique.  I showed a sample last week where I sponged the colour on for the background before adding my white stenciled circles.  On this one I used watercolour paper and watercoloured my background colours of Lost Lagoon and Blackberry Bliss.  Not sure which one I prefer...both are pretty!  I will say, thought, that if using watercolour, make sure your paper is completely dry before sponging on the circles...or the Whisper White ink will change colour (like my pale mauve circles??)  Unless that's the look you're going for, make sure things are completely dry ;)
On this project I created my Bokeh background and then stamped the fern and larger butterfly images from the Butterfly Basics stamp set in Basic Gray ink.  I also stamped the honeycomb image in silver metallic ink.  For the bottom layer I used Brushed Silver card stock that I embossed using the Delicate Designs TIEF. 


The sentiment is heat embossed in silver and die-cut using the Banners Framelits.  The Butterfly is die-cut from Whisper White card stock, using the Butterflies Thinlits and then sponged with Lost Lagoon and Blackberry Bliss inks.  I then lightly dabbed my silver metallic ink pad all over the butterfly to give it a sheen.  I used some silver satin ribbon and a single large rhinestone (retired) to embellish.  The entire card is built on a Lost Lagoon card base.
I may actually give this card to one of the secretaries from my school who is retiring on Friday after 30 years.  Somehow the idea of a caterpillar becoming a butterfly seems suitable for someone about to experience freedom from the working world!

Tuesday, March 3, 2015

Sweet Baby Bokeh

I seem to be on a roll with baby cards lately.  It must be because so many people I know are expecting or have just had little ones.   Today I have a baby card I designed for my techniques group this month.

Baby card featuring the Celebrate Today and Itty Bitty Banners stamp sets and using the Bokeh background technique
The cool thing about this design is that people who don't need a baby card can easily change it to a birthday card by simply switching out the sentiment...gotta love versatility!
I have been wanting to play with my new Colorbox Chalk inks (available in the Stampin' Up! Occasions catalogue) for ages and I finally got my chance.  To create my Bokeh background I began by sponging a piece of Whisper White card stock using the Aquamarine, Rose Coral and Yellow Citrus chalk inks.  I love how easily this ink goes on and the fact that it takes longer to dry gives more time to move the ink around and blend it nicely.  I actually used my heat tool to set the ink once I was finished.  Then I used a circle template I created with some scrap window sheets and the Circles Collection Framelits, a sponge dauber and Whisper White Craft ink to add my light points.  The effect is almost like irridescent bubbles...LOVE it!

To create the balloon, I heat embossed the confetti stars image from the Celebrate Today stamp set in gold on a piece of vellum.  I then die-cut the image using the Balloon Framelits...what an easy way to make a pretty focal image!  I embellished it with gold baker's twine and sequin trim.  The sentiment is from the Itty Bitty Banners stamp set, is heat embossed in gold and die-cut using the Bitty Banners Framelits.  The card front is matted on a piece of Crushed Curry card stock and mounted on a Coastal Cabana card base.

Inside view with sentiment from Cuddles and Kisses (retired)
On the inside, I stamped a couple of the banners from the Celebrate Today set using the Rose Coral and Yellow Citrus chalk inks.  The sentiment is from the (retired) Cuddles and Kisses set and is also stamped in Yellow Citrus.  I have to say I really enjoyed playing with the chalk ink...can't wait to play some more!

Now for this week's Weekly Deals...as always prices are good until Monday at midnight :)

A Little Sumthin’ Sumthin’ Gift Box by Stampin' Up!
A Little Sumthin’ Sumthin’ Gift Box Kit
Price: $19.95 
Sale: $14.96
Decorative Window Gift Box
Price: $5.95  
Sale: $4.46
Extra Large Gift Boxes
Price: $4.95  
Sale: $3.71
Gusseted Cellophane Bags by Stampin' Up!
Gusseted Cellophane Bags
Price: $5.95 
Sale: $4.46
Lucky You Ensemble -- Digital Download
Lucky You Ensemble - Digital Download
Price: $8.95  
Sale: $5.37
Natural Filter Paper by Stampin' Up!
Natural Filter Paper
Price: $3.95  
Sale: $2.96
Polka Dot Tag A Bag Gift Bags by Stampin' Up!
Polka Dot Tag A Bag Gift Bags
Price: $4.95 
Sale:  $3.71
Sweet Treat Embellishment Cups
Price: $3.95 
Sale:  $2.96

Monday, October 7, 2013

One more Bokeh...

I love learning new techniques and when I do I tend to go a little nuts with them.  Last week I showed you several samples using the Bokeh technique, which is featured this week over at The Technique Twist.  I decided I wanted to teach this fabulous technique to my team at our monthly meeting, which is happening  tonight.  Here is the Make-n-take we'll be doing:

Autumn-inspired thank you card featuring the Bokeh technique with sentiment from Truly Grateful (131733)
I love the way the silver metallic ink shimmers and catches the light...


I sure hope my team likes this technique as  much as I do!
**Sorry for the short post...I am swamped this week getting ready for my booth at the Rockton World's Fair.  I will try to post every day, but they'll be short and sweet!

Thursday, October 3, 2013

...and now for something totally different...

The past couple of days I've posted about my new favourite technique called Bokeh.  As part of the design team over at The Technique Twist I am stretching my creativity and trying all sorts of new things, this technique being one of them.  As I began to experiment with Bokeh, I attempted all sorts of different techniques to achieve the look I wanted before finally settling on the one I've showcased the last two days.  Today I want to show you one of my first attempts with this technique.  It is nothing like the later incarnations you've already seen, but it is kind of cool and I want to show you that there is always a way to salvage a project...even if it doesn't turn out as you had planned!

Holiday card featuring the Warmth and Wonder hostess set.
Ok, so as you can see this attempt at Bokeh is nothing like what I ended up with after much more experimentation, but I want to explain to you what I went through to achieve this look.


I started with a piece of Whisper White card stock and stamped the little snowflake from the Warmth and Wonder hostess set several times in various shades of blue ink.  I wasn't thrilled with that look, so I brayered the entire thing with Coastal Cabana ink.  That still didn't give me the look I wanted, so I spritzed it all with bleach (I had a bleach-filled spritzer still sitting on my desk from a previous technique challenge).  That gave me the speckeled, faded look, which I rather liked; however it also pretty much obliterated my stamped snowflakes, so I stamped a few more and added some extras in Silver Metallic Encore ink.  I finally had some sparkle and shimmer but it wasn't enough so I covered the whole thing with Versamark and heat embossed it with Irridescent Ice embossing powder.  Now it was plenty sparkly but I was missing the circles of light that are so essential to the Bokeh look, so I added some bling with rhinestones! 
Whew...I'm tired just typing everything I did to that poor piece of paper, but I am happy with the end result.  It looks absolutely nothing like I had planned in my mind, but that's the best thing about doing creative work...you just never know where you'll end up!
So, why did I tell you this rather lengthy story?  To encourage you to try new things and not to give up on a project, even if it is nothing like you had planned.  There is no wrong answer when being creative and there are no mistakes...just new looks and different directions!

Wednesday, October 2, 2013

Bokeh Butterfly

Happy Hump Day...half way to the weekend...woohoo!  Today I have another project I did using the Bokeh technique...

Encouragement card featuring the Bokeh Technique using stamped images from the Best of Butterflies and Really Good Greetings stamp sets.
Oh, how I love this technique!  This is another project we are doing at my monthly techniques group tomorrow night.  I can't wait!  I think my ladies are going to love this look.  Here is how I did it:
  • Using sponge daubers I stamped the larger, coloured circles using Blushing Bride, So Saffron, Pistachio Pudding, Soft Sky and Crisp Cantaloupe ink.  I stamped each colour several times without reinking to get the depth and layering.
  • Using the clean eraser on a brand new pencil I stamped using Silver Metallic Encore ink to create the smaller circles.  The key again is to stamp several times without reinking and to overlap the circles.
  • The butterfly is stamped on vellum in Staz On and then coloured using So Saffron and Blushing Bride markers.  I adhered the butterfly stamped-side-down to soften the starkness of the black ink.
  • The sentiment is heat embossed in silver.
  • I matted the front panel on Brushed Silver card stock before mounting the whole thing on a Soft Sky card base.
 If you're like I was and haven't tried this technique before I would encourage you to give it a go...you might just like it as much as I do!  Be sure to check out the Design Team samples at The Technique Twist for more inspiration and then link up your creation so we can  all see what you came up with.

Tuesday, October 1, 2013

Beautiful Bokeh!

Happy October!!  I don't know where September went, but I sure am glad October is here!  This is my very favourite month of the year.  With the new month comes a new challenge over at The Technique Twist.  This one is brand new to me.  Called Bokeh, this stamping technique attempts to mimic the effect photographers get when they experiment with capturing the natural reflection of light.  I did a little research online and found this image that really caught my eye...

I love that it was clear this is a Christmas Tree, but the only visible detail is the twinkling lights.  I decided to try to capture this look in my design:

Bokeh Christmas tree with sentiment from Greetings of the Season (128033)
Isn't that cool??  I love this look!!  Here's a closer look:


I can't wait to show to my monthly techniques group this week.  Here is how I achieved this look...it's easier than you might think!
  • Starting with a 3-7/8" square piece of watercolour paper, I sponged Midnight Muse ink all over it.  I then spritzed it all over with water and let it dry completely (you can use your heat tool to speed this along).
  • Then, using the clean eraser end of a brand new pencil, I stamped using Silver Metallic Encore ink.  The key to this is stamping repeatedly with just one inking.  That gives the illusion of depth.  You also want to be sure to overlap the circles and don't be too precise.  This really is a quick and easy look to achieve.
Here is a look at how I finished the inside of this card:

Inside view with images and sentiment from Evergreen (127973)
I stamped the solid tree in Midnight Muse and then the Silent Night text over top in Silver Metallic Encore ink. 
Be sure to check out  the other Design Team members' projects...they are gorgeous!  Then give this technique a try...it is such fun!  Be sure link up to our challenge so we can see what you come up with.  Need more inspiration?  Be sure to stop by tomorrow...I'll have another take on this rather addictive technique :)

Related Posts Plugin for WordPress, Blogger...