Showing posts with label Greetings of the Season stamp set. Show all posts

Wednesday, October 21, 2015

Christmas Dove

Today I have another of the projects I designed for my Handmade for the Holidays card buffet next week.  It is promising to be a busy one!  Just a few seats remaining. This one uses the gorgeous Dove of Peace stamp.

Christmas card featuring the Dove of Peace stamp with sentiment from Greetings of the Season (retired).
Here I used something old, new and blue ;)  The Dove of Peace image is heat embossed in silver on Night of Navy card stock...so pretty! To create the stars I stamped the smaller spatter image from the Gorgeous Grunge set using silver Encore Metallic ink (retired).  The sentiment, which is from the retired Greetings of the Season set, is also heat embossed in silver.

I matted the front panel on a piece of Whisper White card stock before mounting it on a Night of Navy card base. The only embellishments are some silver cording trim and a few rhinestones for added sparkle.

On the inside I added a panel of Whisper White card stock on which I stamped a sentiment from the Peaceful Pines set in Night of Navy ink. I added the dove image in the lower corner, also in Night of Navy ink.

Don't forget about the big stamp sale this week!

http://su-media.s3.amazonaws.com/media/Promotions/NA/2015/10_October/15-percent-off-stamps/Demo_15-Stamps_Ecard_10.19.2015_NA.jpg


Now for the products used to create this card:


Built for Free Using: My Stampin Blog

Thursday, November 21, 2013

http://su-media.s3.amazonaws.com/media/docs/holiday_sale/Holiday_Sale_Flyer_CA.pdf

The Stampin' Up! Holiday Sale is here!!  Click the image above to view the full list of discounted products...just in time for Christmas crafting!  Visit my website to place your order and be sure to use Hostess Code:  QB6S3SGA...you could find yourself the recipient of $35 in FREE Hostess Dollars to spend on even MORE great stuff!

 Now for a little stamping inspiration!  I had a bit of time last weekend to play with some of my stamps from the Holiday Collection Single Stamps.  Here is a project I made using the Christmas Star stamp:

Simple Holiday card featuring the Christmas Star single stamp and the Greetings of the Season stamp set.
 Lots of bling happening here!  The design itself is very simple but the addition of the rhinestones make the stamped stars look like they're set against a starry sky.  I used Soft Suede ink, which looks almost golden against the Very Vanilla background.  Super simple and quick...just the thing when you've got to get your Christmas cards in the mail!

Wednesday, November 13, 2013

Lovely Christmas Star

I really love this year's Holiday Single Stamps.  I just purchased the Christmas Star and took some time to play with it last weekend.  Here is one of the designs I came up with...

Holiday Card featuring the Christmas Star single stamp (134813) with sentiment from Greetings of the Season (128033)

Inside sentiment is from the More Merry Messages stamp set (126402)


Here is a quick how-to:
  • I heat embossed the star in silver on brushed silver card stock...a very pretty look!  
  • I used the Window Frames Framlits to die cut it and the Night of Navy mat and then paper pierced around the stamped layer with the Festive Paper Piercing template.  
  • The background is embossed using the Perfect Polka Dots TIEF.  
  • The sentiment is stamped using Night of Navy ink.
  • I added sparkle with a Large Rhinestone basic Jewel in the centre of the star and a few smaller rhinestones to highlight the sentiment. 
  • The star on the inside is stamped with Smokey Slate card stock.

Thursday, October 10, 2013

A Christmas Quickie!

Today I have a quick and easy Christmas card we did at my Tri-City stampers team meeting this week.

Holiday card featuring the Christmas Collectibles stamp set (131775) with sentiment from Greetings of the Season.
I love the Winter Frost DSP pack...it makes designing holiday projects a snap! 


For this one I started with the three patterns of DSP I wanted to use and went from there.  I hadn't inked up this stamp set (which I won during Prize Patrol at Convention in JULY!), so I figured it was about time!

I wanted to show my team just how easy it is to put together a project using DSP.  So many of them love  the pretty patterns but don't know how to use it!  (Sound familiar?  That was me four years ago!)  Stampin' Up has done all the matching work for you...every pattern in a pack of DSP works with all of the others, so there's no guess work involved.   Easy and fun...what more could you ask for?!

Tonight my crazy weekend at the Rockton World's Fair begins.  If you are in the area be sure to stop by my booth in the Farm and Home Building and say hi.  I will be at the fair for nearly 40 hours over the next four days, so you likely won't hear from me until sometime next week.  Till then, I wish all of my Canadian readers a very happy Thanksgiving!

Tuesday, October 1, 2013

Beautiful Bokeh!

Happy October!!  I don't know where September went, but I sure am glad October is here!  This is my very favourite month of the year.  With the new month comes a new challenge over at The Technique Twist.  This one is brand new to me.  Called Bokeh, this stamping technique attempts to mimic the effect photographers get when they experiment with capturing the natural reflection of light.  I did a little research online and found this image that really caught my eye...

I love that it was clear this is a Christmas Tree, but the only visible detail is the twinkling lights.  I decided to try to capture this look in my design:

Bokeh Christmas tree with sentiment from Greetings of the Season (128033)
Isn't that cool??  I love this look!!  Here's a closer look:


I can't wait to show to my monthly techniques group this week.  Here is how I achieved this look...it's easier than you might think!
  • Starting with a 3-7/8" square piece of watercolour paper, I sponged Midnight Muse ink all over it.  I then spritzed it all over with water and let it dry completely (you can use your heat tool to speed this along).
  • Then, using the clean eraser end of a brand new pencil, I stamped using Silver Metallic Encore ink.  The key to this is stamping repeatedly with just one inking.  That gives the illusion of depth.  You also want to be sure to overlap the circles and don't be too precise.  This really is a quick and easy look to achieve.
Here is a look at how I finished the inside of this card:

Inside view with images and sentiment from Evergreen (127973)
I stamped the solid tree in Midnight Muse and then the Silent Night text over top in Silver Metallic Encore ink. 
Be sure to check out  the other Design Team members' projects...they are gorgeous!  Then give this technique a try...it is such fun!  Be sure link up to our challenge so we can see what you come up with.  Need more inspiration?  Be sure to stop by tomorrow...I'll have another take on this rather addictive technique :)

Monday, August 5, 2013

Playing with the Pop 'N' Cuts

Sometimes it takes me a while to get to using new products.  Althought the Pop'n'cuts dies have been around for a while I only recently cracked one open to try it out.  Here is the result of my first attempt...

Holiday card featuring the Festive Flurry stamp set with card base made using the Pop'n'cuts die.
The inside view...I used the Deco Label insert.  Sentiment is from Greetings of the Season (128033), which is on the carryover list from last year's Holiday catty and still available to order.
Pop up detail...I like the depth this die allows!
Inside sentiment from Many Merry Messages (retired)
So...whaddya think?  Not bad for a first attempt, if I don't say so myself!  Honestly, this die is so easy to use the learning curve is almost nil.  Here are some tips for recreating this card:
  • For the front of the card I embossed a panel of Pool Party card stock using the Northern Flurry TIEF, sponged with Whisper White craft ink and then with Illuminate ink to give it some shimmer.  
  • On the inside I used a bit of the Quatrefancy Specialty window sheets to cut the label.  I wanted it to be subtle so as not to distract from the snow storm happening around it...haha.  
  • The snowflakes are stamped on Whisper White using Pool Party ink and then die cut using the Festive Flurry Framelits (try saying that one ten times fast!).  I adhered them all at different depths using glue dots and dimensionals.  
  • The Greetings of the Season is heat embossed in pewter and die cut using the Chalk Talk Framelits.  I couldn't resist using one of the those gorgeous Designer Brads leftover from last spring's Occasions Catalogue. 
  • The inside sentiment is from the long retired Many Merry Messages set and is stamped in Basic Gray. 
This card is plenty thick...not one you'd want to send through the mail, but certainly one that would be much appreciated by the recipient!

Monday, December 3, 2012

A Dryer Sheet Christmas?

This month my techniques class will be learning the dryer sheet technique.  It is a neat way to add soft sparkle to a design, perfect for Christmas cards.  Here is the card we'll be making at class this Thursday:

Holiday card featuring the Lovely as a Tree stamp set with sentiment from Greetings of the Season
For this card I pulled out the tried-and-true Lovely as a Tree stamp set.  Those images are classic and will never, ever get tired...what's not to love about trees??  The sentiment is from the Greetings of the Season set in the Holiday catalogue.  What the photo doesn't show very well is the sparkle all over the focal image.  This technqiue uses Dazzling Diamonds glitter, which means all of us will leave class on Thursday looking very pretty indeed!

Thursday, August 23, 2012

More Swap-spiration

While I am enjoying life by the lake for the week I have another couple of cards I received in a swap I recently hosted.  I hope they inspire you as much as they have me...

Lovely Christmas card designed by Stephanie VanDorp and featuring the Merry Minis and Greetings of the Season stamp sets.

Cute card designed by Tammie White and featuring the Frosty Friends A La Carte stamp with sentiment from Christmas Lodge
Once again, I LOVE both of these cards!  Steph's card is so creative in the way she used the Window Frames Framelits to create a window for her little ornaments to hang in...I also love that she used Core'dinations cardstock with the Vintage Wallpaper TIEF...gorgeous!
Tammie's card is just plain cute...but there's nothing plain about it!  What you likely can't tell from the photo is that she used the Burnished Vellum technique to give the snowmen dimension and perfect snowy-white colour.  I also love the little touches of Dazzling Details glitter she used for some subtle sparkle. 
Sooooo....have you started thinking about your holiday crafting yet??  It's never too early to get started and finish before the chaos of the holiday season is upon us.  Let's book your holiday card party today and get you started with some FREE stuff!  I am now filling my fall calendar and it is getting busy already!  Send me an email today to reserve your preferred date.  I'll get back to you when I return from my northern sojourn this weekend.

Tuesday, August 21, 2012

Some Inspiration

One of the many things I love about being a demonstrator is swapping card designs with fellow demonstrators from all across Canada.  I recently hosted a swap of cards using stamp sets from the new Holiday Catalogue and WOW did I get some beautiful cards!  Today I want to show you a couple of my favourites:

Wintery Christmas card  featuring the Snowflake Soiree and Greetings of the Season sets designed by Christine Kokiw

Fun and oh-so-creative card featuring the Wonderful Winterland stamp set designed by Kim Munro
Aren't those fun?  I love them both for different reasons.  Christine's card is elegant and detailed and features so many elements it is easy to miss them all at first glance.  One element that doesn't show well in the photo is that she used the Dazzling Diamonds technique on the panel of stamped snowflakes.  So pretty and sparkly...like freshly fallen snow.  Kim's card is just so darned cute!  I love the way she used the image in place of the letter 'o'...so whimsical and fun...not to mention her watercolouring is fabulous!  I hope you enjoyed these...I'll have a couple more tomorrow.  But first I need to show you the latest offering from Craft Project Central.  Check this out:

Embossed Vellum Gift Bag and Card designed by Laurie Zoellmer

Isn't that so soft and pretty?  I love how delicate it looks...perfect for gift giving to just about anyone.  To access the tutorial for Laurie's project just subscribe to August over at CPC.

Friday, August 10, 2012

A Bit Over the Top

Today's project is one that I most certainly wouldn't do in a class or workshop, but really like none-the-less.  It is a wee bit too involved to do in a class setting but sometimes it's fun to just allow yourself to go a little embellishment happy.  Have a look and you'll see what I mean...

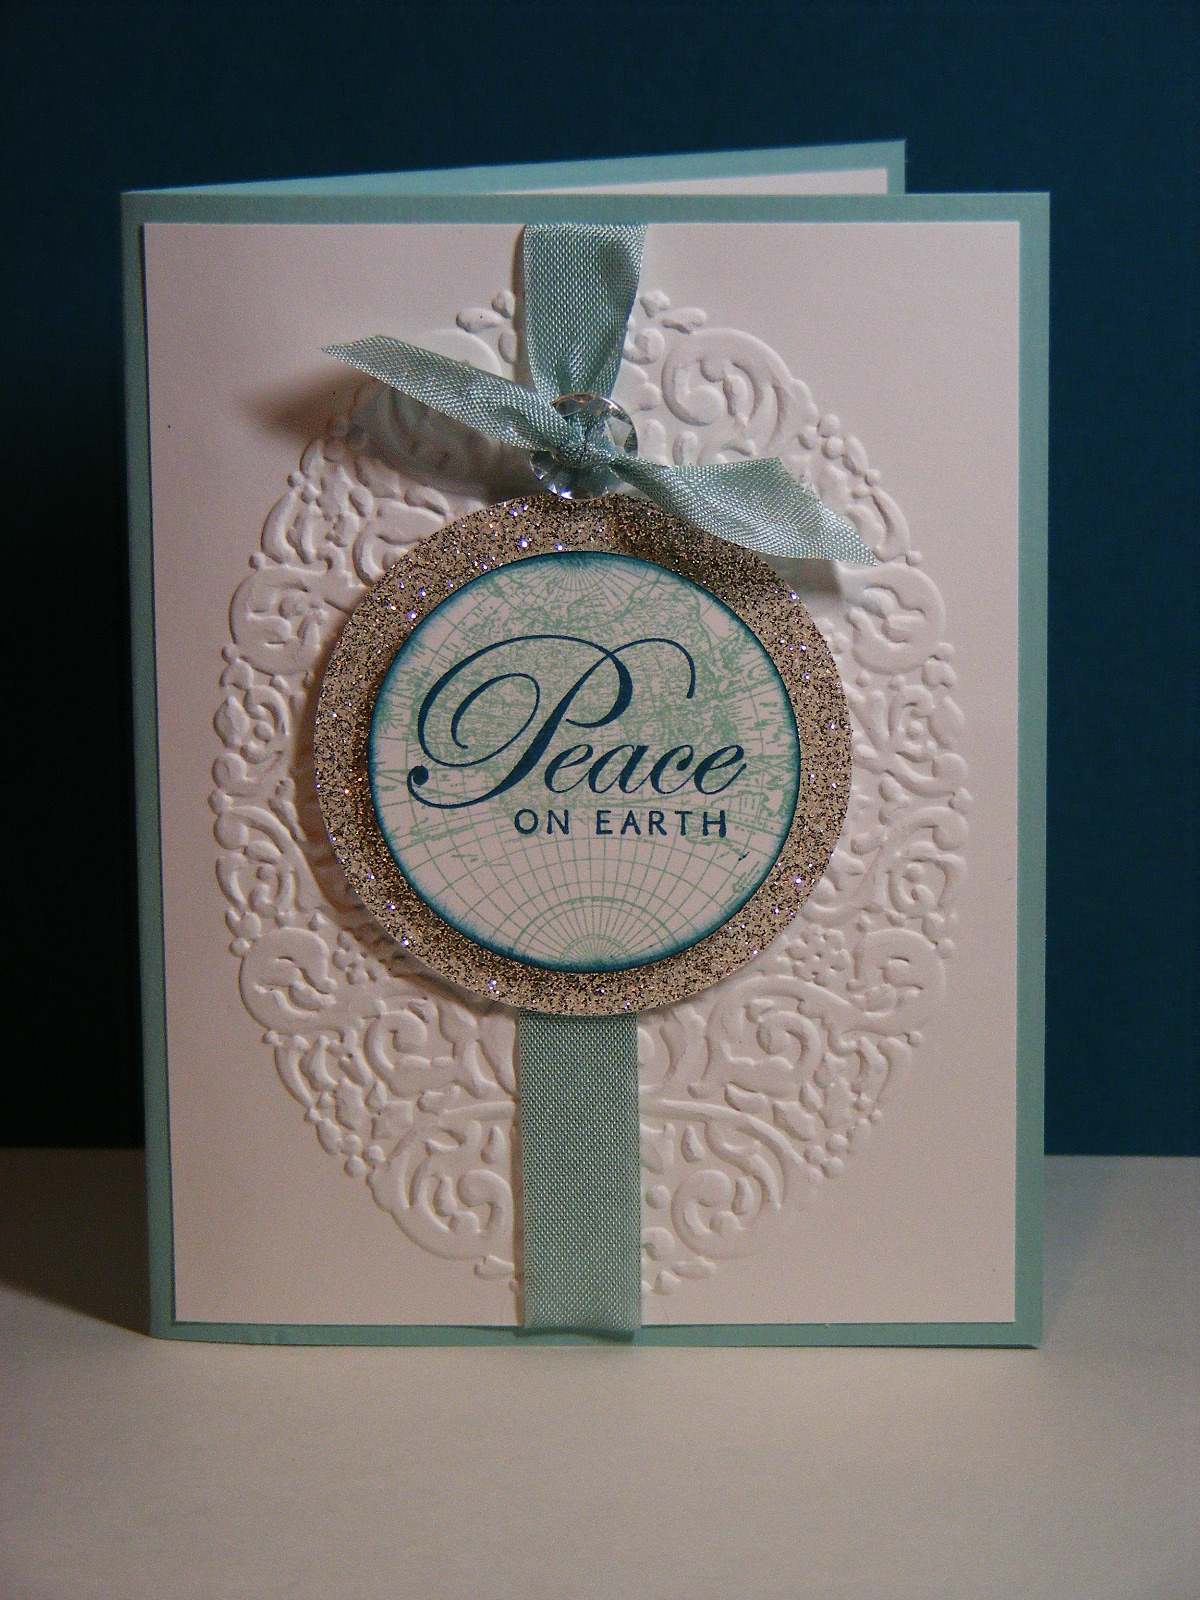
Over-the-top Christmas card featuring the Evergreen stamp set.

Inside View with sentiment from Greetings of the Season
Soooo...I kinda went a little crazy with the pearls.  I just couldn't stop!  Now, looking at it again, I probably should have...they are a bit much!  There are a couple of things I do love about this card, though. Firstly, the music background.  It is from the Natural Compositions specialty paper pack.  The images come clear-embossed on a neutral brown background.  I just sponged Cherry Cobbler ink all over to make the notes pop off the page...they almost look like they're embossed in gold!  Very cool and so easy!  The other element I love is the new scalloped tulle ribbon.  Here I used the Crumb Cake version, but it is also available in Cherry Cobbler and Early Espresso.  So soft and pretty...it adds a truly unique element to any design.  Of course I also love the Evergreen stamp set.  I just can't get enough of that set...you'll most definitely be seeing more of it in the coming months.

Now a couple of reminders...
Firstly, don't forget to enter my monthly draw for a free month's subscription to Craft Project Central.  Just leave a comment on any post dated August 5th -12th.  I will announce one lucky winner here on the 13th.

Secondly, there is just one more week to register for my Ornament Keepsakes Stamp Camp coming up at the end of the month.  In case you missed it, here is a photo of the projects we'll be making:

Register by August 16th.  Don't be disappointed!
All of the details for this event are listed HERE.  Be sure to get in before the deadline...you won't want to miss this event!

Friday, August 3, 2012

And now back to Christmas!

After a brief venture into Fall yesterday, today I'm back with another Christmas card.  The moment I saw the new Lacy Brocade TIEF in the Holiday catty I was dying to see what it looked like used with the Faux Patina technique.  I knew it would be gorgeous...and I was right!  Check this out:

Faux Patina Christmas card featuring the Ornament Keepsakes and Greetings of the Season stamp sets.
Isn't that stunning?!?  I love the way the embossed pattern almost pops off the page with this technique!  Faux Patina lovers, you MUST GET this folder!  Now, to stamp the ornaments, I couldn't just do plain single-colour stamping with a background like that; so I inked the stamp with Marina Mist and then daubed Always Artichoke around the edges using a sponge dauber.  By the way, both of those colours are ones I used for the Faux Patina technique.  I cut the ornaments out with my Holiday Ornaments Framelits, added a bit of linen thread and some pearls and viola...easy, elegant Christmas card!

If you like this card and would like to get your hands on the Ornaments Keepsake stamp set, check out my Events page for details on my Ornament Keepsakes Stamp Camp coming up at the end of the month.  You won't want  to miss the FOUR beautiful 3D projects I have planned.  Since seating is limited, you'll want to reserve your spot ASAP.  Don't be disappointed!

Now for the REALLY big news!  I'm an Auntie again!  Check this little angel out:

Happy Birthday baby Matthew!
My newest nephew was born just after 9:00 Thursday morning weighing in at a whopping 9lbs, 6oz!  My SIL and little Matthew are doing great.  We seem to make big boys in our family!  We've got all boys and everyone of them was over 9lbs when he was born!  That might explain why all the moms have C-section scars!!  A HUGE congratulations to Donna, Rob and big brother Michael...Matthew truly is a miracle!

Tuesday, July 31, 2012

Twelve Days of Christmas (in July!) Day 11

Can you feel the excitement??  Only one more sleep till the new Holiday Catalogue goes live!!  Today I have something a little different for you.  This card uses both new and old items, as well as something a little unexpected.  Check it out!

12 Days of Christmas Day 11 featuring the Open Sea and Greetings of the Season stamp sets.
Surprised?  I used the globe image from the Open  Sea set as the background for the sentiment.  I think it works rather well and I am always thrilled when I find new uses for a stamp set I love.  The other feature that helps make this card is the Holiday Frame TIEF.  It really sets off the focal image so nicely.  It is a gorgeous pattern and NOT just for the holidays!  Here is the complete list of products used on this project.  Starred items are available TOMORROW!!

The Open Sea (CM 123032, WM 123030)
*Greetings of the Season (CM 128033, WM 128030) pg. 8
Whisper White CS (100730)
Pool Party CS (122924)
Silver Glimmer Paper (124005)
Pool Party ink pad (126982)
Island Indigo ink pad (126986)
*Holiday Frame TIEF (127820) pg. 7
Big Shot (113439)
Pool Party Seam Binding ribbon (125582)
Vintage Faceted Designer buttons (127555)

If you've been enjoying this series, you're going to LOVE my Holiday kick-off event!  Check out my Upcoming Events page for details about my Ornament Keepsakes Stamp Camp happening at the end of August.  It will be SUPER fun (I sound like my 5-year-old there!) and will definitely get you going on your holiday crafting.  Here is a photo of the projects we'll be making:

Ornament Keepsakes Stamp Camp Projects


The best part is that in addition to leaving with 4 completed projects, you'll also get to keep your stamp set!  Call or email for additional information or to register. 
I'll be back tomorrow to celebrate the final day of the Twelve Days of Christmas and the launch of the new Holiday Catalogue...see you then!


Saturday, July 28, 2012

Twelve Days of Christmas (in July!) Day 8

Happy Saturday to you!  I hope you have a wonderful weekend planned with friends and family and, of course, some stamping time too!  This weekend we are tackling our VERY long TO-DO list!  I spent time yesterday making a master list and then also did one specifically for my DH.  He needs to get cracking...and so do I!  We have family coming from Austria for a visit in September and our house needs to be ship shape for their arrival!  Not sure how much stamping time there'll be in my future this weekend...hopefully a little!  Here is a little inspiration to get you thinking festive thoughts...

Twelve Days of Christmas in July Day 8 featuring the Evergreen and Greetings of the Season stamp sets

Inside view with sentiment from the Beautiful Season set.
Can you tell I really love the new Evergreen stamp set?  I have several other sets from the new Holiday catty just waiting to see ink while I play around exploring the possibilities of this one!  This card is a really quick and easy one, made stunning by the beautiful embossed pattern.  I used the new Lacy Brocade TIEF and Core'dinations card stock in Cherry Cobbler.  So gorgeous!  I'll be using that combo again for sure!  Not sure you can tell in the photo, but the Merry Christmas on the front is heat embossed in gold.  All in all, a quick, yet elegant holiday card.  Here is the rundown of the supplies used in the creation of this card.  * Starred items are available August 1st.

*Evergreen (CM 127973, WM 127970)  pg. 18
*Greetings of the Season (CM 128033, WM 128030) pg. 8
Beautiful Season (122682)
*Cherry Cobbler Core'dinations CS (127846) pg. 6
*Sanding Block (129367) pg.6
*Lacy Brocade TIEF (127819) pg. 6
Very Vanilla CS (101650)
Early Espresso CS (119686)
Crumb Cake CS (120953)
Crumb Cake Ink Pad (126975)
Cherry Cobbler Ink Pad (126966)
Versamark Ink Pad (102283)
Gold Embossing Powder (109129)
Heat Tool (129053)
Cherry Cobbler Seam Binding Ribbon (102992)
Basics Glimmer Brads (121003)


Feeling festive yet?  If not, no worries!  I've got lots more Holiday inspiration in store for you!  See you tomorrow!

Wednesday, July 25, 2012

Twelve Days of Christmas (in July!) Day 5

Happy Holidays everyone!  Do you know we're exactly five months away from Christmas Day?!?  We're counting down to the launch of the new Holiday Catalogue with some festive fun to help inspire you to get a head-start on your Holiday crafting.  Today I have another sneak peek at some wonderful new products from the Holiday Catalogue, which goes live on August 1st.  Check it out:

12 Days of Christmas in July Day 5 featuring the Greetings of the Season stamp set and Candle Light Christmas DSP.
I think this is my favourite design so far in this series.  I love the elegant simplicity of it!  I wish you could touch this card, because I used the flocked window sheets from the Candle Light Christmas DSP pack.  That lovely red brocade pattern is fuzzy!  Here is the list of products I used to create this card (*starred items are from the upcoming Holiday Catalogue and will be available August 1st:

* Greetings of the Season (CM 128033, WM 128030) pg. 8
* Candlelight Christmas Specialty DSP (126901) pg. 4
* Snow Flurry Bigz Die (127813) pg. 14
Whisper White CS (100730)
Cherry Cobbler Ink Pad (126966)
Vintage Facted Buttons (127555)
Rhinestone Basic Jewels (119246)
Framed Tulips TIEF (121809)

Are you making your wish list?  I know mine includes pretty much everything in the Holiday catty!  So many wonderful new products to play with!
Related Posts Plugin for WordPress, Blogger...