Showing posts with label More Merry Messages stamp set. Show all posts

Wednesday, August 31, 2016

Time is running out!

Happy Hump Day...and happy last day of August! Can you believe tomorrow is September 1st? That means some BIG things are coming down at Stampin' Up! The brand-new Holiday Catalogue goes live tomorrow...wahooo! Finally you can get your hands on all the new product awesomeness that you've likely been seeing all over the internet for the past month. If you haven't yet got a hard copy, contact me to request your complimentary catalogue today!

Also starting today is a new series of weekly promotions, similar to the old Weekly Deals called Special Offers. There will be three weeks of deals, offering three different sets of products from September 1st - 21st. Items on sale will be discounted 25% for the week that they are featured. At the end of that week, a new set of products will be on sale. To view this week's sale items click the image below:


The end of the month also means the end of current promotions. If you still have Bonus Days coupons left, time is running out to redeem them! They expire at midnight tonight, so don't miss out. Also wrapping up is the Thoughtful Branches product offering. The good news is that there are still limited quantities available and Stampin' Up! will continue to make this awesome bundle of products available until supplies are completely depleted. Remember: these products will never again appear for purchase in any catalogue...this is an exclusive offer. In case you need more convincing, here is another project I put together using the Beautiful Branches dies:

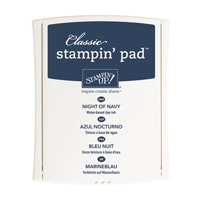
This is a quick and easy Christmas card that I designed for a class last month. I began with a 3" x 4" piece of Whisper White card stock which I ran through the Big Shot using the Woodland TIEF. I layered the embossed piece on a 3-1/8" x 4-1/8" piece of silver foil. I layered that on a Night of Navy card base. The tree is die-cut from silver glimmer paper using the Beautiful Branches thinlit dies. 

The sentiment, from a long-retired set called More Merry Messages, is stamped in Night of Navy ink. The only embellishments are a bit of 1/8" silver metallic ribbon and an also-retired All is Calm snowflake embellishment to which I added a single rhinestone. This really is a quick and easy card, perfect for mass-producing for Christmas cards.

Have a wonderful Wednesday!


Product List
Big Shot
[143263]
$136.00

Friday, August 7, 2015

Festive Friday

Happy Friday...the weekend is here!  Yippee!!  I hope you have some fun planned this weekend.  I am looking forward to dinner with an old college friend, and, of course, some stamping ;)
 Today I have another Holiday Catalogue sneak peek for you.  Check it out:

Christmas card featuring the Wonderland stamp set, Woodland TIEF and Holidays Fancy Foil Vellum; all available September 1st in the 2015 Holiday Catalogue
 Yesterday I showed you a Fall-themed card that used the new Woodland embossing folder, now here it is on a Christmas card.  Those gorgeous trees work for just about any occasion.  Here I added some sparkle to them by sponge daubering on some Versmark ink and then heat embossing with Irridescent Ice embossing powder.  You can see the sparkle a bit better in this photo.


To add even more shimmer I used a piece of the new Holidays Fancy Foil Designer Vellum, which is simply beee-u-ti-ful!  It comes in the silver snowflakes, red candycane striep and green Christmas trees.  So pretty and shiny! Since I was on a roll with the sparkle and shine, I added a bit of Dazzling Diamonds glimmer paper behind my sentiment.  That sentiment is from the new Wonderland stamp set and is heat embossed in silver and die cut using the Project Life Cards and Labels framelits.  I added a couple bits of silver 1/8" metalllic ribbon and a snowflake embellishment from last year's catalogue because my new ones from this year won't arrive till next week! ;)

On the inside I heat embossed in silver a sentiment from the retired More Merry Messages set (again, because my new sentiment sets aren't here yet!) and added some little snowflakes which are also part of the Wonderland stamp set. I've included a list of all of the products I used (minus the ones that are either retired or not available yet!) below.  Clicking on any of them will send you right to my online store for easy ordering ;)
Be sure to check back on Sunday for a new colour challenge from Sunday Stamps.  Till then, have a fabulous weeked!

Built for Free Using: My Stampin Blog

Thursday, November 6, 2014

The Crazy Month has Begun!

November is a nutty month every year.  It is Christmas card season, report card season and Holiday Concert season all at the same time!  I honestly don't know whether I'm coming or going most days this month.  Last weekend I had a few minutes to sit down and design the projects for my upcoming techniques class next week.  This one features the Alcohol Marker Marbling technique using Blendabilities...

Christmas card featuring Alcohol Marker Marbling Technique and the Letterpress Winter stamp set with sentiment from the More Merry Messages (retired) stamp set.
I was so excited to learn this technique because it not only uses my beloved Blendabilities, but also results in a really gorgeous background.  Here is a closer look:


Rather than try to explain this technique to you, check out the fabulous tutorial on Splitcoaststampers.  I will say that I used all three of the shades in the Coastal Cabana set and the medium and light shades in the Night of Navy set to achieve the effect I did on my project.  The other thing I did differently is I didn't use glossy card stock, but rather good old Whisper White card stock instead.  To get a sheen I spritzed it with Vanilla Shimmer Smooch after the background has dried.  I really like the effect.  I layered the front panel on some Brushed Silver card stock and then adhered the whole thing to a Marina Mist card base.

I heat embossed the snowflakes using white embossing powder.  The sentiment is heat embossed in silver and die cut using the Chalk Talk framelits.  The snowflake accent is die cut using the Snowflake Card Thinlits die from Dazzling Diamonds glimmer paper.  I added a large rhinestone jewel in the centre for a little extra sparkle.

Inside view with sentiment from More Merry Messages (retired)
On the inside I stamped the sentiment from More Merry Messages (retired) in Smoky Slate ink and added a couple of small snowflakes in Marina Mist.  I love this technique and will definitely be using it again!

Monday, October 27, 2014

Very Merry Trees

Happy Monday!  I hope you had a fabulous weekend.  I spent yesterday doing one of my favourite things:  stamping with a group of ladies who were almost all brand-new to stamping.  We made three cards and had a blast!  I so love my job!
Today I have a project from my class last weekend.  It uses several new products from the Holiday catalogue:

Christmas card featuring the new Tree punch, Lucky Stars TIEF and Stars Framelits.
Not a lot of stamping on this one!  Just the sentiment, which is from the (retired) Many Merry Messages set.  I chose my colour scheme from the DSP I used:  Cherry Cobbler, Garden Green, Crumb Cake and Whisper White.  The red background circle is die-cut using the Circles Collection framelits and is embossed using the Lucky Stars TIEF.  The champagne glimmer star frame peeking out from behind the red circle was die-cut using the Stars Framelits, as was the medium star on the sentiment banner.  The cardfront is embossed as well, using the Delicate Designs TIEF.  To bring out the texture, I lightly sponged Whisper White Craft ink over it and around the edges of the card.

The trees are punched from Trim the Tree DSP stack.  I trimmed the bottoms of the two smaller ones to create different-sized trees.  The little star atop the left-most tree is punched with the Itty Bitty Accents punch pack.

For the inside I punched one more tree from the Trim the Tree DSP and adhered it to a piece of Whisper White card stock that I had embossed with the same TIEF I used on the front.  The sentiment, also from the More Merry Messages set is stamped in Cherry Cobbler.
Have a wonderful week!!

Wednesday, September 24, 2014

Nordic Noel

Another short and sweet post today...when will my life slow down??

This is another sample from my Holiday Head-start card buffet coming up this weekend...not much stamping on this one!

Holiday card featuring the Nordic Noel DSP and the Wondrous Wreath framelits
This one is SUPER quick to put together!  No stamping at all on the front of the card and just the sentiment stamped on the inside.  Here is a list of the products I used:
Here's a closer look:


...and a look at the inside:

Sentiment from the More Merry Messages (retired) set.
 Have a great day...just two more days till the weekend!

Monday, September 1, 2014

Letterpress Winter Greetings

Well, here it is...the most dreaded day of the year for we teachers.  For most people Labour Day simply means a day off to relax with friends and family.  For teachers like me Labour Day spells the end of summer freedom and the beginning of the hectic insanity that is the school year.  *Sigh*
But you aren't here to listen to me complain.  You're here for inspiration, so here is another project I made for my upcoming Holiday Head-start Card Buffet coming up at the end of the month.

Holiday card featuring the Letterpress Winter stamp set with sentiment from the (retired) More Merry Messages set.
I combined new products with retired ones on this one.  I bought a bunch of those Filigree Builder Brads when they were on the Clearance Rack a while back...I love the touch of elegance they give my projects.  I thought it worked really well with the filigree pattern of the snowflakes from the new Letterpress Winter set.  Here, I added some rhinestones that I coloured with the darkest of the Coastal Cabana Blendabilities set.  I think it looks a bit like a vintage brooch.  I stamped the snowflakes on Soft Sky card stock and heat embossed them in white.  I then sponged the centres very lightly with Soft Sky ink


The sentiment, from the recently-retired More Merry Messages set is stamped in Basic Gray.  After stamping the sentiment I ran the background panel through the Big Shot with the Perfect Polka Dots TIEF.  The whole thing is mounted on a Lost Lagoon card base.

Inside view with another sentiment from the More Merry Messages set.
On the inside I stamped more snow flakes, this time in Soft Sky ink on white card stock, and added the sen
timent in Basic Gray.  Quick and easy, yet elegant.  Perfect for mass-production at a card buffet!

If you haven't yet registered for the Holiday Head-start Card Buffet, you're running out of time.  Spots are filling up quickly for the Friday session so I've added a second session on Saturday morning.  To get all of the information on this and all of my other upcoming events click HERE.

Enjoy your Labour Day Monday!
Wednesday, November 13, 2013

Lovely Christmas Star

I really love this year's Holiday Single Stamps.  I just purchased the Christmas Star and took some time to play with it last weekend.  Here is one of the designs I came up with...

Holiday Card featuring the Christmas Star single stamp (134813) with sentiment from Greetings of the Season (128033)

Inside sentiment is from the More Merry Messages stamp set (126402)


Here is a quick how-to:
  • I heat embossed the star in silver on brushed silver card stock...a very pretty look!  
  • I used the Window Frames Framlits to die cut it and the Night of Navy mat and then paper pierced around the stamped layer with the Festive Paper Piercing template.  
  • The background is embossed using the Perfect Polka Dots TIEF.  
  • The sentiment is stamped using Night of Navy ink.
  • I added sparkle with a Large Rhinestone basic Jewel in the centre of the star and a few smaller rhinestones to highlight the sentiment. 
  • The star on the inside is stamped with Smokey Slate card stock.

Monday, October 21, 2013

Double Embossing for The Technique Twist

This week's challenge at The Technique Twist is Double Embossing.  Now, I had always considered Double Embossing to be where one used both dry and heat embossing on a project, but leave it to the creative gals over at the Twist to switch it up!  This take on Double Embossing uses different coloured embossing powders to colour an image.  Check out my project:

Christmas Card featuring the Double Embossing technique using the Festive Flurry stamp set (131781), coordinating Framelits (132193) as well as the Expressions Thinlits (132171)
I twisted this already twisted technique by stamping and heat embossing my snowflake on acetate. 


I used white, Tempting Turquoise and Pool Party embossing powders.  I did a second, smaller snowflake for the inside.

Inside sentiment is from the More Merry Messages stamp set (126402)
This technique really is as easy as heat embossing, you just use multiple colours of embossing powder rather than a single one.  One tip for heat embossing on acetate: be sure to use your Embossing Buddy liberally before stamping.  Because acetate tends to hold static electricity, the embossing powders will stick where you don't want them if you don't use the Buddy!  You also may need to use a card stock shim when die cutting with acetate to ensure the Framelits cut all the way through.
Give this technique a try...its fun and easy...then be sure to link up over at The Technique Twist so we can admire your work!

Friday, September 13, 2013

Sketched Blessings

Happy Friday everyone!  I hope your week has been better than mine!  I am so glad the weekend is here!!

Stampin' Up! gave us a little pre-weekend surprise by adding several new items to the Online Clearance Rack yesterday.  There are lots of great deals to be had...check it out, but hurry...these items are only while supplies last, which won't be long at these prices!

Today I want to share with you another take on a card I showed you a while back

Holiday card featuring the Simply Sketched Hostess set with sentiment from More Merry Messages.
I had originally designed this card for a stamp-a-stack I held last month, but when the registration jumped to nine, I decided I had to redesign the card for speed's sake!

The branch images were inked using Always Artichoke and Cherry Cobbler markers...not a difficult technique, but one that does take a bit of time and since I had one stamp and one set of markers and each guest at my event was doing four of this card...welll you can imagine why I felt it necessary to rethink my plans!

Inside view with sentiment from Delightful Dozen
The redesigned card was a hit, but I fully intend to use this design at other classes this fall! 
Now, I am dashing out the door to work, so I don't have time to give you the full rundown of what I used, so you'll have to forgive me for that :)
Have a great weekend...and be sure to make time to stamp!!

Friday, August 30, 2013

Holiday Head Start!

Last night I held my first Holiday Head Start event...a Stamp-a-Stack!  Here is one of the three designs we made:

Christmas card featuring the Joyful Christmas stamp set (131805) with sentiment from More Merry Messages (126402).
Each of my guests made four of this design, so I kept it fairly straight forward. 


It was the first time I inked up my Joyful Christmas set.  That poinsettia image is just gorgeous!

Inside view.  Sentiment is from More Merry Messages
Here are a couple of tips for putting this one together:
I can't wait to do more with this stamp set...it is so pretty!  Good thing we're just starting the Holiday card making season...lots more time to play.  Have a great weekend!!

Wednesday, July 31, 2013

It's the last day of July!!

How is it possible that today is the last day of July?!?  Where did the month go?  There is lots to tell you about but first, a little Christmas!  Check out this card I designed for this week's Friday Mash-up Christmas challenge using the sketch from this week's Retro Sketches challenge...

Here is the sketch:


Holiday card for RS74 and FM120 featuring the Festive Flurry stamp set and Framelits (available tomorrow in the Holiday Catalogue) with sentiment from More Merry Messages.
I am dying for my Holiday Catalogue order to arrive!!  I held off ordering all but a few incentive redemptions until after Convention, knowing I would likely get some freebies.  My order is arriving tomorrow, but that didn't stop me from using a couple of new items on this card.  The Festive Flurry stamp set and coordinating Framelits are available in a bundle for 15% off...I know you'll want to add them to your wishlist!  I paired them with some silver Glimmer Paper and This and That Epic Day DSP for a little Christmas in July. 
Now for a few reminders: 
  • Today is the LAST DAY  to take advantage of the Buy-three-get-one-free DSP offer.  Don't miss this chance to stock up on your favourite packs of DSP!
  • Today is also the LAST DAY to purchase Single Stamps.  After today these oh-so-popular stamp images will be gone for good.
I will be placing an order this evening, so be sure to call or email with your order by 7:00 pm or visit my online store to have your order ship directly to you.  Be sure to stop by tomorrow...there will, no doubt be lots of exciting news to share with you and I'll have a new challenge from The Technique Twist!!

Tuesday, July 30, 2013

A Little Christmas in July!

Today I have a project for you that was inspired by a couple of online challenges.  This week's colour challenge at Dynamic Duos is to use Pear Pizzazz and Garden Green on a project.  This is a huge challenge for me, as those are two colours that I rarely pull out.  I decided to create a Christmas project for The Friday Mash-up using the sketch from The Paper Players.   First, here is the sketch:


...and here is my card:

Simple Christmas card for DD63, FM120 and PP156 featuring the Evergreen stamp set with sentiment from More Merry Messages.
This card has some old, some new and some current product on it!  The Evergreen stamp set , as well as More Merry Messages are carryover sets from last year's Holiday Catalogue.  They not in any current catty but are still available to order.  If you missed them last year, it's not too late!  The DSP in the background is from last year's colour family DSP Stacks.  I still have a TON of that stuff kicking around and the stripes were just festive enough for this project.  The bronze button is another leftover from last year's Holiday catty...sadly they are no longer available...but keep your eye on the online Clearance Rack...you never know what might show up there ;)  The burlap ribbon is a new embellishment available August 1st in the new Holiday Catalogue.  I am fast falling in love this that stuff...it adds such wonderful texture to any design!  The little star atop the tree was punched with the Merry Minis punch pack, which is yet another Carryover item from last year.  Still available to order, this pack of three punches includes a Christmas tree and ornament, in addtion to the star. Call or email to order these and any other Carryover items.

Wednesday, July 3, 2013

Christmas in July Preview...

One of my favourite things about this time of year is our pre-order for the Holiday Catalogue.  I know, you're probably thinking it's a little early to be thinking about snow and Christmas, but I love that during the summer I have time to play and design fabulous Christmas projects that I just don't have the time for once the Holiday season arrives.  Today I want to show you a Christmas  card I designed for a swap I am participating in at Convention in just a couple of weeks. 

Christmas card  featuring the Modern Mosaic Embossing Folder and Mosaic punch with sentiment from More Merry Messages.

This is a quick and easy, yet festive Christmas card. Good thing, because I may well be putting these together on the plane to Salt Lake City!!  So much to do and so little time...hard to believe I'm on holidays :)

Monday, June 24, 2013

Christmas in...June?

Christmas in July has become one of my favourite blog features over the past couple of years.  And this year will be no exception, as I have been dreaming in vivid colour, making my wishlist from the new Holiday catalogue!  But today I have a Christmas card for you...exactly six months till Christmas Eve!  Check it out:

Christmas Card featuring the Happy Day and the A Round Array stamp sets with sentiment from More Merry Messages.
I have to admit I was a wee bit dismayed when I saw there were no Christmas-specific stamp sets in the new Annual Catalogue.  Christmas is my thing and I truly do make Christmas cards all year long, so not having new Christmas stamp sets to play with until the Holiday catalogue pre-order was alarming.  So, I set to work designing Christmas cards using sets that may not have been designed specifically for that holiday.  It has really sparked my creativity and, I am proud to say, I am thrilled with the results so far!  This card uses two sets with beautiful medallion images that pass quite nicely for snowflakes when embossed in silver on a white background.  The larger image is from the Happy Day set and the smaller is from A Round Array.  The sentiment is from the carry-over set More Merry Messages.  I am SO glad that set it still around, as it is full of great holiday greetings and sentiments.  I layered the stamped panel on a mat of Coastal Cabana and then adhered it to a Smoky Slate card base.  I love the shimmer and sparkle of this card so much I am making a bunch for a swap I am participating in at Convention!  Who needs holiday stamps, when there are so many great sets that do double duty?!?

Sunday, December 2, 2012

She's Alive!

Finally!  I am back among the living.  Wow...this one really knocked my entire family out for a whole week!  Not fun and certainly not something I'd wish on anybody!  Thankfully the worst of it seems to be behind us, though my DH is still feeling under the weather.  I am sniffly but certainly much better than I was.  So, that means I'm back to stamping!  Today I have a fun Christmas card I designed a while back for one of my events this season.  The layout is based on a sketch challenge over at Pals Paper Arts, but I am WAY late to enter the challenge!  Even so, I thought you might like to see what I did, so here is the sketch:

PPA147 Nov 15 2012

...and here is my take on it:

Holiday card featuring the Snow Much Fun stamp set with sentiment from More Merry Messages.
Don't you just love the Snow Much Fun stamp set?  Those images are just too cute and beg to be coloured!  I have to say I sold several copies of that set during the Online Extravaganza sale when it was 50% off! On this card I used only a portion of the tall snowman, stamping it with Staz-On and colouring with my Stampin' Write markers.  The DSP in the background is from the Snow Festival pack.  I embossed the bottom of the card base using the Delicate Designs TIEF and then sponged lightly using Whisper White Craft ink for a frosted look.  I also made use of some of the white sweater trim from the Holiday catalogue which gives a cozy warmth to the design.  I took some liberties with the sketch, adding the sentiment banner at the bottom, which I embellished with a bit of Cherry Cobbler Baker's Twine. 
There are a lot of elements to this card...I just couldn't stop adding stuff!  Gotta love it when those creative juices get flowing!  Here's hoping they keep flowing...a week in bed has put be WAY behind on just about everything!  Time to get back to my stamping corner...enjoy your Sunday, everyone!


Tuesday, November 6, 2012

Serene Snowfall

Today I have one of the cards I designed for my techniques class this month. It uses the Salted Background technique.  Check it out:

Serene (and chilly!) winter scene featuring the Serene Silhouettes stamp set with sentiment from More Merry Messages.
Talk about CAS!!  This card is positively naked!!  I left it that way to add to the starkness of the scene.  I can almost see those little birdies shivering!  See the snow falling against the night sky?  That's the salted background technique!  It is so easy and adds such a cool effect to the scene.  This technique also works well to create a starry night sky.  I have wanted to do a scene like this one since I first saw the Serene Silhouettes stamp set in the new catty last June!  It only took my five months to get around to it!!
Related Posts Plugin for WordPress, Blogger...