Showing posts with label Love and Care stamp set. Show all posts

Sunday, June 19, 2011

Sunflowers for a colleague and MU11

Last week I was asked to create a retirement card for a colleague.  She is leaving teaching to go on to bigger (and better!) things...can't say I'm not envious!!  Anyhow, she loves sunflowers and I was asked to do something with them for her card.  I SOOOOO wish I could order the one of the new background stamps from the new catty in time...when you see the new catty you'll know which one I'm talking about!  But since I can't order it until July 1st and the lady's retirement party is June 28th, I had to improvise.  I got out my Build-A-Blossom stamp set and punch and went to town.  Conveniently, sunflowers are also one of my favourite things about summer which means this card also works for this week's Friday Mash-up challenge, which is to create a summer-themed project with polka dots.  So...here is my card:

Sunflower card for a colleague and for MU11 using the Build-A-Blossom stamp set with sentiment from the Word Play set.

Inside of card using Love and Care and Occasional Quotes hostess sets.

 So this card is BIG...it had to be to allow enough room for everyone on our staff of 60 to sign it.  I also made it so that the inside opens up to reveal a full 8 1/2" x 11" area for signatures.  The sunflowers on the front were made by stamping the solid petal image in more mustard ink on daffodil delight cardstock.  I then stamped the shaded petal over top using peach parfait ink.  The result are petals with lots of depth without the extra effort of sponging each individual one.  I punch each petal out using the build-a-blossom punch and then textured them using my stylus and the foam from my mat pack.  It makes them curl a little and gives them dimension that makes them look almost real.  The centres of the flowers are punched from chocolate chip cardstock, sponged and then covered with Crystal Effects and clear micro beads (retired), again to give them texture and depth.  The leaves are also made using the Build-A-Blossom set but this time I stamped the largest solid petal image in wild wasabi ink on cardstock of the same colour.  I then stamped the shaded petal of the same size over top in garden green ink.  To make them look like leaves, rather than petals, I just turned them around so the narrow end was showing.  I again textured them using my stylus and mat pack.  The rest of the card is pretty simple and straightforward.  It had to be with those big flowers on the front!  I really hope my colleague likes this card...it took me quite a while to make!!

Monday, May 23, 2011

Love and Care for PPA

Well...it seems the long weekend is over...hard to believe!  Why does time off go by so much faster than time at work?!?  The past three days have flown by...but then I've been mighty busy!  The weather was better than forecasted and so I got a lot of gardening and yard work done.  Our backyard is still a swamp from all the rain we've had, but I did manage to get my patio pots planted and it looks great!  Now for a little patio weather and we could actually say summer is on it's way!  In addition to all the yard work, I made some headway on my course and still found a little time to stamp.  After being buried in assignments on the computer, getting down to my stampin' corner to put ink to paper is like a breath of fresh air!  The card I have for you today is inspired by the Stamping 411 colour inspiration for this week:  always artichoke, river rock and rose red.  Now those three colours are not ones I would typically put together, but I am actually quite happy with the result.  The layout for this card is from this week's Pals Paper Arts sketch:


Here is my card:
Card for PPA 94 using Love and Care level 2 hostess set.

Close up of focal images and vellum butterflies

Inside of card
You may be wondering when my love affair with this stamp set will end...keep wondering!  I just love the softness of the images and am having fun playing with them.  This card really just sort of came together because of the images I was using.  Here is how I put it together:

Starting with a river rock card base, I ran it through my Big Shot with the vintage wallpaper embossing folder.  I sponged the edges of the card base with river rock ink.  Setting that aside, I stamped the stem image randomly on a strip of always artichoke cardstock using ink of the same colour.  All the images were stamped off once to keep the background subtle.  I sponged all the edges in always artichoke ink.  I then punched a strip of rose red cardstock using my dotted scalloped ribbon punch.  I cut it to 5 1/2" and then adhered it to the top edge of the artichoke strip.  I then took a piece of rose red seam binding ribbon and pulled the threads to gather it.  I adhered it along the bottom edge of the artichoke piece.  I then adhered the whole thing to the prepared card base.  For the focal images, I stamped the stems in river rock, both full strength and stamped off, the flower in rose red, stamped off and the leaf in always artichoke stamped off.  I stamped the images randomly all over a scrap of very vanilla textured cardstock and then punched out three 1 3/8" circles.  I sponged the edges of all the circles and then layered them each on a 1 3/4" scalloped circle punched out of rose red cardstock.  For added interest, I notched every other scallop with my paper snips.  I adhered the circles to the card using dimensionals.  The final touch was the butterflies that I cut from vellum paper using my beautiful wings embosslit and my Big Shot.  I sponged them lightly in rose red ink and then adhered them using glue dots.  I added some little pearls to each one.  
You may be wondering where the sentiment is!!  The answer is that I left it off.  I made this card with the intent of sending it to a colleague who is recovering from back surgery.  I thought the simple "Take Care" on the inside would suffice.  Speaking of the inside, it is pretty easy to figure out what I did.  The sentiment is stamped in always artichoke, full strength on a scrap of the leftover images from the front.  I punched it out with my large oval punch and layered it on a scalloped oval.  I again notched every other scallop.  The rest you can figure out from the photos.  

I can't wait for you to see the card I have for you tomorrow!  I made it for my son's friend who is having a birthday party this week.  It is such fun...stay tuned!!

Thursday, May 5, 2011

One of my fav colour combos for PPA 92!

This week's challenge at Pals Paper Arts is a colour challenge using one of my favourite colour combos from Stampin' Up!  Here is the inspiration:
I love these three colours together and have used them often.  So it was easy to come up with a card for this challenge.  Here it is:
Card for PPA92 using Love and Care stamp set for the background behind the flower and lots of Big Shot:  a texture plate and two different dies!

Close up of the flower...not sure what happened to the colour in this one! 

Thanks to my Big Shot, this card was a cinch!  First I stamped the background using the daisy image from the Love and Care set and then sponged the whole thing in peach parfait.  The flowers were cut from peach parfait cardstock using my Daisy #2 die and then some of the layers were sponged in poppy parade.  I curled up the petals using my stylus and mat pack.  The "leaves" are from the Scribbles and Swirls die.  The label is punched with my decorative label punch...see this post for a link to a how-to-video on getting this shape.

Sorry that's all the detail I have time for tonight...I have an assignment to get done for my course!  See you tomorrow!

Wednesday, May 4, 2011

Love and Care

Today's post will be short, as will many for the next couple of months.  I just started an online course for work which is eating up most of my evenings and, as a result, I won't have much time for blogging!  I will still try to post something new for you most days, but my descriptions of how I made the projects will have to go by the wayside for a while.  If there is something that you see that you can't figure out how I did from the photos, please drop me a line and I will do my best to answer your questions.  So, today I have another card I did using the level two hostess set from the Summer Mini:  Love and Care...

Card using Love and Care level 2 hostess set

Close-up of embossing detail

I have found a new appreciation for the colour Not Quite Navy.  It is such a gorgeous blue...not too light as to be wishy-washy, but not so dark as to be...well...navy!  The other thing I love about this card is the embossing...how did I ever live without my Big Shot?!?

Monday, May 2, 2011

Another Sketch Challenge!

The sketch challenge over at Stamping 411 this week is a simple one that is easily adapted to just about any occasion.  I chose to showcase one of the hostess sets from the new Summer Mini.  First, though, here is the sketch:


...and here is my version using the Love & Care level two hostess set from the NEW Summer Mini:

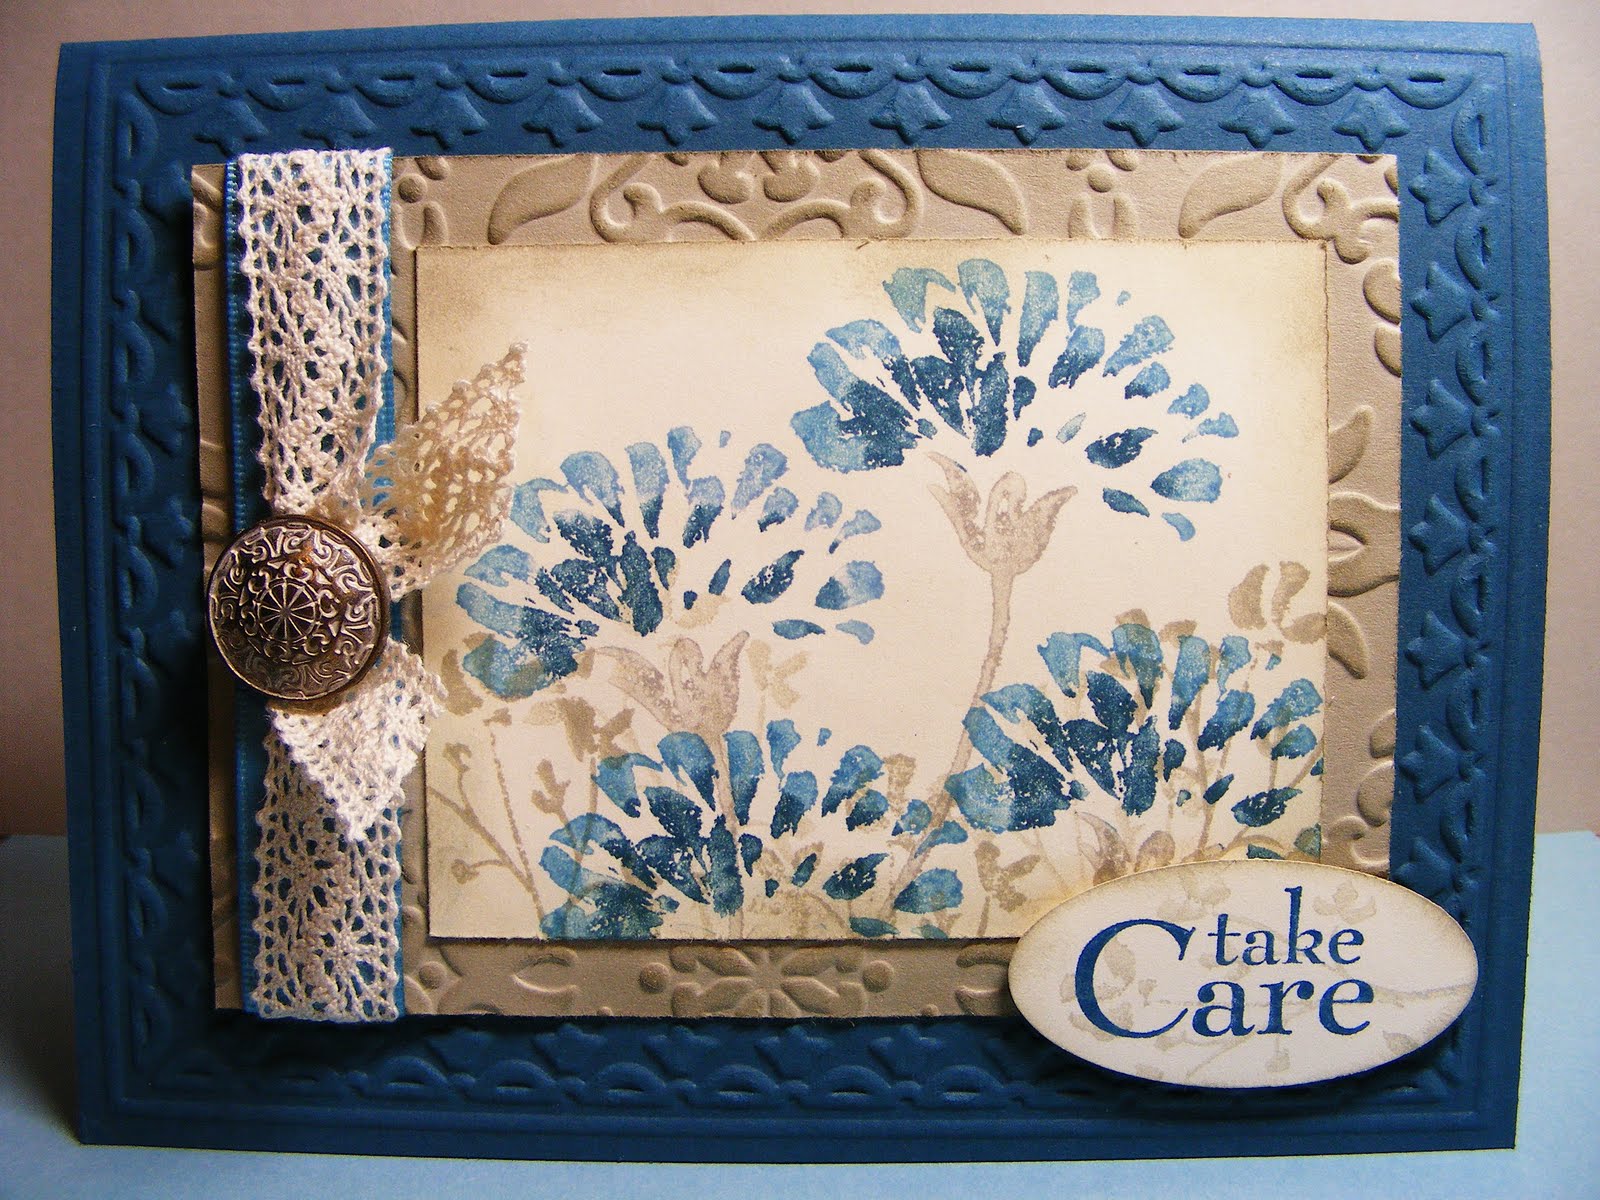
Card for SSC201 using Love & Care level two hostess set from the Summer Mini.

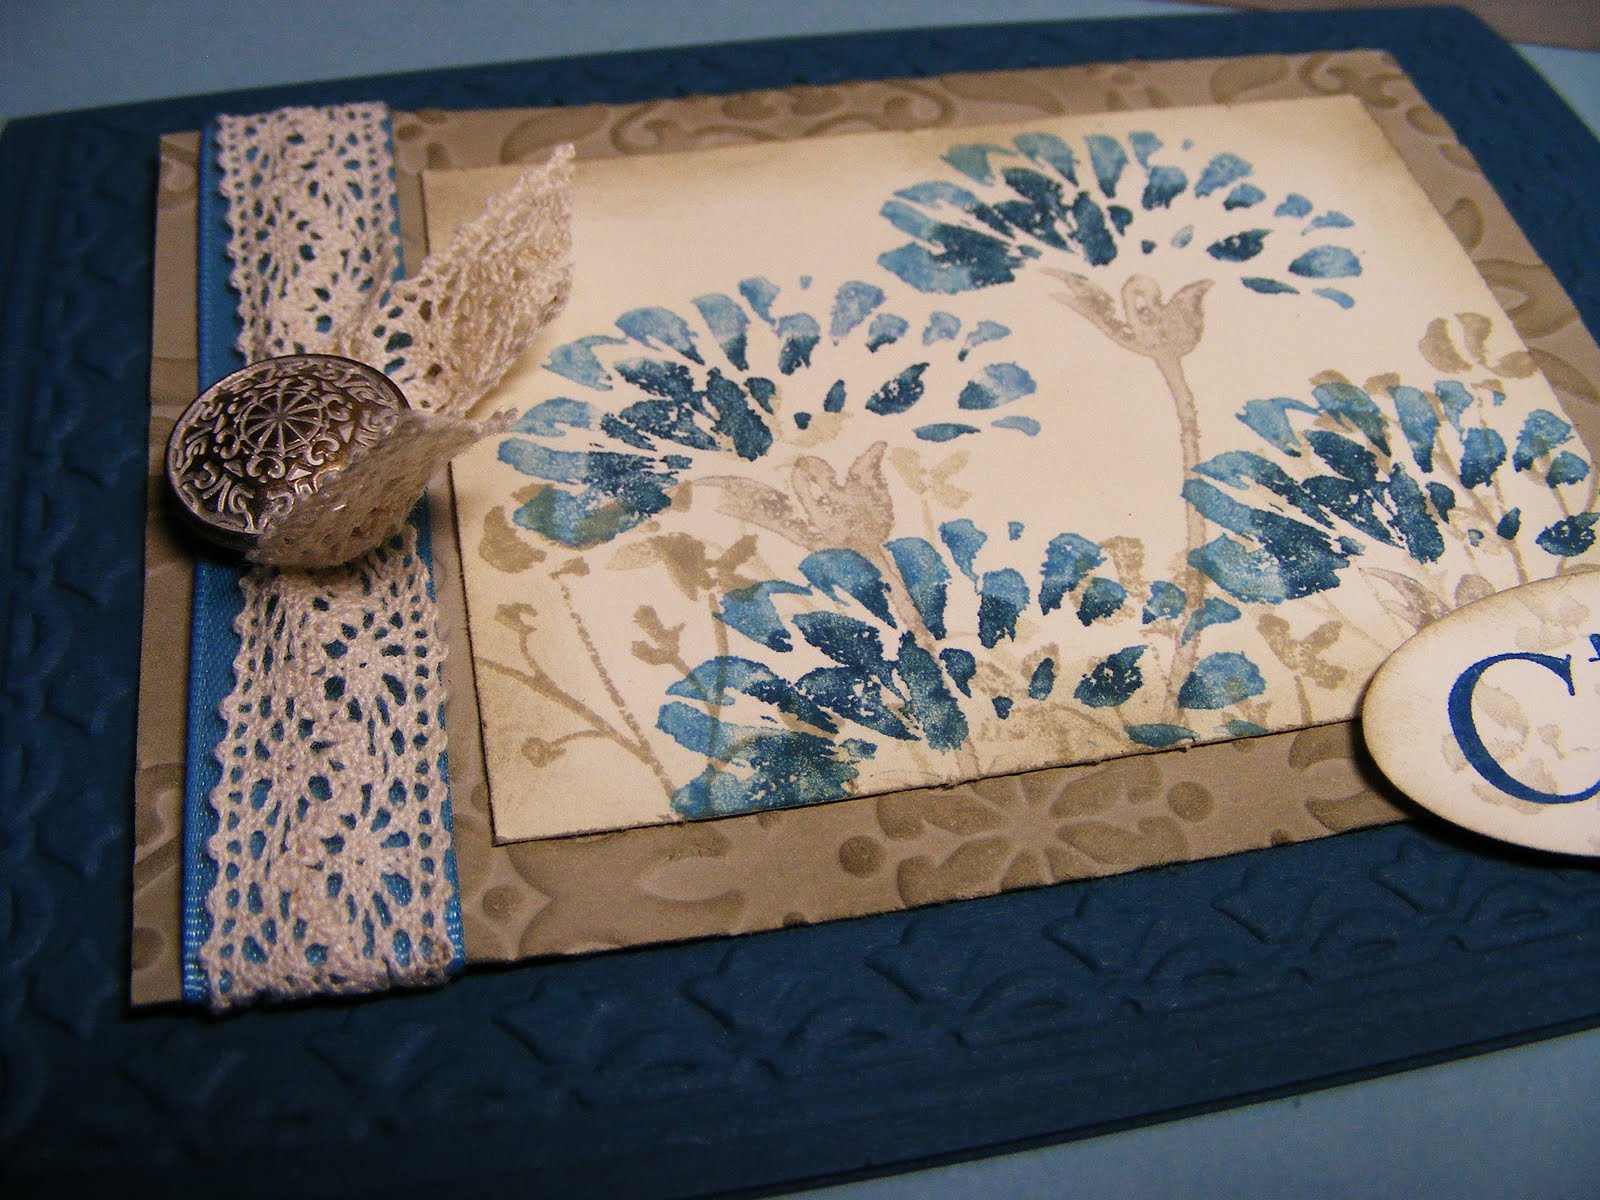
I love the watercolour-look this set gives.

Inside of card...sentiment is from the Thoughts and Prayers set.
Isn't this pretty?  I have to admit this set was another one I wasn't too crazy about when I first saw it; but, having worked with it, I really love the soft, watercolour-like images it gives.  Very delicate and pretty.  So...here's how I made this card:

Starting with a 2 1/2" x 5" strip of very vanilla cardstock, I stamped the branch image randomly around the edges in sahara sand ink.  I stamped both full strength and stamped  off once and twice to give it depth.  I then stamped the flower stem image, which I inked with my sahara sand, pretty in pink and rose red markers, several times.  Finally, I stamped the blossom image twice, inking it with my pretty in pink and rose red markers as well.  I then sponged the edges in sahara sand.  Setting that aside, I embossed a 5 1/4" x 4" piece of sahara sand using my Vintage Wallpaper embossing folder and sponged the edges in sahara sand ink.  I matted that on a 5 3/8" x 4 1/8" piece of rose red cardstock.  I adhered my stamped piece to the embossed sahara sand layer using SNAIL.  I then stamped the sentiment in rose red on a scrap of very vanilla and punched it out with my large oval punch.  I stamped the branch image, second generation, in sahara sand and sponged the edges of the oval.  I mounted it to my cardfront using the oval frame from the Hodgepodge Hardware, securing it with brads.  I then tied a piece of rose red seam binding ribbon around the bottom of the cardfront, finishing it with a bow.  I adhered the whole cardfront to a sahara sand card base.  The final touch was the addition of three pearls just above the ribbon. 
For the inside of the card, I stamped the flower stem and the branch in the lower right corner in the same manner I had done on the front of the card.  I then stamped the sentiment, from the Thoughts and Prayers set, in rose red ink on very vanilla cardstock and punched it out with my large oval punch.  I gave it the same treatment I did the sentiment on the front of the card and then adhered it to a scalloped oval I punched in rose red.  The sentiment element was then adhered in the lower right corner using dimensionals.  I will likely send this card to a friend who is battling breast cancer, in the hopes it will brighten her day the way making it did mine!
Related Posts Plugin for WordPress, Blogger...