Showing posts with label Warmth and Wonder stamp set. Show all posts

Thursday, October 3, 2013

...and now for something totally different...

The past couple of days I've posted about my new favourite technique called Bokeh.  As part of the design team over at The Technique Twist I am stretching my creativity and trying all sorts of new things, this technique being one of them.  As I began to experiment with Bokeh, I attempted all sorts of different techniques to achieve the look I wanted before finally settling on the one I've showcased the last two days.  Today I want to show you one of my first attempts with this technique.  It is nothing like the later incarnations you've already seen, but it is kind of cool and I want to show you that there is always a way to salvage a project...even if it doesn't turn out as you had planned!

Holiday card featuring the Warmth and Wonder hostess set.
Ok, so as you can see this attempt at Bokeh is nothing like what I ended up with after much more experimentation, but I want to explain to you what I went through to achieve this look.


I started with a piece of Whisper White card stock and stamped the little snowflake from the Warmth and Wonder hostess set several times in various shades of blue ink.  I wasn't thrilled with that look, so I brayered the entire thing with Coastal Cabana ink.  That still didn't give me the look I wanted, so I spritzed it all with bleach (I had a bleach-filled spritzer still sitting on my desk from a previous technique challenge).  That gave me the speckeled, faded look, which I rather liked; however it also pretty much obliterated my stamped snowflakes, so I stamped a few more and added some extras in Silver Metallic Encore ink.  I finally had some sparkle and shimmer but it wasn't enough so I covered the whole thing with Versamark and heat embossed it with Irridescent Ice embossing powder.  Now it was plenty sparkly but I was missing the circles of light that are so essential to the Bokeh look, so I added some bling with rhinestones! 
Whew...I'm tired just typing everything I did to that poor piece of paper, but I am happy with the end result.  It looks absolutely nothing like I had planned in my mind, but that's the best thing about doing creative work...you just never know where you'll end up!
So, why did I tell you this rather lengthy story?  To encourage you to try new things and not to give up on a project, even if it is nothing like you had planned.  There is no wrong answer when being creative and there are no mistakes...just new looks and different directions!

Tuesday, September 17, 2013

Merry Christmas, Deer

Holiday card featuring the Warmth and Wonder Hostess set with sentiment from Petite Pairs
Do you ever sit down to create something and have an idea in your mind and then end up with something entirely different?  That was the case with this card.  I don't mind the end result, but it certainly isn't what I was going for!  Here is a quick rundown on how I put it together:
  • I embossed the bottom edge of the Soft Suede card base using the Delicate Designs TIEF (127023)
  • The birch paper is from the Thankful Tablescape Simply Created Kit (133463)...love that stuff!
  • The DSP is from the Season of Style 12x12 DSP pack (132340).
  • The deer image is from the Warmth and Wonder Hostess set (131883)and is heat embossed in gold.  The sentiment is stamped in Cherry Cobbler and is from the Petite Pairs set (122497).  The label is die cut using the Deco Labels framelits (130132).
Thanks for checking in...stop by tomorrow for another Faux Patina project!

Tuesday, September 10, 2013

Hostess Greetings

Today I have the third design we made at my Holiday Head Start Stamp-a-Stack last month.  I think this is my favourite of the bunch!

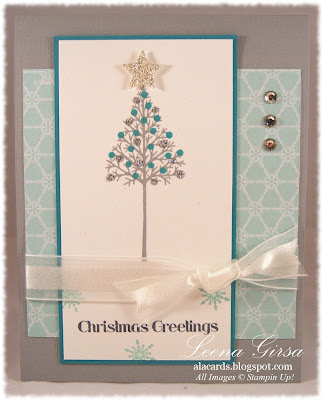
Holiday card featuring the Warmth and Wonder Hostess set (131883) and Winter Frost DSP stack (132183).
I don't often buy Hostess sets because of their limited life-span...it just doesn't make a lot of fiscal sense to invest in something I can't demonstrate after the catalogue expires; however I HAD to have this set!  I just love it...from the Charlie Brown Christmas tree to the font of the sentiments I just saw so many possibilities for it.


So when I was designing the projects for my Stamp-a-Stack I pulled it out and inked it up.

Inside View
Whenever I design projects that are to be made in multiples I try to keep them as simple as possible.  This was no exception.  Just stamps, ink and paper with a little bling and some ribbon for texture.  Here is what I did:
I am really loving all of the the blue and silver products for the Holidays this year.  It is such a lovely change from red and green.  It might take me a little longer this year to tire of making Christmas cards with such lovely products to use!

Related Posts Plugin for WordPress, Blogger...