Happy Tuesday...can you believe we are less than two weeks away from Christmas?? I have to admit I am especially looking forward to the holiday break...we finish this Friday and I have an entire week to enjoy the lead up to Christmas this year. That is something we rarely get and I intend to make the most of it!
Since Christmas is so close, I have decided to shift gears for a couple of weeks back to some fantastic products from the Annual Catalogue that I didn't get a chance to showcase before the Holiday Mini launched. One of the drawbacks of having so many new products launch all at once is that there just isn't time to give them all the love they deserve. So, this week and next, I'll be shining the spotlight on the Annual Catalogue before I start my countdown to Sale-a-bration and the new Mini after Christmas.
This week I am all about the Expressions in Ink Suite, This is, hands down, my favourite suite in the Annual Catalogue and I am only now really having a good play with it; o much so that I am offering a Virtual Zoom class featuring this suite in January. You can learn more about it under the Upcoming Events tab in the right sidebar.
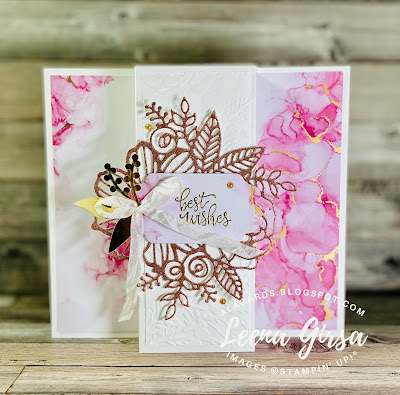
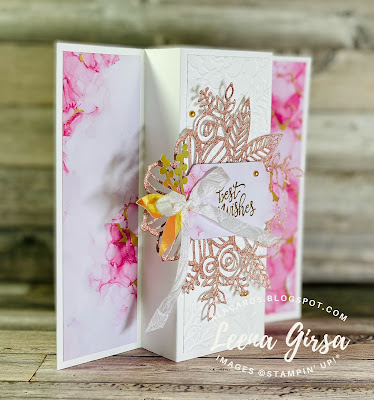
Check out this gorgeous (but super-easy) fun fold...
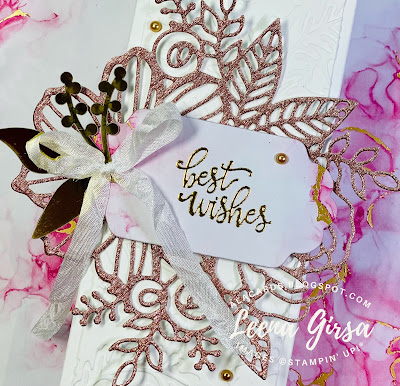
Doesn't that just make your eyes happy?? I don't know what I love more...the beautiful Designer Paper or the FABULOUSLY detailed die-cut!
Or maybe it is the fact that this fun fold is a serious WOW but comes together in about 15 minutes?? Yep...I think that's the part I love most ;)
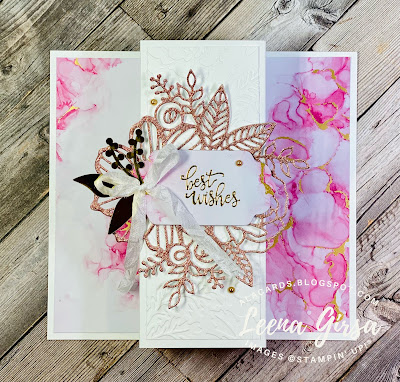
I started with a simple 5-1/2" x 8-1/2" card base and added four score lines...at 2", 3-1/8", 5-3/8" and 6-1/2". That's it...its really THAT easy!
The two side panels are layered with Expressions in Ink DSP that measures 1-3/4" x 5-1/4" and the centre panel is layered with a 2" x 5-1/4" piece of Basic White card stock that I embossed using the Pretty Flowers embossing folder (another easily-missed Annual Catalogue item!). I die-cut the gorgeous focal image from Rose Gold Metallic Specialty paper...that stuff is THE BOMB and another hidden gem in the Annual. The sentiment is heat embossed in gold on a label die-cut from Expressions in Ink Designer paper using the Seasonal Labels dies. I added a gold foil accent from the Expressions in Ink Ephemera pack and some gold metallic pearls. A little bit of crinkled white seam binding completes the bridal vibe of this WOW card.
I demonstrated this card and two others in the video below...check it out:
Thanks so much for stopping in today. Be sure to come back tomorrow...it's blog hoppin' time!
Happy Tuesday! I hope your week is going well. This week is a tough one for me as my hubby and I were supposed to have been in Maui for the Stampin' Up! incentive trip. Sadly, being in Canada and in lockdown, we are unable to travel, so we and the other 40+ Canadian achievers, as well as those from the European and South Pacific, have to watch from afar as US achievers who were able to travel get spoiled without us. It feels a little like Cinderella not being allowed to attend the ball, but my fairy godmother forgot to show up. :(
So, to cheer myself up, I play with paper and ink! This week I am all about the Elegantly Said bundle from the new Annual Catalogue. The entire suite is utterly gorgeous with stunning metallic papers, a lovely stamp set and super-versatile punch. Check out this pretty...
There is so much yummy on this card it's hard to know where to start! I began with an embossed Very Vanilla panel for the background. I used the STUNNING new Pretty Flowers embossing folder. This was the first time I cracked it open and WOW...what a stunner!
The DSP panel is from the Simply Elegant Specialty DSP pack. It comes with a white background, making it perfect for the direct-to-paper technique to add beautiful colour. Here I used Blushing Bride ink and love the look with the gold foil.
The sentiment is heat embossed in gold on a Very Vanilla scalloped rectangle die-cut with the Stitched So Sweetly dies. I added little hints of the paisley image from the stamp set in Blushing Bride in the corners. Behind the sentiment, I added a floral die-cut made with the Artistic Dies. I used the new Rose Gold Specialty paper and wow...I need to order more of that stuff! By way of embellishment, I added some Blushing Bride Metallic Ribbon and a few Gold Metallic Pearls.
On the inside of the Very Vanilla card base I stamped some flowers in Blushing Bride ink. I omitted a sentiment for now, as it could work for a wedding, anniversary or bridal shower.
I'll be demonstrating this card and two others in today's Live @ Five video over on my Facebook Business page at 5 pm ET. I hope you'll join me, as I'll also be giving a sneak peek at the projects for my new online class featuring this suite as well! You can read all about the details of this class on my Upcoming Classes & Events page. If you miss me live you can catch the replay shortly afterwards on my YouTube channel.
Thanks for stopping by this week. Have a great one!
Happy Monday...and happy March! Today is a big day...it is my dad's 75th birthday! I so wish I could be spending it with him, but distance and my teaching gig mean I will have to send my birthday wishes long distance for now. I'm planning to get up to see him over the March break, so I can celebrate his milestone properly.
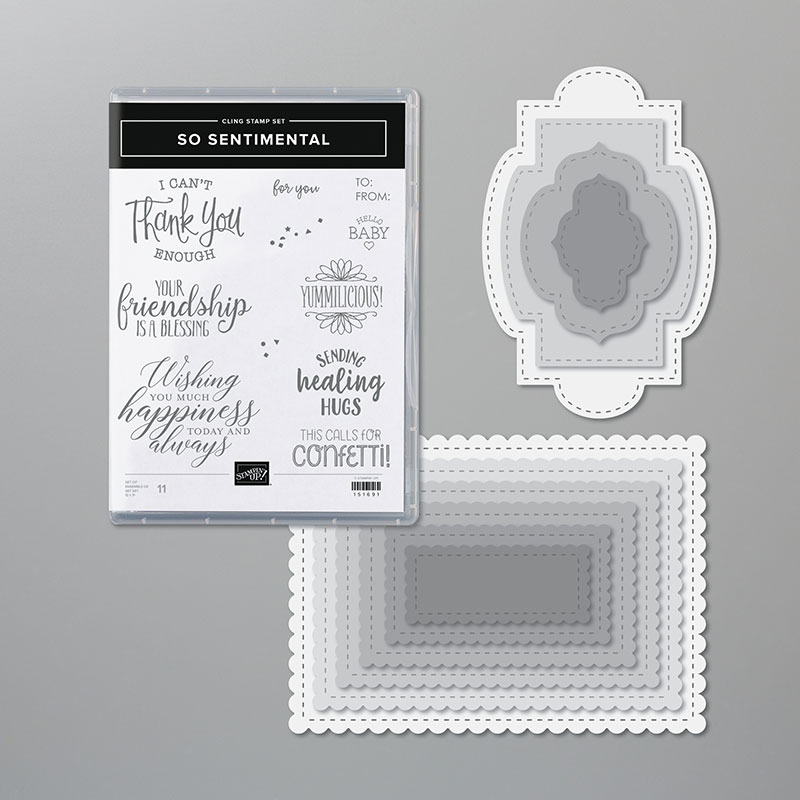
Tomorrow marks the launch of the second release of products for Sale-a-bration. There are FIVE fabulous new freebies to earn, including the GORGEOUS new Flowering Foils Specialty Designer Series Paper. This paper is off-the-charts-stunning and I had so much fun this weekend playing with it that I decided to feature it along with the So Sentimental bundle from the January-June Mini Catalogue. Check out the bundle and the paper below...
So Sentimental Bundle (Item #153828)
Flowering Foils Specialty DSP (Item #152312) - *FREE* with a $60 order!
Now, this photo does NOT do this gorgeous paper justice! Check out the card I made...
Those stunning flowers are fussy-cut from one of the DSP sheets...they are simply beautiful! I used sponge daubers to colour the flowers, using Calypso Coral and Soft Sea Foam inks. The sentiment is from the So Sentimental stamp set and the label is die-cut using the coordinating Stitched So Sweetly dies. I have to say that these dies are fast-becoming my go-to's for quick and pretty labels!
The background is Petal Pink card stock, embossed using the Scripty 3D embossing folder. I added a Pearlized White Doily and some Petal Pink Metallic Edge ribbon, along with a few champagne rhinestones for some bling.
On the inside I added another fussy-cut flower, leaving lots of space for another stamped sentiment or a hand-written note.
Here's my video in which I demonstrate this card and two others featuring the Flower Foils DSP and So Sentimental Bundle...
Thanks for stopping by today...have a spectacular week!