Tuesday, May 18, 2021

Elegantly Said and a new Online Class

 Happy Tuesday! I hope your week is going well. This week is a tough one for me as my hubby and I were supposed to have been in Maui for the Stampin' Up! incentive trip. Sadly, being in Canada and in lockdown, we are unable to travel, so we and the other 40+ Canadian achievers, as well as those from the European and South Pacific, have to watch from afar as US achievers who were able to travel get spoiled without us. It feels a little like Cinderella not being allowed to attend the ball, but my fairy godmother forgot to show up. :(

So, to cheer myself up, I play with paper and ink! This week I am all about the Elegantly Said bundle from the new Annual Catalogue. The entire suite is utterly gorgeous with stunning metallic papers, a lovely stamp set and super-versatile punch. Check out this pretty...


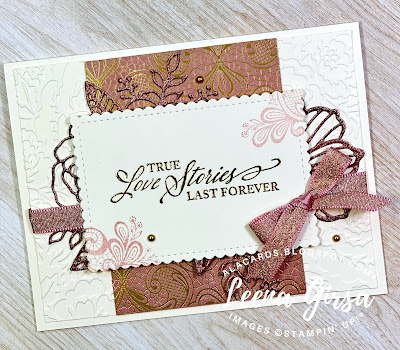
diy wedding card

There is so much yummy on this card it's hard to know where to start! I began with an embossed Very Vanilla panel for the background. I used the STUNNING new Pretty Flowers embossing folder. This was the first time I cracked it open and WOW...what a stunner!

The DSP panel is from the Simply Elegant Specialty DSP pack. It comes with a white background, making it perfect for the direct-to-paper technique to add beautiful colour. Here I used Blushing Bride ink and love the look with the gold foil. 

diy wedding anniversary card

The sentiment is heat embossed in gold on a Very Vanilla scalloped rectangle die-cut with the Stitched So Sweetly dies. I added little hints of the paisley image from the stamp set in Blushing Bride in the corners. Behind the sentiment, I added a floral die-cut made with the Artistic Dies. I used the new Rose Gold Specialty paper and wow...I need to order more of that stuff! By way of embellishment, I added some Blushing Bride Metallic Ribbon and a few Gold Metallic Pearls.

diy wedding anniversary card

On the inside of the Very Vanilla card base I stamped some flowers in Blushing Bride ink. I omitted a sentiment for now, as it could work for a wedding, anniversary or bridal shower.

I'll be demonstrating this card and two others in today's Live @ Five video over on my Facebook Business page at 5 pm ET. I hope you'll join me, as I'll also be giving a sneak peek at the projects for my new online class featuring this suite as well! You can read all about the details of this class on my Upcoming Classes & Events page. If you miss me live you can catch the replay shortly afterwards on my YouTube channel.

Thanks for stopping by this week. Have a great one!
 
diy wedding anniversary card


Product List

Saturday, May 15, 2021

Pansy Petals & a Blog Hop

 Happy Saturday! I hope the weather is a stunning where you are as it is here. FINALLY it looks like spring is truly here to stay and I can start planting my garden and enjoying the outdoors! This is the week I should have been in Maui for the Stampin' Up! incentive trip. Actually, it was supposed to have been two trips...the postponed one from last summer and this year's Elite trip. I was so excited to be able to take my hubby to paradise to celebrate both of our 50th birthdays (his was in November, mine is coming in June). Sadly, Covid had other plans and we aren't able to participate in the trip, as we are still in lockdown here in Ontario. It is so disappointing to miss two hard-earned incentive trips, especially after a year of lockdowns and hybrid teaching. The nice weather sure helps, but I have to admit I'd rather be seeing palm trees outside my window than my neighbor's yard!

But, being home means I am able to participate in this month's Stamping Symphony team Blog Hop! This month we are all about the new catalogue and, since I have been all about pansies this week, I thought I would share a project that we'll be making at my Virtual Catalogue Launch and Bingo event this evening...


pansy patch

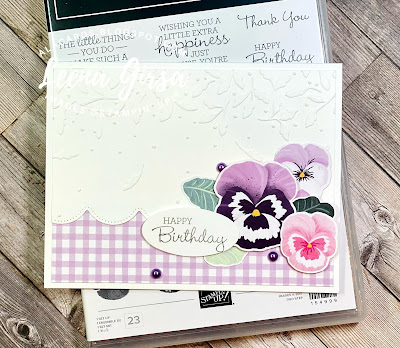
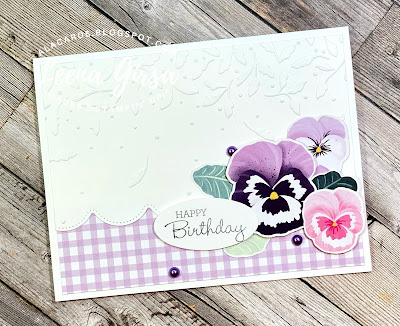
Now, one of the challenges when planning a virtual event like this is designing cards that can be made with limited supplies on-hand, as each guest has varying levels of stamping resources. So this card features die-cut blooms from the Pansy Petals Designer Paper pack, some pretty embossing and a stamped sentiment. That way, my guests can simply choose a sentiment from their stash, stamp in a neutral ink and assemble their cards. While it doesn't really showcase the stamp set, it sure does showcase other pretty products. 

I used the Meadow Moments embossing folder to emboss the Basic White background panel and die-cut the edge using the Scalloped Contours dies. I love the way the gingham DSP pattern from the Pansy Petals pack peeks out and grounds the design. The sentiment I used is from the Pansy Patch stamp set and is stamped in Basic Gray ink, but any neutral would work. The oval is punched using the Double Oval punch. I added some Pastel Pearls for a bit of shimmer.


pansy patch

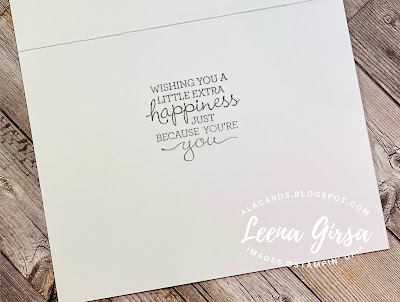
On the inside I stamped another sentiment from the Pansy Patch stamp set in Basic Gray ink. 

pansy patch

While designing cards this way means lots more prep work for me with all of the die-cutting and embossing, it is worth the effort to allow my guests to get their hands on new product and see first-hand just how beautiful they are! I hope my guests this evening enjoy putting this card together.

Now before I say farewell, a reminder to check out the next blog in our hop. 


Thanks for stopping by today. Have a super weekend!

pansy patch


Product List

Monday, May 10, 2021

A Pansy Petals Fun Fold

Happy Tuesday! I hope you are having a good week thus far. Here we are still in the thick of our third lockdown in a year, but there is hope! Cases are starting to come down and I was just able to pre-register my 14-year old for his first vaccine shot. Here's hoping that summer will bring bright days and a return to semi-normal!

I have been having so much fun playing with my new products from the 2021-22 Annual Catalogue. One of my favourite, by far, as been the Pansy Petals suite. Not only am I a sucker for pansies, but the Designer Paper uses ALL of the new In-colors in it! I just had to feature it this week, not only here on my blog, but also in this week's Facebook Live @ Five. One of the cards I'll be demonstrating is this easy fun fold...

w fold card

The surprise is when the card is opened to reveal this fun pop-out feature.


w fold card

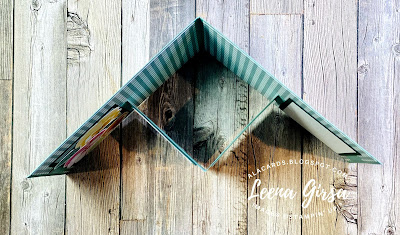
Here's the overhead view...

w fold card


See what I mean about the gorgeous DSP?? This card is all about the paper! The only stamping is the sentiments which are from the Pansy Patch stamp set. The individual pansies and leaves are die-cut from the DSP using the Pansy Dies. I actually took the time to cut out several pages of pansies and leaves and now have an awesome stash of ready-to-go elements to use on quick projects. Aren't those images just beautiful??


w fold card

I used more of the die-cut pansies and leaves on the inside panels The cool thing about this fold is that you can make it as simple or complicated as you'd like. Instead of using stamped or die-cut images, simple DSP patterns will also work on each panel. The same goes for the DSP liner on the inside of the card...completely optional, but a great way to showcase our beautiful papers!


w fold card


w fold card

w fold card

For the complete how-to on this card, check out my video below. All measurements are included in the video description:


Thanks so much for stopping by this week. I hope you have a great one! Be sure to swing by on Sunday for our monthly Stamping Symphony Blog Hop!


Product List
Related Posts Plugin for WordPress, Blogger...