 |
| Thank you card featuring the Established Elegance stamp set with sentiment from the Vintage Verses Sale-a-bration set. |

Sharing my love of all things paper.
Showing posts with label Established Elegance stamp set. Show all posts
Showing posts with label Established Elegance stamp set. Show all posts
Friday, March 15, 2013
Double Embossed Thanks
Last night my monthly techniques group met. We always have great fun crafting together and learning new things to incorporate in our own creations. One of the techniques covered last night was Double Embossing. Have a look at this card we made:
I love this technique...especially for creating fantastic backgrounds on Vintage-style designs. Here I used pewter embossing powder with First Edition DSP and the Vintage Wallpaper TIEF. To achieve this look simply apply Versamark all over the SMOOTH side of the embossing folder. Place the paper in folder with the desired pattern face-down against the inked side of the folder. Run it through the Big Shot and remove the embossed paper. Then sprinkle embossing powder all over the embossed paper, shake off the excess and heat. The result is stunning! The rest of the card is simply a collage of stamped images from the Established Elegance stamp set that I stamped on a label cut with my Window Frames Collection Framelits. I used Basic Black, Cherry Cobbler and Basic Gray ink to stamp the images. I added a little paper-pierced detail around the label using my Occasions Paper Piercing Pack (still available!). I also heat embossed the seal in the upper left of the focal image using pewter embossing powder. The sentiment is also heat embossed in petwer on black card stock. I added a pop of colour with some Cherry Cobbler seam binding ribbon and a silver Basic Designer button. Lots of shine on this card...my heat tool got a serious workout...but it is so worth the effort!
Wednesday, May 2, 2012
Farewell Finial Press
I have to say that when I saw the Finial Press Textured Impressions folder on the retiring list I thought it must have been a typo. I couldn't imagine that it could possibly be leaving us, but alas, it is true. As of the end of May one of my most favourite embossing folders will go away (~sob~).
In honour of it's retirement I created this card that uses the Double Embossing technique. Have a look...
I have to say that I really love doing vintage-style cards. They are so easy to pull together and such fun to distress and sponge. This one really is made by the cool background. Here is a quick how-to for this technique.
Starting with the embossing folder of your choice, apply Versamark ink all over the smooth side (non-bumpy side) of the folder. Insert DSP or card stock into the folder and run it through the Big Shot with usual sandwich. Remove the embossed paper and pour embossing powder all over the raised pattern. The powder will stick to the Versamark, leaving the raised pattern free from powder. Heat the powder until it melts and takes on that beautiful shine. If desired, sponge ink over the raised pattern to accentuate the pattern (I didn't do that on this card because I wanted the newsprint text to show up). The rest of this card is just about distressing and sponging. Such a fun and easy card to put together. If you haven't tried a vintage-style card, what are you waiting for? It is easier than it looks...and tons of fun!
On another note...in case you missed it, yesterday I told you about some exciting Blog Candy I am giving away this week. In honour of my Guest Designer gig over at Craft Project Central, I am giving away a free 1 month subscription to one of my lucky blog readers. To enter, just leave a comment on any (or every!) post between May 1st and May 8th. The more you comment the more entries you'll have! I will announce the winner on May 9th and you'll have the rest of the month to peruse this month's great projects over at CPC. Be sure to stop by here tomorrow...I'll have another of this month's projects to show you...
In honour of it's retirement I created this card that uses the Double Embossing technique. Have a look...
 | ||
| Pretty Thank You card featuring the Double Embossing technique and the Creative Elements and Established Elegance stamp sets. Sentiment is from Rue des Fleurs. |
Starting with the embossing folder of your choice, apply Versamark ink all over the smooth side (non-bumpy side) of the folder. Insert DSP or card stock into the folder and run it through the Big Shot with usual sandwich. Remove the embossed paper and pour embossing powder all over the raised pattern. The powder will stick to the Versamark, leaving the raised pattern free from powder. Heat the powder until it melts and takes on that beautiful shine. If desired, sponge ink over the raised pattern to accentuate the pattern (I didn't do that on this card because I wanted the newsprint text to show up). The rest of this card is just about distressing and sponging. Such a fun and easy card to put together. If you haven't tried a vintage-style card, what are you waiting for? It is easier than it looks...and tons of fun!
On another note...in case you missed it, yesterday I told you about some exciting Blog Candy I am giving away this week. In honour of my Guest Designer gig over at Craft Project Central, I am giving away a free 1 month subscription to one of my lucky blog readers. To enter, just leave a comment on any (or every!) post between May 1st and May 8th. The more you comment the more entries you'll have! I will announce the winner on May 9th and you'll have the rest of the month to peruse this month's great projects over at CPC. Be sure to stop by here tomorrow...I'll have another of this month's projects to show you...
Sunday, July 31, 2011
Playing with new toys...
...and getting rid of old ones! You may have noticed the new tab at the top of this page that says "Retired Stamp Yard Sale". I need to get rid of more of my retired stamps, so I've posted them for sale on my blog. Check out the list and if there is something you're interested in, make me an offer. A paypal account is needed to complete the sale.
Now on to today's post! I've been playing with the new Established Elegance set and came up with this card...see what you think. It is based on this week's sketch at Stamping 411. Here is the sketch:

...and here is my card:
I took a few liberties with the sketch, rotating it and moving the three buttons from the edge and onto the focal image. The colour scheme was inspired by the Timeless Portrait Suite. I just substituted the river rock for sahara sand on this card. I really love the way the island indigo just makes everything pop. Here is how I put this together:
Starting with a piece of very vanilla cardstock, I ran it through my Big Shot with the Top Note die. I also took a piece of island indigo cardstock and ran it through with the scalloped square die and I ran a sahara sand cardbase through with my Vintage Wallpaper embossing folder. Now that the Big Shot work was done, I set to stamping! Laying the scalloped square on my card, I decided how much I wanted to offset it and trimmed it accordingly. I then layered the top note diecut on top of the square and trimmed it to size as well. Taking the trimmed top note, I stamped the various images in basic black, cherry cobbler and island indigo ink, stamping off some images to give depth and interest to my collage. Then I sponged the whole thing using the tea stain ink from my distressing kit. Setting this aside, I took my scalloped square and distressed it using my bone folder to break down the cardstock. I adhered my stamped top note to the scalloped square, ensuring the left edges were aligned. I then took scraps of black striped ribbon and Chantilly lace trim, layered them and adhered them to the right edge of my focal piece. I took a piece of cherry cobbler seam binding, crumpled it and then tied it into a bow using an antique brad and adhered it to the upper left corner of my focal piece. Taking my embossed card base, I sponged the edges in sahara sand ink and then adhered the focal image along the left edge. The final touches were a bit of Timeless portrait fabric gathered on a safety pin from the vintage trinkets and three little buttons that I had sitting around the house.
Gotta love vintage...so easy to put a bunch of elements together and make them work!
Now on to today's post! I've been playing with the new Established Elegance set and came up with this card...see what you think. It is based on this week's sketch at Stamping 411. Here is the sketch:

...and here is my card:
 |
| Card for SSC214 using Established Elegance stamp set. |
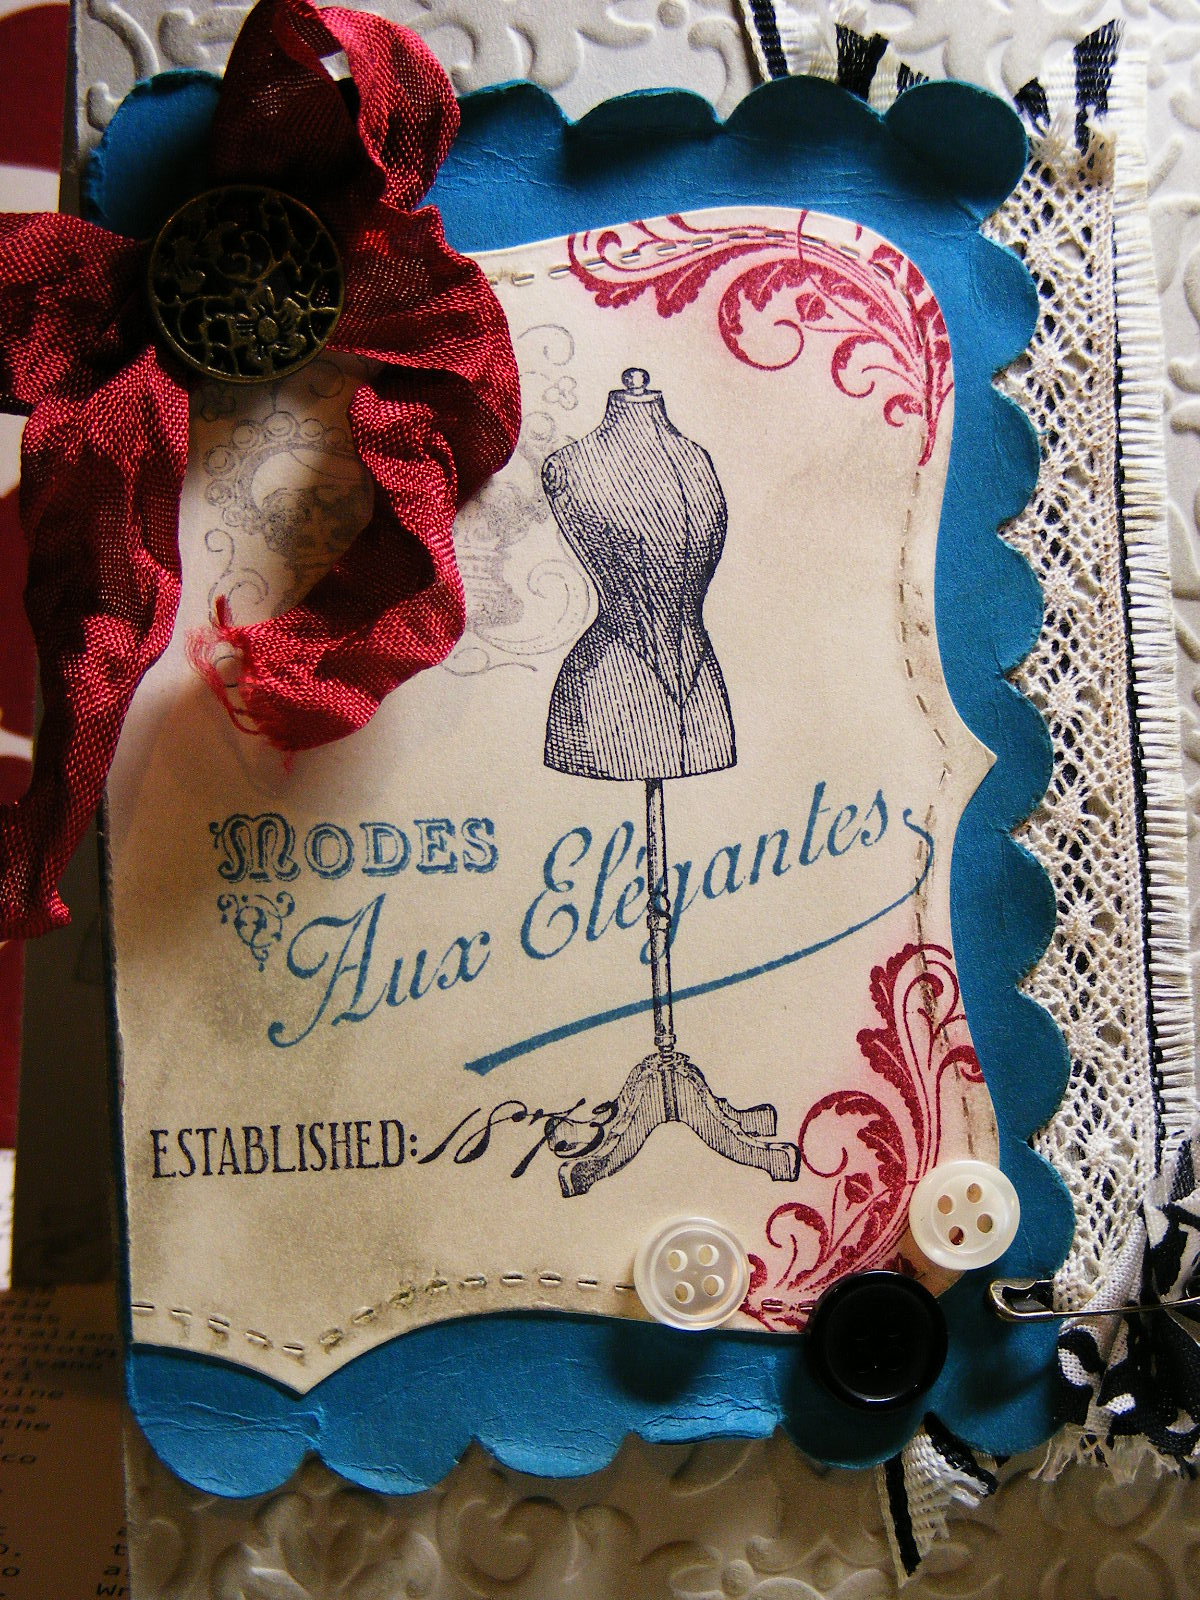 |
| Close up of images |
Starting with a piece of very vanilla cardstock, I ran it through my Big Shot with the Top Note die. I also took a piece of island indigo cardstock and ran it through with the scalloped square die and I ran a sahara sand cardbase through with my Vintage Wallpaper embossing folder. Now that the Big Shot work was done, I set to stamping! Laying the scalloped square on my card, I decided how much I wanted to offset it and trimmed it accordingly. I then layered the top note diecut on top of the square and trimmed it to size as well. Taking the trimmed top note, I stamped the various images in basic black, cherry cobbler and island indigo ink, stamping off some images to give depth and interest to my collage. Then I sponged the whole thing using the tea stain ink from my distressing kit. Setting this aside, I took my scalloped square and distressed it using my bone folder to break down the cardstock. I adhered my stamped top note to the scalloped square, ensuring the left edges were aligned. I then took scraps of black striped ribbon and Chantilly lace trim, layered them and adhered them to the right edge of my focal piece. I took a piece of cherry cobbler seam binding, crumpled it and then tied it into a bow using an antique brad and adhered it to the upper left corner of my focal piece. Taking my embossed card base, I sponged the edges in sahara sand ink and then adhered the focal image along the left edge. The final touches were a bit of Timeless portrait fabric gathered on a safety pin from the vintage trinkets and three little buttons that I had sitting around the house.
Gotta love vintage...so easy to put a bunch of elements together and make them work!
Subscribe to:
Posts (Atom)