Showing posts with label Owl punch. Show all posts

Tuesday, July 14, 2015

It's Kid's Week!

I have found myself making lots of kid-friendly cards lately for various events my son has been invited to.  So, I'm declaring this to be Kid's Week here at A La Cards :)
Today I have a birthday card I made for a Lego-themed birthday party Max went to last weekend.

Lego-themed birthday card featuring the Hip Hip Hooray Stamp set (retired)
To create the Lego blocks I cut 1" x 2" rectangles (larger blocks) and punched 1" squares (smaller blocks) from various colours of card stock.  I used Real Red, Crushed Curry, Cucumber Crush and Pacific Point.  The bumps on the blocks were punched with the middle-sized circle on the Owl Builder punch.  Every piece was sponged using ink of the same colour to give depth and dimension. I also popped each circle up with trimmed bits of Dimensionals to make them even more life-like.

The final touch on each block was to add the little highlight using the white gel pen...it's amazing what a difference that little touch makes!  The sentiment is from the recently retired Hip Hip Hooray Card Kit.  I inked the stamp using Real Red, Pacific Point, Crushed Curry and Cucumber Crush Stampin' Write markers and die-cut the stamped image using the Squares Collection Framelits.  The blocks are arranged on a piece of Basic Black card stock which is then mounted on a piece of thick Whisper White card stock.

Now, here are this week's Bonus Weekly Deals.  Remember that there are limited quantities of each item available at the sale price.  Once they are gone, the item returns to it's regular price.

Calypso Coral Thick Baker’s Twine by Stampin' Up!
Calypso Coral Thick Baker’S Twine
Price: $4.50  
Sale: $3.38
Cherry Cobbler Thick Baker’s Twine by Stampin' Up!
Cherry Cobbler Thick Baker’S Twine
Price: $4.50  
Sale: $3.38
Color Me Irresistible Specialty Designer Series Paper by Stampin' Up!
Color Me Irresistible Specialty Designer Series Paper
Price: $16.00  
Sale: $12.00
Everyday Chic Designer Washi Tape by Stampin' Up!
Everyday Chic Designer Washi Tape
Price: $10.00 
Sale:  $7.50
Gift Box Punch Board by Stampin' Up!
Gift Box Punch Board
Price: $25.00  
Sale: $17.50
Go Wild Designer Series Paper Stack by Stampin' Up!
Go Wild Designer Series Paper Stack
Price: $10.00  
Sale: $7.50
Handpicked Framelits Dies by Stampin' Up!
Handpicked Framelits Dies
Price: $31.00  
Sale: $23.25
Metal Rimmed Pearls  by Stampin' Up!
Metal Rimmed Pearls
Price: $6.25  
Sale: $4.38
Metallics Sequin Assortment  by Stampin' Up!
Metallics Sequin Assortment
Price: $6.25  
Sale: $4.38
Pretty Petals Designer Series Paper Stack  by Stampin' Up!
Pretty Petals Designer Series Paper Stack
Price: $10.00  
Sale: $7.00

Tuesday, April 8, 2014

Whew! What a weekend!

Well, I survived my crazy weekend!  It was my son's 7th birthday and we held his party on Saturday.  It was, of course, a Minion theme, so I had to come up with a Minion birthday card to match.  I found a cute one on Pinterest designed by Paula Dobson, so I pretty much CASE'd it because I didn't have much time to get overly creative.  Paula didn't provide details about how to make her version, so it took some trial and error to figure it out.  Here is what I came up with:

Punch Art Minion birthday card featuring the Just Sayin' stamp set.
Cute, huh?  The only thing I wasn't thrilled about was the hair...not very Minion-esque.  Too much hair...as my son pointed out!  If I did this one again I would definitely do the hair differently.  In case you ever find yourself in need of a Minion card, here is a list of the the punches I used:

  • Body:  3rd smallest die from the Window Frames Collection Framelits cut from Daffodil Delight card stock with the left and right "bumps" trimmed off.  Sponge edges with Crushed Curry ink.
  • Overalls:  same die cut as above cut from Midnight Muse Core'dinations card stock.  Trim off the bumps as above and also cut in half.  Then insert each side into the hexagon punch about 1/8" and punch the "bib" of the overalls.
    • Straps:  slot punch (retired) If you don't have this punch you could hand-cut small strips
    • Pocket:  Banner punch reinserted at the points and punched to get the angled bottom
    • Patch on pocket: I hand-cut a 1/8" square and added the smallest circle from the Owl Builder punch in Midnight Muse to the centre.
    • Sand all pieces of overalls with sanding block and then sponge with Midnight Muse ink
  • Legs:  pennant punch (non-scalloped triangle) - punch two and overlap.
  • Feet:  heart from the Owl Builder punch with one of the bumps trimmed off
  • Hands:  Four-petal flower from the Itty Bitty shapes punch pack, trim one petal off
  • Arms:  Punch a 3/4" circle from Daffodil Delight, then punch around the resulting hole with the 1-1/4" circle to get a ring.  Cut in half and use one half for each arm.  Sponge with Crushed Curry ink.
  • Strap for goggles:  Word Window, trimmed
  • Goggles:  3/4" circle in Silver Foil, largest circle from Owl Builder in white, medium circle from Owl Builder in Chocolate Chip, smallest circle from Owl Builder in black
  • Hair (in case you like this minion's faux-hawk):  ornament from the Merry Minis punch pack, fringed with paper snips.
Here's a better look:


Here are a couple more shots from the big bash on Saturday:

The littlest minion:  my 18-month-old nephew modeling the party hats I made from toy construction hats, fun foam, black pipe cleaners (for the hair!) and card stock. 
My big 7-year-old birthday boy minion, blowing out his candles.
It was a great day...Max said it was his best birthday ever, which is all I needed to hear!  I'm just really glad I have a year to recover before we do it all again!

Friday, September 17, 2010

Spoooky....

I am not big into Halloween.  As the parent of a 3-year-old, I find many Halloween displays are just too scary for him and therefore don't really do much besides taking my son trick-or-treating around our court and carving a pumpkin.  That said, I have seen many cute little ghosts made with the Owl Punch floating around various blogs and websites that were just too adorable to pass up.  So, here is a Halloween card that is WAY out of my confort zone!

Close-up of my punch-art bats.
Close up of my Owl Punch ghost!
This card is really a combination of many tools and techniques!  Here is a list of all the products I used:
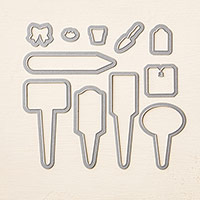
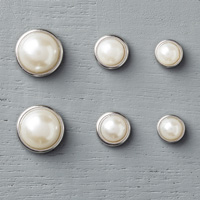
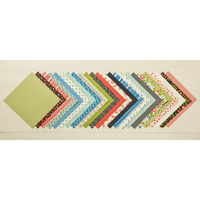
Big Shot with Top Note die, sponges, More Mustard, Cajun Craze, Night of Navy, Early Espresso, Sahara Sand and Basic Black ink, Owl, 1" circle, Scalloped Oval, 1/3/4 circle and Medium Jewelry Tag punches, Lovely as a Tree & Tiny Tags stamp sets, White gel pen, Gold Lamme Smooch accent ink, black hemp twine, black button, Crumb Cake, Early Espresso, Whisper White, Cajun Craze and Basic Black cardstock, Snail adhesive, Glue Dots and Stampin' Dimensionals.

Whew...that list is longer than I thought! I sponged the sky using a 1 3/4" circle mask for the moon and Night of Navy ink.  I then removed the mask and sponged the moon in More Mustard and Cajun Caraze and added a few wispy clouds in Night of Navy.  The ground was sponged in Early Espresso.  I stamped the trees in Basic Black.  the bats were made using the largest circle from the Owl punch for the body, the 1" circle cut in half and then inserted into the scalloped oval punch.  I then trimmed them a bit to make them a little less round on top.  I added the facial detail using Smooch and a white gel pen.  My ghost is the body of the owl (with the feet cut off) turned upside down.  The feet are from the same punch-out but in black.  The eyes and mouth are all circles from the owl punch.  I sponged the edges of the body in Sahara Sand to give it some dimension.  I think you can probably figure out the rest by looking at the pictures.  I had fun with this card and might actually think about doing some little treat bags to hand out on the Big Night.

Tuesday, September 7, 2010

Happy First Day of School!

Well...some people are happy about it anyway...don't get me wrong...I love my job, I just miss the freedom to play with ink and paper that I have in the summer.  During the school year my papercrafting has to take a backseat to reports cards, marking and band practices.  Ah well...just another 10 months to go before I'm free again!
In the meantime, today's post features some cute little projects I made for my department colleagues to welcome them back from summer vacation.

Owl punch pencil holders for my department.
Close up of the cute little owl made with the XL 2-step Owl punch
Note pad and pencil holder for my teaching partner.  The 2 owls represent the stunned looks the two of us will have all day today!
Aren't these just adorable?!?  I LOVE both the Owl punch and the Playdate designer series paper.  The punch is amazingly versatile, especially if you are into creating various punch art.  The variety of shapes it produces are really diverse.  The Playdate paper is just fantastic.  Not only are there cute kid-friendly patterns, but the reverse side of most designs are simple, single-colour patterns.  The red and green in the owls' vests are great examples, as is the background paper in the note pad photos.

I am working on a tutorial for the notepad holder and the pencil holder.  I will post here with a link to the tutorial once I have it finished.  I just couldn't resist posting the photos now...I just love these little owls!
Related Posts Plugin for WordPress, Blogger...