Tuesday, April 28, 2015

Grungy Thanks

Happy Tuesday!  I hope your week is off to a good start.  Today I have another take on this week's sketch from Sunday Stamps.  In case you missed it on Sunday, here is the sketch:


...and here is a completely different take on it:

Thank you card featuring the Gorgeous Grunge and Sassy Salutations stamp sets.
I kind of went a little wild with this one!  I love playing with my Gorgeous Grunge stamp set and once I got started, I just couldn't stop!  I began by stamping the larger splatter in Crushed Curry ink, stamped off once to get a slightly lighter shade.  Then I used Bermuda Bay to add the large spots and finally Memento Tuxedo Black for the smaller spatters.  I added some Washi Tape from the Beach House and Stacked with Love bundles and the Everyday Adventure Project Life Accessory Pack

The sentiment, from the Sassy Salutations set,  is stamped in Memento Tuxedo Black ink.  I added some Baker's Twine in Basic Black, Bermuda Bay and Crushed Curry, as well as some Itty Bitty Accents Epoxy Stickers for texture.

On the inside I stamped more spatters, as I did on the front.  Gotta love getting grungy!

Sunday, April 26, 2015

It's a Sketchy Challenge!

Today marks the 100th edition of Sunday Stamps!  We are celebrating with a fabulous new sketch challenge...check it out:


Here is my project for the Design Team:

Any-occasion card featuring the Regarding Dahlias and Perfect Pennants stamp sets.
This project was inspired by a recent order from a customer.  She ordered several packages of Blushing Bride, Chocolate Chip and Whisper White card stock, which got me to thinking about that yummy colour palette.  So, I decided to give it a go for this week's challenge.  I began by heat embossing the dahlia from the Regarding Dahlias stamp set (this one is on the Retirement List...get it before it's gone) using Blushing Bride embossing powder (this is retiring too!) on a panel of Chocolate Chip card stock.  I then coloured in the entire dahlia image using an aquapainter and Whisper White craft ink.  Once that had dried I went back and added a subtle hint of colour using my Blushing Bride Stampin' Write marker and a blender pen.  I love the soft look this technique produces! 

I die-cut the silver glimmer pennant using the Itty Bitty Banners Framelits, and the Blushing Bride pennant using the Banners Framelits.  The sentiment, from the Perfect Pennants stamp set, is stamped in Chocolate Chip ink and then die-cut using the Banners Framelits.  I added some long-retired Blushing Bride stitched grosgrain ribbon and a few random rhinestones for some added bling.  The final touch was a wee butterfly, punched from vellum with the Bitty Butterfly punch.

On the inside of the card I stamped the dahlia image again, this time using Chocolate Chip ink.  I lightly sponged the image using a dauber and Blushing Bride ink.

We would love to have you join us for our 100th challenge...why not give this sketch a try?  In case you need more inspiration, I'll be back with a couple of other takes on the sketch! 

Friday, April 24, 2015

Birthday Butterflies CASE

Happy Friday!!  This week has been SO long...I couldn't be happier to see it end!  My poor boy has been sick with the stomach flu again and it has been a long haul.  Looking forward to the weekend and some R & R (and time to stamp!). 
Today I have a project I CASE'd at the request of a client who asked me to design projects for her upcoming Ladies Retreat at her church.  She found this project on Pinterest and asked me to make kits for the women on her retreat to make.  The original design is by Carol Payne...I changed the colour scheme slightly to accommodate the inks my client has in her collection...

Birthday card featuring the Gorgeous Grunge stamp set with sentiment from Express Yourself (retired)
I began with a piece of Whisper White card stock on which I stamped the spatter image from the Gorgeous Grunge stamp set using Lost Lagoon ink.  I also stamped the lines in the lower right corner using Lost Lagoon ink.  The sentiment, from the Express Yourself stamp set, is stamped in Soft Suede ink.  The stamped panel is mounted on a piece of Lost Lagoon card stock before being adhered to a Crumb Cake card base. 

The butterflies are punched from vellum using the Elegant Butterfly and the Bitty Butterfly punches.  I also layered the two larger vellum butterflies with smaller ones punched from the Moonlight DSP stack.  I added Linen Thread and some rhinestones for embellishment.

Inside view with sentiment from the Endless Birthday Wishes set.
On the inside I stamped the spatter image again using Lost Lagoon ink.  I added a couple more punched butterflies and the sentiment, from the Endless Birthday Wishes set, in Lost Lagoon ink.

In case you missed it earlier this week, the Retirement List has posted AND the online Clearance Rack was update.  Be sure to check out both this weekend for some great deals!  Have a good one!!

Thursday, April 23, 2015

Butterflies are Back!

In case you missed the news, the Butterfly Thinlits, which have been out-of-stock for ages are FINALLY available for order again.  I, for one, am very excited about this, as they are one of my favourite tools.  What's even better, is that you can get these Thinlit dies until the end of April for 15%!!  Woohoo!!

Today's project is one I made a while back, but haven't posted because of the delay in availability. 

Birthday card featuring the Butterfly Basics stamp set and coordinating Butterflies Thinlit dies.
To create this card, I began with a piece of Very Vanilla card stock, which I stamped using images from the Butterfly Basics stamp set.  My colour palette included Pear Pizzazz, Blushing Bride, Crumb Cake and Metallic Gold.  I layered the stamped panel on a piece of Blushing Bride card stock and then onto a Crumb Cake card base.  The sentiment is stamped in Versamark and heat embossed in gold.  I layered the sentiment panel on a piece of Blushing Bride card stock and highlighted it with half of a Tea Lace Doily.

 The butterfly is die cut using the Butterflies Thinlits from Blushing Bride card stock.  I used the direct-to-paper technique with the metallic gold Encore ink pad to add some shimmer to the die-cut butterfly before adhering it to the front of the card.  I added a rosette, made using Simply Pressed Clay and the Buttons and Blossoms molds (SO sorry to see these are retiring!).

Inside view
On the inside, I stamped more of the images from the Butterfly Basics set, using the same colour palette I did for the front.

Now, in case you missed it, the Retirement List has posted and it features some great deals on retiring products.  Check it out HERE, but hurry...all accessories are available only while supplies last!

Tuesday, April 21, 2015

Time to say Good-bye

This a bittersweet day each year for those of us who love Stampin' Up!  The annual ritual of saying goodbye to beloved products is a difficult one...like losing dear friends...but at the same time it is exciting as we anticipate all of the fabulous new products that will replace them when the new Annual Catalogue goes live in June.  This year is no different.  Some of my go-to favourite products will be going away soon, which makes me very sad.  The good news is that, while supplies last, many of these products are being offered at a discount!  Be sure to click the image below to view the complete list of retiring products and then place your order as soon as possible, so as not to miss out on the items you want.

Click the image to view the complete list of retiring stamps and accessories.

 Now for a new project!  This is one of the make-n-takes we did at my monthly team meeting last week.  It uses the Guy Greetings and Gorgeous Grunge stamp sets:
Father's Day card featuring the Guy Greetings and Gorgeous Grunge stamp sets.

 I began by stamping a Smoky Slate card base with the splatter images from the Gorgeous Grunge stamp set.  I used Basic Gray ink for the larger splatters and Metallic Silver for the smaller ones.  The centre strip is Basic Black card stock that I embossed using the Zig Zag TIEF.  The DSP panel is from the Stacked with  Love pack and is sponged using Bermuda Bay and Smoky Slate ink.  I added three little silver mini brads.  The focal image, from the Guys Greetings stamp set,  is stamped in Basic Black ink, punched with the 1-3/4" circle punch and matted on a 2" circle in silver foil.


The sentiment, which is also from the Guy Greeting set, is stamped in Basic Black ink on a 1/2" strip of Whisper White card stock.  I used the Banner punch to create the pennant end and then wrapped the other end in some Basic Black Baker's Twine.


On the inside I stamped the wrenches again, this time using Smoky Slate ink.  The sentiments are stamped in Basic Black.  I added one more Bermuda Bay splatter, stamping off once before stamping on my panel.

Now, as if the retirement list wasn't enough excitement, here is a new round of Weekly Deals for you!  Sale prices are good until Monday at midnight.

Build a Bouquet Photopolymer Stamp Set by Stampin' Up!
Build A Bouquet Photopolymer Stamp Set
Price: $41.95  
Sale: 31.46
Handpicked Framelits Dies by Stampin' Up!
Handpicked Framelits Dies
Price: $30.95 
Sale:  $23.21
Label Card Thinlits Die
Price: $40.95  
Sale: $20.48
Ornate Tag Topper Punch by Stampin' Up!
Ornate Tag Topper Punch
Price: $31.95 
Sale:  $23.96
So You Photopolymer Stamp Set by Stampin' Up!
So You Photopolymer Stamp Set
Price: $30.95  
Sale: $23.21
Sweet Dreams Designer Buttons by Stampin' Up!
Sweet Dreams Designer Buttons
Price: $7.50 
Sale:  $5.63
Sweet Dreams Designer Series Paper  by Stampin' Up!
Sweet Dreams Designer Series Paper
Price: $13.50  
Sale: $10.13
Sweet Dreams Designer Washi Tape  by Stampin' Up!
Sweet Dreams Designer Washi Tape
Price: $9.95 
Sale:  $7.46

Monday, April 20, 2015

It's Coming...

The new 2015/16 Annual Catalogue is coming, and to make way for all of the fantastic new products it will offer, we must say good-bye to lots of current favourites.  The Retirement List will be released tomorrow and will include all of the products that will be leaving the Stampin' Up! offerings.  Some items listed will be offered at a discount, which means there will be some great deals to be had.  All items listed will be available only while supplies last, so you'll want to order your must-haves early to avoid missing out.

Now for some stamping!  It has been a crazy few weeks around here, which means I haven't had much time to stamp :(  Thankfully, I still have several projects I made a while back that I haven't yet shown you yet, like this one that features the Painted Petals stamp set:

Thank you card featuring the Painted Petals stamp set and coordinating Painted Blooms DSP
My background layer is cut from the Painted Blooms DSP pack...so many gorgeous patterns and colours in that one!  I die cut the focal layer from Whisper White card stock using the Party Pennants Bigz L die.  Using the Painted Petals stamp set, I stamped the stems in Wiild Wasabi ink and the blossoms in Rich Razzleberry.  Then I used a blender pen and some Old Olive ink to add shadows to the stems and leaves.  I  added the darker shadows to the blossoms in the same manner using Blackberry Bliss ink, add added the yellow centres to the flowers using Crushed Curry.


The sentiment is stamped in Rich Razzleberry ink and punched with the 1-3/8" circle punch.  I layered it on a 1-3/4" scalloped circle punched from Wild Wasabi card stock.  I added some Painted Blooms cotton twine in Wild Wasabi and a little flower punched using the Itty Bitty Accents pack from Rich Razzleberry card stock.  A single little pearl adorns the centre of the flower.


On the inside I stamped the stems and flowers again, as I did on the front.  I added the sentiment from the Painted Petals set, stamped in Rich Razzleberry ink.

Be sure to stop by tomorrow to check out the Retirement List and the new Weekly Deals!

Thursday, April 16, 2015

For You Mom

Today I have one of the make-n-takes we did at my monthly team meeting this week.  It also just happens that the Mother's Love stamp set we used is on sale this week as part of the Weekly Deals!  Couldn't have planned that one better if I tried ;)

Mother's Day card featuring the Mother's Love stamp set.
To create this one I stamped the flower image from the Mother's Love stamp set in Versamark ink on Whisper White card stock.  Then I heat embossed in white.  Using sponge daubers, I sponged the flowers in Blushing Bride, the leaves in Pear Pizzazz and the background in Soft Sky ink.  The card front is matted on a piece of Blushing Bride card stock and then adhered to a Sahara Sand card base.


I added half a Tea Lace Doily and then a Flower Medallion punched from Blushing Bride card stock and embossed with the Perfect Polka Dots TIEF.  The sentiment is heat embossed in Blushing Bride and then die-cut using the Circles Collection Framelits. I popped it up on the punched medallion using dimensionals.  I added a small Vintage Faceted button and a bit of Painted Blooms Cotton Twine in Soft Sky.

Inside view with sentiment from the Sweet Laughter stamp set.
On the inside I repeated the same process I did on the front, but only did a couple of flowers.  I stamped the sentiment from the Sweet Laughter stamp set in Blushing Bride ink.
The Mother's Love stamp set is a fabulous deal right now...get it on sale before Monday at midnight!

Tuesday, April 14, 2015

Sheltering Sympathy

Today I have a project that uses one of my favourite stamp sets from the Occasions catalogue...Sheltering Tree:

Sympathy card featuring the Sheltering Tree and Build a Bouquet stamp sets.
This is a quick and easy project that is perfect to mass produce to have sympathy and/or thinking of you cards on-hand.  I began by stamping the woodgrain image from the Build a Bouquet stamp set in Versamark ink on Sahara Sand card stock and then heat embossing the image using white embossing powder.  The embossed panel is adhered to an Early Espresso card stock panel, which is mounted on a Sahara Sand card base..  The tree image, from the Sheltering Tree set, is stamped in Early Espresso ink, as is the sentiment.  The leaves are stamped in Sahara Sand ink, both full strength and stamped off once.


The ribbon I used is the retired 3/8" Natural Trim...love the subtle texture it provides.  I also added two pearls that I coloured using the darkest shade of Crumb Cake Blendabilities (retired).

Now, I neglected to take a photo of the inside of this one, but I did stamp the tree image again on the inside panel and added a sympathy sentiment stamped in Early Espresso.  Another option would be to leave it without a sentiment, making it suitable for just about any occasion.  Nothing like versatility!

Now for this week's AWESOME weekly deals!

Birthday Bash Designer Washi Sheets  by Stampin' Up!
Birthday Bash Designer Washi Sheets
Price: $11.95  
Sale:$8.96
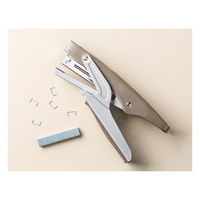
Handheld Stapler by Stampin' Up!
Handheld Stapler
Price: $12.50 
Sale:  $9.38
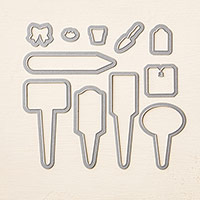
Labels Collection Framelits Die
Price: $32.95 
Sale: $24.71
Mother's Love Photopolymer Stamp Set by Stampin' Up!
Mother's Love Photopolymer Stamp Set
Price: $30.95 
Sale:  $23.21
Pansy Punch
Pansy Punch
Price: $21.95  
Sale: $16.46
Something Borrowed Embellishments by Stampin' Up!
Something Borrowed Embellishments
Price: $8.95 
Sale:  $6.71
Striped Scallop Thinlits Die by Stampin' Up!
Striped Scallop Thinlits Die
Price: $30.95  
Sale: $23.21
Wonderful Wreath Framelits Dies by Stampin' Up!
Wonderful Wreath Framelits Dies
Price: $30.95 
Sale: $23.21

Sunday, April 12, 2015

Spring has Sprung at Sunday Stamps!

Happy Sunday...and happy spring!  The weather here is FINALLY warming up and there is a definite feeling of spring in the air.  The new colour challenge over at Sunday Stamps is perfect to welcome the new season...

Here is my Design Team project:

Thank you card featuring the Butterflies Thinlits and the Embossed Embossing technique, with sentiment from Itty Bitty Banners
I actually designed this project to do double duty!  Not only is it for this week's challenge, we also made it at my montly techniques class last week.  I used the Embossed Embossing technique to create the background.  I embossed a piece of Whisper White card stock using the Spring Flowers TIEF.  Then, after rubbing the Embossing Buddy all over it, I inked a brayer with Versamark and lightly ran it over the raised pattern.  I sprinkled it with Blushing Bride embossing powder, shook off the excess and then heated it.  I love the result!

The butterflies are die cut from Wisteria Wonder and Blushing Bride card stock using the Butterflies Thinlits.  The little vines are punched from Pear Pizzazz card stock using the Bird Builder punch.  I anchored them to the design using half of a Tea Lace doily.  The sentiment is from the Itty Bitty Banners set and is stamped in Wisteria Wonder ink and then die cut using the Bitty Banners Framelits.  I added a Vintage Faceted button and a bit of Wisteria Wonder (retired) baker's twine.  The card front is matted on a piece of Wisteria Wonder card stock and adhered to a Pear Pizzazz card base.

Inside view with sentiment from Painted Petals.
On the inside I stamped the large and small floral butterflies from the Papillon Potpourri set in Blushing Bride and Wisteria Wonder ink, respectively.  The sentiment is from the Painted Petals set and is stamped in Pear Pizzazz ink.
Be sure to check out the rest of the design team's sample projects and the new, fresh look over at Sunday Stamps.  Then give this challenge a go and play along!

Thursday, April 9, 2015

Faux Patina'd Hello

Tonight I am holding my monthly techniques class where I am featuring two techniques to help get more from our Textured Impressions Embossing Folders.  One of the techniques I'll be teaching is the Faux Patina technique.  Here is the project we'll be doing:

Thinking of you card featuring the Tap, Tap, Tap stamp set and using the Faux Patina technique
I wanted to include a masculine card in this month's class and the Faux Patina technique is perfect for a man-card!  I began by inking the Alphabet Press TIEF with Crumb Cake ink and running it through the Big Shot with a piece of Whisper White card stock.  Then I sponged the entire piece with Island Indigo ink, followed by Always Artichoke and then Early Espresso.  I ran the embossing buddy all over it and then lightly ran the Versamark ink pad across the raised letterining.  I sprinkled on some gold embossing powder and heated.  The result is a WOW everytime! 


I layered the embossed panel on a Crumb Cake card base that I stamped all over with the image from the Tap, Tap, Tap stamp set and lightly sponged with Crumb Cake ink.  The DSP is from the Typeset pack and is punched with the Spiral Border punch and distressed with Crumb Cake ink.  The typewriter image is heat embossed in gold on Very Vanilla card stock and then lightly sponged with Sahra Sand ink.  The sentiment is stamped in Basic Black.  I added a mini library clip (retired) and some Linen Thread by way of embellishment...suitably manly, right?

On the inside I stamped and other sentiment from the Tap, Tap, Tap set in Basic Black and the border image in Crumb Cake ink.  If you haven't yet tried this technique I highly recommend it...just beware...it is a wee bit addictive!

Don't forget...the FREE SHIPPING promotion expires tomorrow at midnight.  Don't miss out on the savings!!

Tuesday, April 7, 2015

Celebrate Embossed Embossing

Happy Tuesday!  In case you missed it, we are now into Day Two of five days of FREE shipping on all orders...with no minimum purchase.  Be sure to take advantage of this offer by the end of the week, or you'll miss out!

Today I have one of the projects we'll be doing at my monthly techniques class this week.  It uses the Embossed Embossing technique...

Birthday card featuring the Embossed Embossing technique and the Celebrate Today stamp set.
I have to admit, I'm a little bit addicted to this technique!  The results are so cool and differ, depending on the embossing folder one uses.  For this card I used the Decorative Dots TIEF and gold embossing powder on Blackberry Bliss card stock.  I love that the result looks like confetti.  I matted the embossed panel on a piece of gold foil card stock and then onto a Whisper White card base.  The balloons are heat embossed in gold on vellum using various images from the Celebrate Today stamp set. I die cut the balloons using the Balloon Framelits.  I added some gold baker's twine and gold sequin trim for more sparkle.

On the inside I stamped two sentiments from the Celebrate today set.  One in Blackberry Bliss ink and the other in Versamark, which I then heat embossed in gold.  I added a few more gold sequins because one can never have too much sparkle on one's birthday!


Now here are this week's Weekly Deals...some great deals on awesome products...and FREE shipping!  It doesn't get better than this!

1-1/4 Burlap Ribbon
1-1/4" Burlap Ribbon
Price: $9.95  
Sale: $7.46
Brights Designer Buttons
Price: $10.95 
Sale:  $8.21
Daffodil Delight 1/2 Ribbon Seam Binding
Daffodil Delight 1/2" Ribbon Seam Binding
Price: $9.50 
Sale: $7.13
Flower Fair Framelits Die by Stampin' Up!
Flower Fair Framelits Die
Price: $30.95  
Sale: $23.21
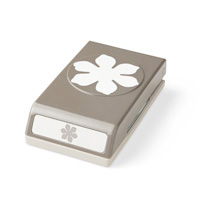
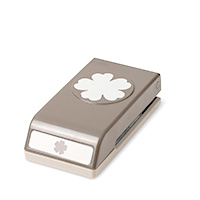
Fun Flower Punch
Fun Flower Punch
Price: $22.95  
Sale: $17.21
Hearts Collection Framelits Die
Price: $32.95  
Sale: $24.71
Metallic Silver Encore Pad
Price: $12.95  
Sale: $9.71
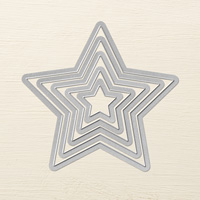
Stars Framelits Dies
Price: $32.95  
Sale: $24.71

Related Posts Plugin for WordPress, Blogger...