Wednesday, June 22, 2011

Clean and Simple for the Paper Players

If you've been following my blog for a while, you likely know that I don't do simple very well.  I find it very difficult to create a clean and simple card without layers and embellishments.  This week's challenge over at the Paper Players was REALLY tough for me, but I wanted to give it a go and come up with another make-n-take for my hostess appreciation night on Friday.  So here is the sketch:
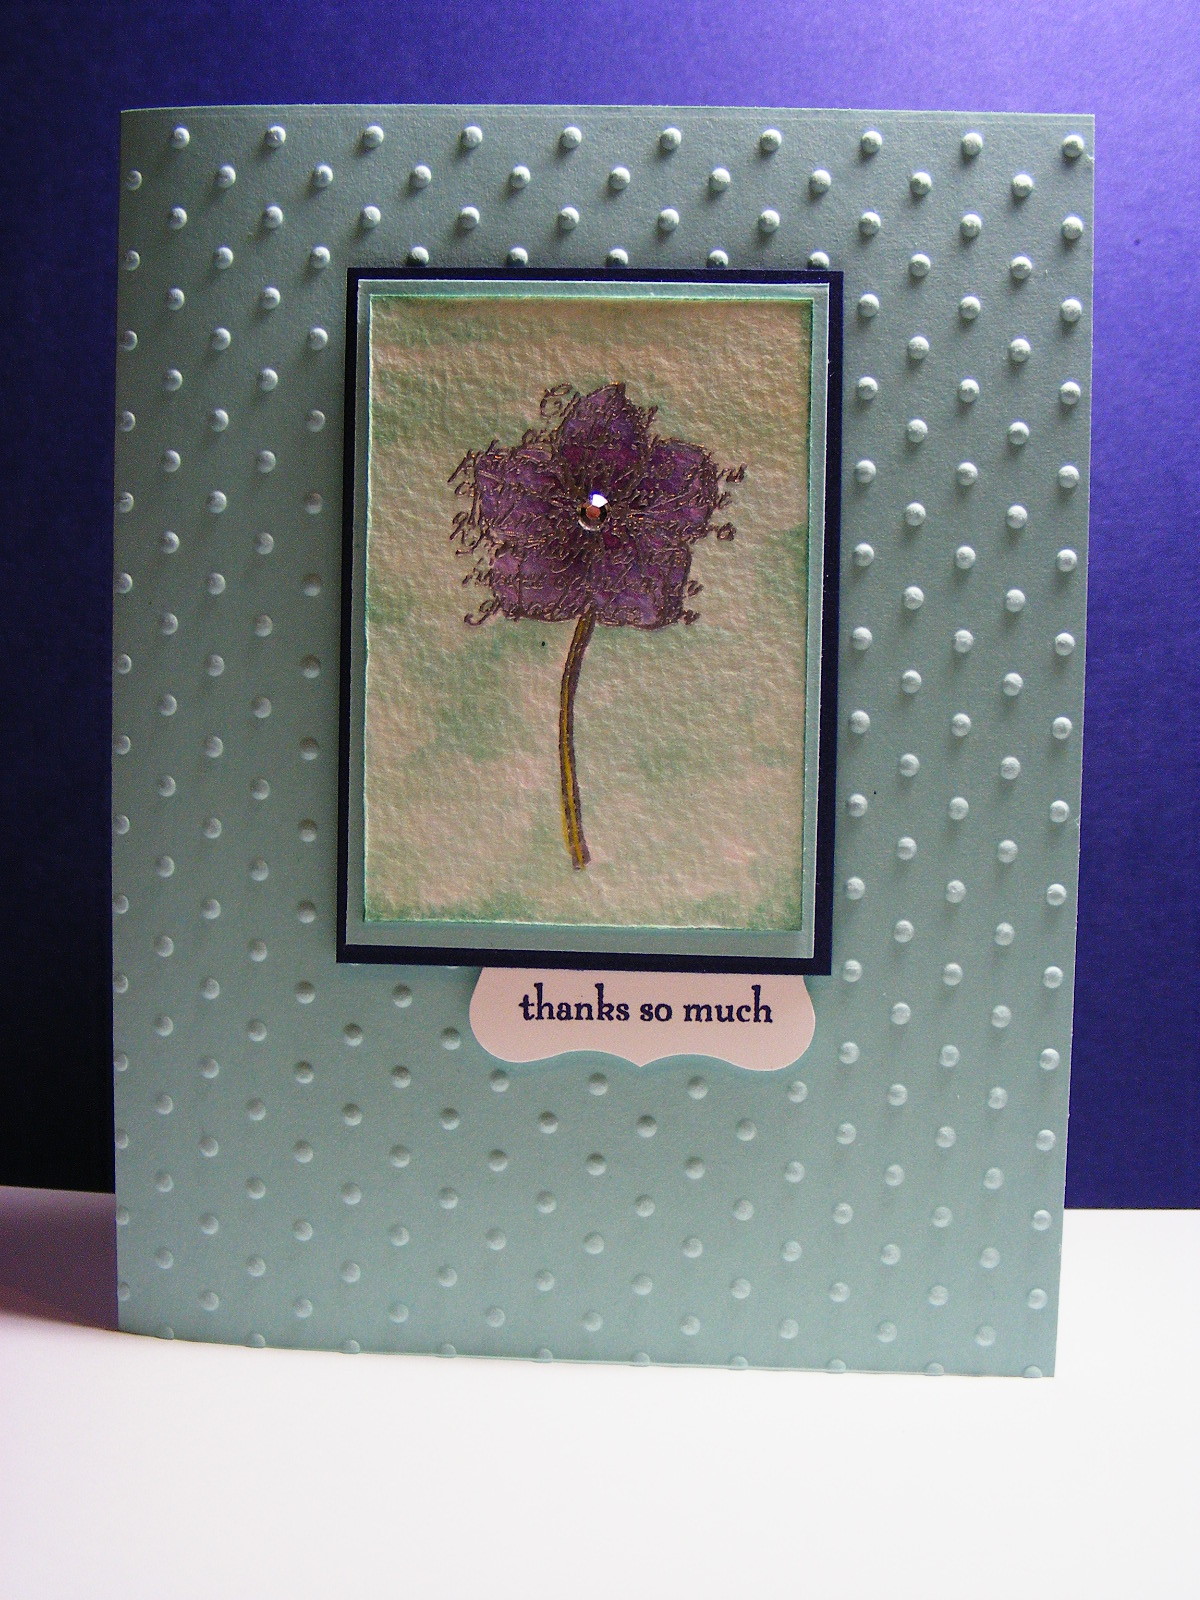
...and here is my card...

CAS card for PP52 using the new Faith in Nature hostess set.

Close up of the focal image...sentiment is from Pocket Silhouettes

Sooooo...not sure I like this clean and simple thing.  I miss my embellishments!!  No ribbon???  No buttons or brads???  I feel naked!!!  You'll notice I couldn't resist adding just a touch of bling to the centre of the flower...a girl's gotta be able to live with herself, you know??
So what do you think of the new in-colours?  I am IN LOVE with pool party, which is what I used in this card.  I paired it with concord crush and a touch of lucky limeade for the stem.  I watercoloured the whole image with my aquapainter...I hate to say it but my blender pens are feeling neglected!   I just love how easy it is to get great colour effects with the aquapainter.  I'll have to show my blender pens some love soon...stay tuned.  There isn't much more to say about this card other than it took me a lot longer than one would think.  I did a lot of trial-and-error stuff before I got the finished product.  The good news is, my hostesses will love it and it will be a quick and easy card for them to make.
On a completely different note, I FINALLY started my swaps for convention.  I have 200 to make for various organized swaps I'm in and just tonight got going on them.  I knocked off 50 for a pre-convention event...I'd love to show them to you but don't want to ruin the surprise for anyone out there who may also be in the same swap.  I will take photos and post them for you the day of the swap.  In fact, I plan to post every day I'm at convention...I'm sure there will be a ton to blog about!  In the meantime, I need to go put my son to bed.  Be back tomorrow...

Tuesday, June 21, 2011

Simple Cheerful Treat project

Today's post is another project I designed as a make-n-take for my hostess appreciation night coming up this Friday.  It is a cute little wine bottle tag, perfect to add to your favourite beverage the next time you're invited to dinner.  We are heading to my husband's sister's on Sunday  for a BBQ and this will be perfect to add to a yummy bottle of ready-to-serve-chocolate martini!  Check it out:
Bottle tag using the Pretty Postage set (from the Summer mini, but also in the new Catty!!) as well as Cheerful Treat Hostess-only DSP.

Flowers were punched using my boho blossoms punch...one I neglect far too much!
Isn't this a cute little tag?  My hostesses are going to love it even more when they see what they're going to receive to to with it ;o)  I can't wait to spoil them all silly on Friday night!  We are going to have a blast!  I have lots of games and prizes for them and one more project which I'll post tomorrow.  I am so busy with school work and getting ready for this event I haven't even had time to think about designing anything for this week's challenges.  Here's hoping tomorrow night is a creative one! 

Monday, June 20, 2011

Some more Sneak Peek fun...

Today's card is a simple one, compared to yesterdays!  This weekend I was working on designs for the Make-n-Takes for my Hostess Appreciation event this Friday night.  I want to use all new products to showcase the upcoming catalogue as well as to promote the new Hostess plan.  Here is one of the cards I came up with:

Cheerful card made using the Hello Blossoms A La Carte stamp from the Summer Mini and the Cheerful Treat DSP from the upcoming new IB&C
I kept this card really simple, knowing that I have LOTS of other fun activities planned for my Hostess Night.  I like the way the flowers from the stamped image are echoed in the DSP...I also LOVE the colour combo:  melon mambo, concord crush and lucky limeade...can't go wrong with such yummy colours!
I am SO excited about the new Hostess program and cant' wait to tell all of my past hostesses about it.  If you'd like to learn more I'd be happy to explain it to you too!  Just drop me a line and I'll give you the deets!

Till tomorrow, happy stamping!

Sunday, June 19, 2011

Sunflowers for a colleague and MU11

Last week I was asked to create a retirement card for a colleague.  She is leaving teaching to go on to bigger (and better!) things...can't say I'm not envious!!  Anyhow, she loves sunflowers and I was asked to do something with them for her card.  I SOOOOO wish I could order the one of the new background stamps from the new catty in time...when you see the new catty you'll know which one I'm talking about!  But since I can't order it until July 1st and the lady's retirement party is June 28th, I had to improvise.  I got out my Build-A-Blossom stamp set and punch and went to town.  Conveniently, sunflowers are also one of my favourite things about summer which means this card also works for this week's Friday Mash-up challenge, which is to create a summer-themed project with polka dots.  So...here is my card:

Sunflower card for a colleague and for MU11 using the Build-A-Blossom stamp set with sentiment from the Word Play set.

Inside of card using Love and Care and Occasional Quotes hostess sets.

 So this card is BIG...it had to be to allow enough room for everyone on our staff of 60 to sign it.  I also made it so that the inside opens up to reveal a full 8 1/2" x 11" area for signatures.  The sunflowers on the front were made by stamping the solid petal image in more mustard ink on daffodil delight cardstock.  I then stamped the shaded petal over top using peach parfait ink.  The result are petals with lots of depth without the extra effort of sponging each individual one.  I punch each petal out using the build-a-blossom punch and then textured them using my stylus and the foam from my mat pack.  It makes them curl a little and gives them dimension that makes them look almost real.  The centres of the flowers are punched from chocolate chip cardstock, sponged and then covered with Crystal Effects and clear micro beads (retired), again to give them texture and depth.  The leaves are also made using the Build-A-Blossom set but this time I stamped the largest solid petal image in wild wasabi ink on cardstock of the same colour.  I then stamped the shaded petal of the same size over top in garden green ink.  To make them look like leaves, rather than petals, I just turned them around so the narrow end was showing.  I again textured them using my stylus and mat pack.  The rest of the card is pretty simple and straightforward.  It had to be with those big flowers on the front!  I really hope my colleague likes this card...it took me quite a while to make!!

Saturday, June 18, 2011

Finally stamping again!

My crazy week has ended, I am finished my course (YAY!) and there are only 1 1/2 more days of classes before exams.  Even though I have a TON of marking to do, I did manage to find a bit of time to get down to my stampin' corner this afternoon.  I felt guilty being inside on such a beautiful day, but I was missing my stamps and ink...it has been nearly a week!!  That's far too long and I often find my creativity is a bit stunted when I've been away for this long.  So, to get my mojo working again, I created a card using the sketch from this week's challenge at Pals Paper Arts.  Check it out:


Since I had Mr. UPS pay me a visit this week, bringing a pack of the new hostess-only DSP, I decided to crack it open and use the colour combo as the basis for my card.  Here it is...

Card for PPA98 using the new My Friend stamp set from the soon-to-be-released new IB&C.

Close up...sentiment is from the Perfect Punches set.
I just love this colour combo:  concord crush, melon mambo and lucky limeade.  It is so fresh and rich. This card features several new products from the upcoming Idea Book and Catalogue:  My Friend stamp set (p.139), Cheerful Treat DSP (p. 11) and the Lace Ribbon Border punch (211).  I'm including page numbers because Stampin' Up! has set Monday as the date we demonstrators are allowed to release our new catalogues.  Yep, you can get your hands on the new catty as of Monday, gals!  If you'd like me to send you one, drop me a line and I'll get one to you pronto.  Now, keep in mind you won't be able to ORDER from the new catty until July 1st at noon, but you sure can get started on your Wish List!  I sure have...mine is 4 pages long!!!  My credit card is going to get a serious workout come July 1st!
I'll be back tomorrow with some more sneak peeks at what you'll see in the new catty...till then, happy stamping!

Monday, June 13, 2011

A Black & White Threefer...

This week is going to be a little nutty.  It is the last full week of classes and as such I have a TON of marking to do, not to mention being out two nights this week for my senior recitals.  I likely won't have much time to stamp between now and Friday, never mind getting a photo taken and posting it for you.  I will do my best, but no promises.  The good news is that after this week my life becomes much simpler as I head into exams and the end of the school year...yippee!!
I did get a chance to whip up a quickie for you tonight.  It is a threefer for the Stamping 411 sketch challenge, the Handstamped Sentiments wedding challenge, as well as the Just Add Ink Black and White challenge.  First of all here is the 411 sketch:


 I like that this sketch is so simple...it made this card easy to pull together quickly...

Card for JAI71, HSSWD & SSC207...sorry about the blurry image...not sure what's up with my camera!

Sentiment from Teeny Tiny Wishes, frame from Four Frames sets...and then of course there's the Medallion!

Inside of card

This was super fast and easy to put together...good thing because I had literally 15 minutes of stamping time before my husband left for the evening and I was on full-time Mommy-duty!  Here is what I did:

Starting with a piece of textured basic black cardstock I stamped the medallion image using frost white shimmer paint.  After it dried, I ran it through my Big Shot with my Finial Press embossing folder.  I tried sponging the edge using shimmer paint...don't try it...it doesn't work!  I just ended up with a gloopy mess, so I tore the edge of the cardstock to get rid of it.  I then layered it on a slightly larger piece of whisper white cardstock, which I also tore to match.  I wrapped a piece of white satin ribbon around and added a clear rhinestone brad.  I then stamped the frame and sentiment in basic black ink on a scrap of whisper white cardstock and then punched it out with my decorative label punch.  I added a row of rhinestones and adhered it to my card using dimensionals.  For this inside I stamped the medallion again in basic black on whisper white cardstock and adhered it.  See...told you this was a fast and easy one!

Sunday, June 12, 2011

Another weekend in the books!

Unlike last weekend when I felt like I was spinning my wheels and accomplished next to nothing, this weekend has been a productive one.  Yesterday I held my "Out with the Old" Stamp-A-Stack.  It was a great morning with lots of stamping fun.  One of my customers arrived with a treat for our family...check this out...

How fun is that??  This lady, who is also a fellow teacher, made this giant oatmeal chocolate chip cookie!  My son LOVED it and we all dug into it after dinner last night.  It was as yummy as it looks!
Today I prepped for this week's class and got two of my final three assignments for my course done...what a relief that was!  Just one more to go...I'll be SO glad when I'm finished...it will mean more time for stamping and more attention for my business.  I also managed to do a little stamping.  I made this card for both the A La Card Monkey and the Paper Players challenges.  The Paper Players is a colour challenge this week, using the colours wild wasabi, melon mambo and daffodil delight.  I decided to use those colours with the Monkey sketch shown below...


So here is my two-for-one card:

Card for PP#51 and Monkey #60 (turned upside down!) using the Fabulous Florets stamp set from the Summer Mini...and the NEW IB&C!!

Close-up of the watercoloured flowers.
I was so happy to see the Fabulous Florets stamp set in the new catalogue.  It is a great one to play with and such fun to watercolour!  Here is how I put this card together.

Starting with a 4" x 5 1/4" piece of Beyond the Garden DSP, I stamped the stem image twice using Versamark ink and then heat embossed them using wild wasabi embossing powder.  I matted that on a 4 1/8" x 5 3/8" piece of melon mambo cardstock.  Setting that aside, I stamped the larger flower once and the smaller one three times, using Versamark ink, on a scrap piece of whisper white cardstock.  (Normally I would using watercolour paper, but I am out and am waiting to order the new, larger-sized pieces in the up-coming catty!)  I then heat embossed them using melon mambo embossing powder.  Next came the fun part!  Using my aquapainter, I coloured the flowers using daffodil delight and melon mambo ink.  I then fussy cut each flower out, arranged them on the stems and adhered them using Tombow liquid glue for some and dimensionals for others to give some depth.  On another scrap of whisper white cardstock I stamped the sentiment in wild wasabi ink.  I trimmed the cardstock into a banner, sponged the edges in melon mambo ink,  and adhered it to the cardfront.  I added a brad and then adhered the whole cardfront to a wild wasabi cardbase.  That's it...pretty simple to put together, but quite pretty, I think!
Related Posts Plugin for WordPress, Blogger...