Wednesday, August 31, 2011

Procrastination...a good thing sometimes...

ok, so maybe not.  I'm sitting at my computer with a PILE of work to do to get ready for the start of the school year next week and instead of getting started, I'm typing a blog post instead!  Can you tell I'm really not ready to let go of summer yet?  The good news for you is that I have another birthday card to show you.  Since I've covered the kids pretty well this week, I figure its time for a grown-up card.  This is another one I designed for my workshop tonight.  The hostess requested a masculine birthday card, so, given the season we are about to begin, I designed this with fall in mind...

Masculine birthday card using French Foliage set with sentiment from Bring on the Cake.

Inside of card
Can you tell I am in love with the French Foliage set?  I was SOOOOO thrilled when it came back in the main catty this year!  It is my go-to fall set...love the realistic looking leaves!  Here is how I put this together:
Starting with a 3 1/2" square of very vanilla cardstock, I randomly stamped the leaves in cajun craze, more mustard and early espresso, stamping off at times to give depth.  I then spritzed the whole thing using my spritzer tool and early espresso marker.  I layered the stamped piece on a 3 5/8" square of always artichoke and then adhered it to an early espresso card base.  Setting that aside, I took a 2 1/2" x 4 1/4" piece of more mustard cardstock and ran it through my Big Shot using the houndstooth embossing  folder.  I then tore off about 1/4" of an inch along one of the long sides and added some early espresso distressing with the mahogany ink and solid stamp from the distressing kit.  I wrapped and tied a piece of early espresso 1/8" taffeta ribbon around the left side and tied a knot.  This was then glued on to the bottom of the cardfront.  The sentiment is heat embossed using pewter embossing powder, punched out with the decorative label and then layered on a second decorative label in always artichoke.  I adhered it using dimensionals.
The inside of the card is simply more randomly stamped leaves and the sentiment stamped in early espresso. 
Easy peasy and effective.  Hope my hostess and her guests like it!  Now I guess I'd better get going on my school work!!

Tuesday, August 30, 2011

Teenage boy b-day card

I seem to be on a roll with the juvenile birthday cards this week!  I have a workshop tomorrow night and the hostess requested a card appropriate for a teenaged boy.  So I got out my Well Worn DSP and this is what I came up with:
Birthday card for a teenaged boy using Extreme Elements and Grunge Rock stamp sets along with Well Worn DSP.
These sets are sure getting a workout this week!  I do love how versatile they are...and how different they look in various colour palettes.  For this card I stuck to the earthy tones in the paper:  cajun craze, early espresso, river rock and not quite navy.  I added lots of interest and texture by roughing up the edges of both the card base and the DSP and sponged the edges of pretty much every element.  The hemp twine and little aged brass clip (from my stash, bought who-knows-when!) add the perfect finishing touches without being too fussy.  I will replace the clip with one of Stampin' Up's mini library clips when my order arrives...I just used this in the meantime!  I hope my hostess and her guests like it!  Now I've gotta run and prep for my Watercolouring 101 class tonight!

Monday, August 29, 2011

Fall Demonstrator Event and fall card for the Monkey

If you are a Stampin' Up! demonstrator, have I got a deal for you!  Because there is no SU Regional in Southern Ontario this year, my upline, Jamilla Ivits, has decided to hold her own "mini regional"!  "Stampin' Sparks" promises to be a fabulous day of speakers, demos, make-n-takes, swapping and prizes and it is all right here in our own backyard!  The event will be held at the Homewood Suites by Hilton Hotel, here in Cambridge on Saturday, September 24th, 2011 from 9:00 am - 3:30 pm.  The cost for the day, including lunch is just $55!!!  What a deal!  For more information or to register contact Jamilla at 519-622-9394 or email gerjam@golden.net.

Now on to today's card!  This week's challenge over at A La Card Monkey is an autumn sketch challenge.  Here is the sketch:


...and here is my interpretation:

Autumn card for Monkey71 using French Foliage, Studio Sketches and Fabulous Phrases sets.

Inside of card with sentiment from Pursuit of Happiness set.
This card was FUN to make!  I pulled out all the distressing stops for the background:  sponging, spritizing, crumpling...you name it!  After doing so many simple cards over the past few weeks in preparation for various classes and workshops, it was fun to really go to town and get my fingers inky for a change.  The sad thing is that this is the very first time my Studio Sketches set has seen ink...and I've had it for almost a year!!!  GASP!!  I know...bad, bad demonstrator (insert wrist-slap here).  I really love that set and there is absolutely NO excuse for the neglect it has received.  I promise to give it more attention this fall!
No time to give you the details on how I created this one...gotta go get Max ready for the birthday party this afternoon!  If you have questions drop me a line and I'll do my best to answer.

Sunday, August 28, 2011

What a party...and still more to come!

Well, my nephew celebrated his birthday in fine style last night with a big (17 kids!) bash at Chuck E Cheese.  Max had a great time because his aunt and uncle kept handing him game tokens...he never ran out!  He'd still be there if we hadn't dragged him out!  Now we're gearing up for yet another birthday party tomorrow!  This is for my friend's daughter who is turning 7;  Max sure does get around!  Tomorrow's event is supposed to be a pool party, though the weather may be a wee bit cool for swimming.  I know Max's mommy isn't going anywhere near the water, which likely means Max won't be either!  In any case, I sat down this evening to make a card for Katelyn.  Since I don't have any little girls in my life, I'm not really up on what a 7 year old might like so this was a challenge!  Last year she was VERY into Hannah Montana so I kept with a "pop star" theme and came up with something I hope she'll like.  Since it is so sparkly it also works for this week's challenge over at Stampin' Royalty.  I was actually inspired by one of the guest designer's cards.  Anyhow, here is my card for a 7-year old:

Blingy Birthday card for a 7-year old girl using the Best Friends Forever and Grunge Rock sets.

Inside of card using sentiment from Delightful Dozen set.
So, whaddya think?  Do you think she'll like it?  Do me a favour...if you have a 7'ish-year-old girl around can you get her opinion for me? 

This card was a wee bit of work.  The glitter stripes were fairly easy as I used sticky strip, peeling the backing off one at a time to apply the various colours of glitter.  Kind of a cool look, but mighty messy to create...my house will be glittery for weeks...and so will I!!  My Circle Scissors Plus got a workout cutting all those circles...how I love that little contraption!  Makes layering circles SO easy!!  No need for a ton of different sizes dies!  The guitar is embossed using the new tempting turquoise embossing powder. I think my favourite thing about this card is the colour combo:  melon mambo, tempting turquoise, lucky limeade and basic black.  So bright and fun...and not entirely girlie.  Here's hoping this is a hit with the recipient...and that the party is a huge success!

Friday, August 26, 2011

Brithday card for a Four Year Old

My nephew Michael is turning four tomorrow and, of course, my son is invited to the big party at Chuck E Cheese, no less!  He is quite excited as Chuck E's is one of his FAVOURITE places EVER!  This afternoon I sat down to make a birthday card with my son right by my side to make sure I "did it right".  Here is what we came up with:

Michael's birthday card using licensed Disney stamps and Big Top Birthday DSP

Inside of card with sentiments from the Bring on The Cake set
As much as I adore Stampin' Up and all their wonderful stamps, there are times that just call for something that SU doesn't offer.  Today was one of those times.  My son, Maxwell, was determined that his cousin's birthday card have Lightening McQueen on it.  Since SU doesn't do licensed stamps, I pulled out some of Max's stamps and went to town.  It was actually kind of fun colouring in McQueen...except that Max was there watching my every move and telling me when I wasn't using the right colour!  He is a tough critic!!  Anyhow, in order to really make this card pop I pulled out some of the Big Top Birthday DSP.  I just got this pack through the Buy-3-get-1-free promo and am I ever glad I did!  I LOVE the bright colours and bold patterns!  I can't wait to play with it some more!  Now, I know this card looks a wee bit Red-White-and-Blue, given that I'm in the Great White North, but let's face it, McQueen is the all-American racing champ.   I thought it only fitting to bring in a little nod to his roots.  Plus, I think the stars are perfect for a little boy's birthday.  It got the stamp of approval from Maxwell...now here's hoping Michael likes it too!

Thursday, August 25, 2011

Stormy Weather!

WOW!  Did we ever have a storm last night!  The lightening was incredible...it looked like a strobe light, there was so much of it.  On the news this morning they said there were 1000 lightening strikes every 2 minutes in southern Ontario during the height of the storm!  That's a lot of electricity flying around and, since our hydro kept flashing of and on, I didn't want to take the chance of turning on my computer to do a blog post.  Sorry if you missed me!  Today I have another Christmas card for you.  This is one that I did while I was away up north last week.  If you recall, I was really struggling to come up with something I loved...this card is just ok, in my books, but you might love it...so here you go!

Holiday card using Scenic Season set with sentiment from Contempo Christmas
One thing I DO like about this card is the colour scheme:  soft suede and cherry cobbler are just yummy together!  I also like the Mocha Morning DSP for holiday cards...you'll see more of that in the coming months.  What I did discover is that when using the new Dazzling Details product (in the new Holiday Mini), it is necessary to let the ink dry throughly before applying the Dazzling Details.  Otherwise the ink runs and you end up with what I did:  sparkly brown snow!  I was a wee bit disappointed with that...I was hoping for a nice glittery effect to balance that sparkly glimmer paper accent.  Ah well, live and learn, no?  This way I can warn all of you and save you from the same frustration!!
On another note, tonight is the first meeting of my Christmas Club.  I am so excited to show everyone some of the new products from the Holiday Mini...I know they're going to love them!  We are going to be busy making 12 cards, so it will be a stampingly crazy night!  Can't wait!!  If you'd like to get in on the action, you can join for the last three installments in September through November.  Check out my Events tab at the top of this page for additional information.

Tuesday, August 23, 2011

A Happy Accident...

Do you ever set out to create a card with a certain idea in mind only to end up going in an entirely different direction?  Today's card is an example of me starting out with a CAS design in mind and ending up with a completely different look.  First I'll show you the card I ended up with and then I'll explain how I got there!
Vintage holiday card using Bells & Boughs and Merry & Type stamp sets.
Definitely NOT CAS, hunh?  So here's what happened...
I started out needing a scrap of always artichoke cardstock to emboss and then cut out the oval designer frame from.  I grabbed a piece from my stash, ran it through the embossing folder and then flipped it over to check the quality of the impression.  Lo and behold, there were holly images I had stamped in bleach (months ago when trying to come up with designs for convention swaps) in two corners.  Liking the look, I decided to go with it and use it to frame the focal point for a card.  I then found some torn scraps of Deck the Halls fabric in amongst my ribbon scraps...I added that as a ruffle along the right edge using sticky strip to adhere it.  From there I just kept layering and adding, finishing it off with the perfect sentiment from the Merry & Type set!  Don't you love it when things just sort of fall into place?  I think that's one of the things I love most about Vintage cards...they're meant to look like they're made up of spare bits and treasures, so it is easy to use up all the little bits and bobs you were too cheap to throw out! 

Monday, August 22, 2011

A bit of fall for PPA

I thought I'd take a bit of a break from Christmas cards today...all that red and green gets a bit old after while, you know?  I have a workshop next week and I think I'll use this Thanksgiving card for it.  Unlike all of you in the US, our Canadian Thanksgiving is just over a month away, so it certainly is time to get going on some projects to celebrate!  This card was inspired by this week's sketch at Pals Paper Arts.  Here is the sketch...

Here is my very fallish Thanksgiving card:

Thanksgiving card for PPA107 using the Day of Gratitude set with sentiment from Teeny Tiny Wishes

Inside of card using a sentiment from the Pursuit of Happiness set.

I really do love fall colours...guess that's why I got married in October!  There is something about the combination of early espresso. more mustard and cajun craze that just soothes my soul...so warm and earthy!  This card is pretty straightforward, though I'd like to point out one very important feature:  there are NO embellishments!!  Yay...I did it!  I created a card that doesn't look naked without any brads, ribbon or pearls!  Let me tell you, the thought certainly did cross my mind to add some hemp twine or early espresso ribbon, but I resisted the urge...are ya proud of me???
Tomorrow its back to Christmas...I had my first Christmas Club meeting on Thursday and need to get in the zone!

Sunday, August 21, 2011

Drum Roll, Please...

...and the winner is:  Karen Gilman!!  Congratulations, Karen!  Please send me an email with your shipping info and I will get your goodies in the mail this week!

A HUGE thank you to all who helped me celebrate my Bloggaversary and took the time to leave kind comments.  It has been a crazy year...can't wait to see what the next year holds! 

Now for some stamping!  One of the things I most enjoy about participating in online challenges is the way they jump-start my mojo.  The week up north was a frustrating one and I had kind of been putting off going down to prep for my classes this week and next because I was worried it would again be an exercise in mediocrity.  Thankfully, some of my favourite challenge sites had sketch challenges this week!  They sure did get the creative juices flowing!!  The card I'm going to show you is based on one of the two sketches over at Stamping 411 this week.  Here is the simple sketch...


Since I am in full Christmas mode these days, it was only natural that I do a holiday card (yes, I know, its only August!).  So, here is my version:

Holiday card for SSC217 using the Jolly Bingo Bits and Contempo Christmas sets

Inside sentiment from the Many Merry Messages set
 This sketch was so CAS I had to try my best to reflect that in my card.  Since those of you who follow my blog know what a hard time I have with CAS, I hope you're impressed! This card actually came together quite easily and will likely make my fall line-up.  The poinsettia image is from Jolly Bingo Bits (so handy, that set!)  I also used some of the silver glimmer paper from the upcoming Holiday Mini...so sparkly and no mess!  The sentiment is from Contempo Christmas and is heat embossed in silver.

On another note, there is still time to register for my Christmas Club.  The first class is this Thursday, so don't delay!  I need to confirm attendance by Wednesday so that I can be sure I have enough supplies on hand.  For more information click on the Upcoming Events tab at the top of this page and then call to register today!

Saturday, August 20, 2011

Home Again...

...and happily so!  Though it is nice to spend time away it is ALWAYS good to come home!  My son is especially happy to see his daddy...a whole week away from him is a LONG time for a 4-year-old!  I am happy to have high-speed internet again...you don't realize how dependent you are on something until you don't have it for a week!  I hope you enjoyed the projects I scheduled to post while I was away...I sure have enjoyed reading all of your comments!  Don't forget that today is the last day to enter the draw for my Bloggaversary blog candy.  If you haven't already done so, leave a comment HERE and you'll be entered in the draw.  I am going to select and post the winner tomorrow, so be sure to get your entry in  tonight!
So, are you tired of Christmas cards yet?  I sure hope not, because I'm just gettin' started!!  Today's post is another holiday card, this time of the cute variety.  It uses the Stitched Stockings stamp set and coordinating stocking builder punch from the upcoming Holiday Mini.  Speaking of which, have you received your copy yet?  If you're on my mailing list you should get yours this week sometime.  If you're not and would like to be drop me a line and I'll hook you up!  Now, on to the card...

Cute holiday card using the Stitched Stockings set and punch from the upcoming Holiday Mini.
Cute, eh?  I was inspired by Jackie Topa's card here but I was too lazy to do all that punching and sponging for the fireplace.  Enter Well Worn DSP!  Conveniently this pack has BOTH a woodgrain pattern AND a brick pattern!!  Insta-fireplace!  I added some sponged flames (made using the wing from the bird punch) and voila...a cozy fire with stockings hung with care!  I used some of the adorable new mini clothespins to "hang" the stockings and created the banner using the pennant punch and the Calendar Alphabet and Numbers set.  (Come to think of it, I'm not sure why this set is named that way...I don't think I have EVER used it for a calendar!  It is a VERY handy set to have though!  Perfectly tiny letters and numbers for any kind of sign, pennant, banner etc...but I digress...).  What's kind of uncanny is that this card looks just like our fireplace at Christmas!!  I didn't intend for it to, but the colour of the brick and the dark wood mantel is just like our family room!  Weird, huh?!? 
I have to go an unpack all my stamping supplies I took up north with me...believe it or not, I did very little stamping!  It wasn't for lack of trying, mind you...I just couldn't come up with anything I remotely liked.  I did a few cards, but each one was just so-so.  I got really frustrated and just gave up over the last couple of days.  I read three novels instead!  Here's hoping I get my MOJO back quick...I have A LOT of projects to plan and make for my September classes and workshops!  I'll post a couple of the cards I did get done this week...you can judge them for yourselves!

Friday, August 19, 2011

Holiday Mini Sneak Peek #2

Here is another card I created using products from the upcoming Holiday Mini.  This one uses my FAV set from the new mini...check it out:
Christmas card using the Christmas Lodge stamp set and Frostwood Lodge DSP
The products in the Frostwood Lodge suite are so homey and cozy.  The patterns in the DSP remind me of flannel nightgowns I wore as a child and the images in the Christmas Lodge stamp set are just so detailed and beautiful!  The tree on this card is from that set...isn't it gorgeous??  I combined it with a sentiment from the Merry & Type set in the IB&C for a vintagey, homespun look.  The quilted satin ribbon adds that final, cozy touch.
Have you entered my Bloggaversary draw yet?  If not, what are you waiting for?  There is some quality blog candy up for grabs!  Just leave a comment on THIS POST to enter.  I'll be choosing the winner when I get back from my week up north on the 21st.

Wednesday, August 17, 2011

Holiday Mini Sneak Peek #1

Man, oh man, so I love the upcoming holiday mini!  Maybe its because I first laid eyes on it at convention and could actually see and touch the new products.  Whatever the reason, this mini is, in my humble opinion, the best one yet!  There are SO many new products...and not just stamps!  Adorable little embellishments, beautiful ribbon, punches, dies...too many for my little bank account to handle all at once!  Good thing it is around till January!  Today I have a card that I created using some of the new products...have a look:
CAS Christmas card using The Sounding Joy stamp set from the upcoming Holiday Mini
Pretty, no? I just love this stamp set...likely because Joy to the World is my favourite carol!  The scripted  font is so elegant...and it looks beautiful done in the new pewter embossing powder!  This colour has just a hint of gold in it to give it an aged look...and it goes perfectly with the Antique Brads!  I also used some of the new quilted satin ribbon...so beautiful!  This is another card that will likely make my class line-up this fall.  If you haven't already, click the Upcoming Events tab at the top of this page to see what's happening.
Don't forget to enter my Bloggaversary  draw for some cool blog candy!  Leave a comment on THIS POST to enter.  I'll be selecting the winner on August 21st!

Monday, August 15, 2011

It's The Most Wonderful Time of the Year...

...unless you're a teacher!!  That Staples commercial makes me CRAZY!  Parents dancing in the aisles because they're getting rid of their kids by sending them back to school so we teachers can deal with them!  It always makes me shake my head that some parents can't handle having their kids around for 2 months...I deal with the attitude and sullenness every day for 10!  God bless teenagers!
Anyhow, the reason I titled this post as I did is more about the REALLY wonderful time of the year:  Christmas!!  We crafters like to start early when creating holiday projects and as the teacher of many a crafting class, I start even earlier as I have to plan and create the projects I'm going to offer.  So, this week, while I am away enjoying the wilds of the Almaguin Highlands in northern Ontario, I am going to give you a sneak peek at some of the holiday projects I've been working on.  Today's card uses the Pennant Parade stamp set...yes...for Christmas!  This set is SO versatile!  Take a look at this:
Homespun Christmas cards using the Pennant Parade stamp set and Letters to Santa DSP

Inside of card using sentiments from Many Merry Messages set.
Isn't this a cute card?  I love the way the embossed focal image looks quilted...so homey and cozy.  Like a warm blanket and hot cup of cocoa on a cold and blustery day.  Sorry...I digressed there for a second.  This card will likely make my class line-up this fall because it came together really quickly and easily.  Click the Upcoming Events tab at the top of this page for class info.
Don't forget to enter my Bloaggaversary draw for some fab blog candy.  Just leave a comment on THIS POST to enter.  I'll be selecting the winner on August 21st.

Saturday, August 13, 2011

A Little Fall in the Air...

...I know, you're thinking "What the heck is she talking about...its the middle of August!!"...but the other night is got quite cool here...much cooler than it has been in months and the first thing I thought was that it felt like fall.  Don't get me wrong, I am in NO hurry to wish summer away...fall means back to school and...well, back to the crazy, insanity that is my life.  However, I DO love the season.  I got married in the fall because I love fall colours...the fresh, crisp air, the crunch of a freshly picked apple and of course, those glorious leaves!  All that thinking of fall got me to creating a fall-ish card.  I pulled out the ol' standby Lovely As A Tree for this one, but combined it with the new Well Worn DSP.  See what you think:

Fall thank you card using Lovely as a Tree set with sentiment from Petite Pairs.

Inside of card
I really like this DSP...it is perfect for masculine cards or for cards that you want to give more of an edgy or earthy feel.  Here I was going for earthy and I pulled my colours for the tree from the paper:  early espresso, cajun craze and a little more mustard.  The tree is just coloured with my Aquapainter and ink pads...really quick and easy.
On another note, tomorrow I am heading up to my parents' place in northern Ontario for a week of grandma and grandpa time for my son.  It means I'll get some R & R too, as my parents will keep my son more than occupied for the week.  I hope to do some stamping too, so I'll have lots to show you when I get back...I'm bringing my new Holiday Mini goodies to play with!  I won't have internet access while I'm there, so I won't be able to respond to questions or emails, but I will pre-post some projects to hold you over till I get back!  While I'm gone, don't forget to enter the draw for my Bloggaversary blog candy by leaving a comment on THIS POST.  I'll be selecting the winner on the 21st, so don't forget to enter!  Have a great week!

Thursday, August 11, 2011

It's my Bloggaversary!!

Well, today my little blog turns one year old.  It's hard to believe its been a year already...time goes SO fast, now that I'm old!  It has been a busy but wonderful year as I've built my Stampin' Up! business and my blog.  A HUGE thank you to all of my followers and customers for helping me grow what started as a way to get a discount on products to feed my addiction into a thriving and extremely fulfilling second career.  To celebrate this milestone, I've got some blog candy for you!  Check out this load o' loot:

Here is what's included:  Northern Flurries stamp set, A Slice of Life stamp set, a roll of soft suede polka dot grosgrain ribbon, a package of star designer brads and a package of Floral Fusion felt flower accents.  So, how do you win this little bundle of goodies?  Leave a comment telling me what your favourite product from the new 2011/2012 Idea Book & Catalogue is and what is at the top of your wishlist from the new Holiday Mini (if you haven't received your mini yet tell me what you're hoping to see!).  I will then use a random number generator to choose the winner from the comments I receive.  You have until I get back from my parents' place up north to enter...that's LOTS of time!  I'm gone till Saturday, August 20th!!

Now on to something new!  Since its a BIG day, I have a BIG project to show you!  This is something that I spent quite a bit of time on, but was SO worth the effort!  See what you think...

Square paper-medallion wreath made using the NEW Simply Scored tool! (Do you like the blur-effect in the bottom left corner of the photo?  That would be my son's fingerprint on the lens!!!)
So...whaddya think?  This wreath is quite large...12" square!  That's a lotta medallions...but I am mighty pleased with the way it turned out!  It certainly was made MUCH easier thanks to the new Simply Scored scoring board!!  This fantastic (and long-time-in-coming) product will be available September 1st when the Holiday Mini goes live and it is sure to be a HUGE seller.  It made all the scoring I did to make these medallions really quick and easy...I don't even think I would have attempted this project without it!  I see MANY more projects like this in my future...along with all sorts of fun-folded cards and boxes and envelopes...oh  my!  I plan to offer this project as a class this fall...keep an eye on my upcoming events page for dates and details, or send me a request to receive my newsletter each month and stay informed about what's happening.

Wednesday, August 10, 2011

Swimming Teacher Thank you


It seems I am making a lot of thank you cards for my son's various activities of late.  As summer begins to wind down, so do his summertime pursuits.  His last day of swimming lessons is tomorrow.  This has been a tough year in the pool for my son.  He regressed BIG time since last summer.  At the end of last summer he was doing really well (for a 3-year-old) until he was unexpectedly dunked by someone he trusted who had said they wouldn't dunk him.  That is all he remembers about swimming last year and, as a result, he has become very fearful and untrusting of anyone (even me!) around water.  His first session of swimming was group lessons and they did not go well at all.  We decided to break the piggy bank and put him in private lessons for another session in the hopes of undoing some of the damage that had been done last summer.  I am thrilled to say he has made excellent progress thanks to his wonderful teacher.  This young man has exhibited the patience of a saint in working with my stubborn boy over the last two weeks!  As I watched from the bleachers, mentally willing my boy to do things, Dylan (his teacher) has patiently and systematically worked to build Maxwell's trust.  I have been SO impressed as I watched the creative ways Dylan has worked to overcome Max's fears.  Since tomorrow is our last day with Dylan I wanted to make him a special card to say thank you for his kindness and patience with my boy. 

Thank you card for my son's swimming teacher using the Sunny Fun stamp set from the Summer Mini.

Close up of focal image.
In case you're wondering, this is a shaker card.  I used one of our Treat Cups and filled it with retired clear micro beads.  I wish I had blue beads so that it would look more like water, but clear was all I had in my stash!  It actually looks kinda cute when you shake it...like water splashing on the little boy (supposed to be my son!).  I kept this card very clean and simple (and almost embellishment free!) because it is for a young man.  I hope he likes it...I know he'll like the iTunes gift card I tucked inside!
On a completely different note, tomorrow is my one year Bloggaversary!!  A La Cards will celebrate in style with some quality blog candy, so be sure to stop by tomorrow to check it out. 

Monday, August 8, 2011

Soft and Pretty for 411

Today's card is one that is just so pretty!  I am not much of a girlie girl, but I have to say that now and then I like pretty, girlie things.  I put this card to together for this week's Saturday sketch challenge over at Stamping 411.  Here is the sketch:
...and here is my card (with the sketch turned sideways!)
Soft and pretty card for SSC215 using the Nature's Pace stamp set and Beau Chateau DSP

Isn't this pretty?  I have to say I struggled with this sketch!  I actually started making this card a couple of days ago and just couldn't get it to work.  So I set it aside and came back to it last night and viola...it just fell together!  Sometimes I need to remember to do that more often...I think I would create far fewer ho-hum cards!  I'm not going to take the time tonight to give you step-by-step instructions for this one, but I will give you some tips:
  • The focal image is stamped in brown Staz-on and then  coloured with a blender pen and watercolour crayons.  I also spritzed it and distressed it with the tea stain ink from the distressing kit.
  • The "No. 5" and "for you" are from the Clearly for You set.
  • The white-with-blue floral DSP isn't sponged...it comes  that way!
I think the rest is pretty straightforward.  I have to say I am loving this DSP!  Such pretty images with soft, feminine colours!  I may just see more "girlie" in my future!

Sunday, August 7, 2011

16-year-old Boy birthday for PPA105

Today's card is one I designed for this weeks colour challenge over at Pals Paper Arts.  The challenge is to create a card using daffodil delight, island indigo and lucky limeade.  I started out to design a masculine card, but then as I went started thinking it would be perfect for a 16-year-old boy's birthday.  You'll see why in a second...

Masculine birthday card for PPA105 using the Need for Speed stamp set and sentiment from Pennant parade.

Inside of card with sentiment from the new Delightful Dozen set.
Now what 16 year old boy doesn't wish for a shiny new sports car for his birthday??  I remember turning 16 (about a century ago!) and dreaming of getting a car for MY birthday!  (Didn't happen, but a girl can dream, right?)  Anyhow, this card was really fun to make because I got to use a bunch of new product as well as some retired stuff too.  Here is how I put it together:
 Starting with an island indigo card base, I stamped the textured background on both the front and inside the card using the retired Sanded background stamp and island indigo ink. ( I can't, for the life of me figure out why that one retired!  It is perfect for adding just a bit of texture...).  I also sponged the edges of the front of the card using the same coloured ink.  Setting that aside, I took a scrap of black cardstock and ran it through my Big Shot using the new houndstooth embossing folder.  LOVE that one!!  I tore the long edges and distressed the short ones and then sanded the raised areas with my sanding block.  The result, I think, looks like a tire tread (I actually asked my husband and HE agreed, so it must be good!).  Then, taking another scrap of lucky limeade cardstock, I randomly stamped the Good Grid mini background stamp (one I got FREE at convention!) all over.  I distressed and then sponged the edges in the same colour.  Then I spritzed both lucky limeade and basic black for even more textural interest.  I glued this piece to the back of the "tire tread".  Then I wrapped some retired black twine around the lucky limeade piece. securing it with glue dots.  Using my matpack and piercer, I pierced holes for five mini brads in the lower right corner of the lucky limeade piece and then adhered it to my cardfront.  Setting this aside, I stamped the car image in black Staz-On ink on a piece of whisper white cardstock.  Using my aquapainter and watercolour wonder crayons, I coloured the car.  I then adhered the stamped piece to a slightly larger piece of daffodil delight cardstock and adhered it to the cardfront using dimensionals.  The final touch on the front was to stamp the sentiment from the Pennant Parade set in island indigo ink on whisper white cardstock and punch it out with my jewelry tag punch.  I punched two more tags, layered them together with glue dots and added them to the knot in the twine.  On the inside of the card I stamped the sentiment in black Staz-on again on whisper white cardstock.  I coloured in some of the letters in lucky limeade.  I then stamped the image again in island indigo and daffodil delight, cutting out parts of the sentiment I wanted to highlight, and adhering them where appropriate.  I sponged the edges of the sentiment piece using lucky limeade and adhered it to the inside of the card. 
Now...I just need to find a 16-year-old boy to give this to...though I suppose a 40-year-old man would likely enjoy it too!

Saturday, August 6, 2011

My Soccer Star and aTimeless Birthday card for Monkey 68

Well, soccer is done for another year.  My son had great fun this year and today he got his prized "gold" medal!  Check this out!
He couldn't be prouder of that medal!

Now we have our Saturday mornings back for a few weeks until skating starts in September!  We're gonna make the most of these next few weeks, for sure!
Now on to some stamping.  I haven't played along over at A La Card Monkey for a while and I figured it was high time I paid them a visit.  This week's sketch is anything goes, so I did a birthday card using the Timeless Portrait DSP.  I really love the bold images and colours in that paper!  I am definitely going to stock up during the Buy-three-get-one-free promo this month! Here is the sketch:


...and here is my card:
Card for Monkey68 using Timeless Portrait DSP and a sentiment from the retired Watercolor Trio set.

Close up of focal image and sentiment.

Inside sentiment from Bring on the Cake set.
I'm not sure what it is that appeals to me more about this DSP:  the bold patterns or rich colours!  I just knew the moment I saw it in the new catty that I just HAD to own everything in the suite!  You likely can't tell, but I embossed the black background layer using the new strips embossing folder...another new fav...as are the designer frames folders.  I especially love how the large oval punch fits inside the oval frame perfectly!  This card really was very easy to put together thanks to my Big Shot and punches...the only stamping is on the sentiments!  I may just have to use it in an upcoming class or workshop!

Friday, August 5, 2011

Soccer Thanks

Tomorrow is the last game for my 4-year-old's soccer season.  He has had his ups and downs as he has learned that just because the other kids are trying to take the ball away from him doesn't mean they don't want him to play!  There were many tears shed until he got the idea that it is all part of the game!  He has come a long way this season due, in large part, to the patience of his coach.  All of the coaches in my son's league are parents of kids who play and who volunteer to act as the coach.  They have many watchful eyes on them and are held to a standard that, at times, is unfair...they are, after all, volunteers!  My son's coach has been great...working with the kids on skill-building drills before the "game" and then encouraging them to do their best during the "game".  I use the term "game" rather loosely as they are only four and it is a bit of a free-for-all.  One week my son spent the entire game running hand-in-hand with a little girl from the opposing team!  So cute!  None-the-less he has learned a lot and we wanted to express our appreciation for his coach's willingness to take on such a big job.  I made this card using a REALLY old set called I Love Soccer...check it out:

Thank you card for my son's soccer coach using the long-retired I Love Soccer set as well as the still-current Calendar Alphabet set.

Inside of card...the jersey is coloured lucky limeade (his team's colour) and stamped with my son's number.  The sentiment is from the Pennant Parade set.
So this card uses a bunch of retired product, but also several new items too!  As I mentioned, the stamp set in ancient!  However I used the pennant builder punch and the Calendar Alphabet set to do the banner.  The banner is held together with the new silver mini brads...these are really teeny, but so great!  The colour scheme is wild wasabi, daffodil delight and poppy parade. I chose the DSP (from a retired Simply Scrappin' kit) because I thought the pattern looked a little bit like the mesh on a soccer net.  I spent most of the evening working on this one...I sure hope he likes it!  I know my son will enjoy giving it to him with the Tim Horton's gift card we bought...what coach doesn't love Timmy's?!?

Wednesday, August 3, 2011

Another class preview

Yesterday I showed you one of the cards for my September class featuring the Vintage Vogue stamp set.  Today I have another for the same class that uses the Very Vintage wheel as well.  It also uses my new favourite DSP:  Mocha Morning!

Sneak peek at September's monthly class projects using Vintage Vogue and Perfectly Penned stamp set and Very Vintage wheel.
This card comes together far more quickly than the one I showed you yesterday!  It really is quite simple, but that gorgeous Mocha Morning paper makes it so elegant!  I honestly see A LOT of that paper in my stamping future!  I also love the WOW that the lace border punch offers...so pretty when punched from brushed gold cardstock and threaded with black satin ribbon!  Ok...that's all the hints I'm going to give!  If you want to know more, come on out on September 13th and make this and two other cards with me!

Tuesday, August 2, 2011

September Monthly Class Sneak Peek!

Believe it or not, I am already into planning my classes and events for September!  I know it seems early, but my monthly card class happens on the second Tuesday of every month and with school starting, I know the first week is going to be nutty!  So, since my featured stamp set next month will be Vintage Vogue, I started playing with ideas to use that set.  It is one that I've had for a while but haven't inked up in quite some time.  So, here is the first card I came up with.  It is based on the sketch from the Paper Players this week...see what you think!

For PP57:  September's Monthly Card Class Preview using Vintage Vogue and Perfectly Penned stamp sets and Beau Chateau DSP
So, whaddya think?  I really didn't set out to make a shabby-chic card, but that's kinda how it turned out!  There is a lot of fussy cutting in this one, so my class attendees will need their favourite pair of paper snips.  Don't you just LOVE the Beau Chateau DSP pack?!?  It is so pretty and feminine I can't get enough of that paper!  Good thing I can stock up with the BOGO (or rather BTGO) event this month!  I'm not going to give the deets for making this one...you'll just have to come and take my class on September 13th!  Its posted on my website events page HERE...you can even RSVP right from that page!  I hope you can join us...did I mention you also have the option to purchase the Vintage Vogue set at a discount if you attend this class?  That's right...every month I feature a different set and offer it for purchase at a discount for all class attendees.  Plus, if your order is $40 or more you get to take the class FOR FREE!!  See, now there's even MORE reason to join us!  Click on over to my Stampin' Up website and RSVP today!

Monday, August 1, 2011

And the winner is...

...Jessica Strub!!  Jessica was the 11th person to complete my online survey and, lucky her, the random number generator I used chose her number!  That means Jessica receives a $40 Stampin' Up gift certificate to redeem with yours truly.  Congratulations, Jessica!

Now, on to today's news.  With the start of a new month there is always a new promotion to tell you about.  This month's offer is a GREAT one!  Its BOGO time at Stampin' Up!  When you buy 3 packs of Designer  Series Paper (DSP) from either the Summer Mini or the new Idea Book & Catalogue, you get a fourth pack FREE!!!  That's like getting 25% off each pack.  To put that into dollars and cents, the regular price of  a pack of DSP is $13.50 or $1.13 per page;  during this promotion it is only $10.13 per pack or $0.84 per page!!  You can't get gorgeous paper like this ANYWHERE for that price!  Take advantage of this offer and stock up...you'll be glad you did!!  Click HERE for a pdf listing all of the products included in this promotion and call or email to place your order today!

Also this month, I am getting back to my regular schedule of clubs and classes.  Check out the "Upcoming Events and Classes" tab at the top of this page for a listing of this month's offerings.

Another thing I look forward to with the start of a new month is our monthly team meeting and swap.  This month's challenge is to create a card using some kind of technique and the Just Believe stamp set.  The idea is to have a selection of cards using the same set to show how versatile our stamp sets are.  For my card I decided to try brayering.  I am by no means an expert at this technique...in fact, I'm pretty novice.  However it just goes to show you don't have to be Michelle Zindorf (the goddess of brayering) to create a pretty decent looking card using a brayer.  Check this out:

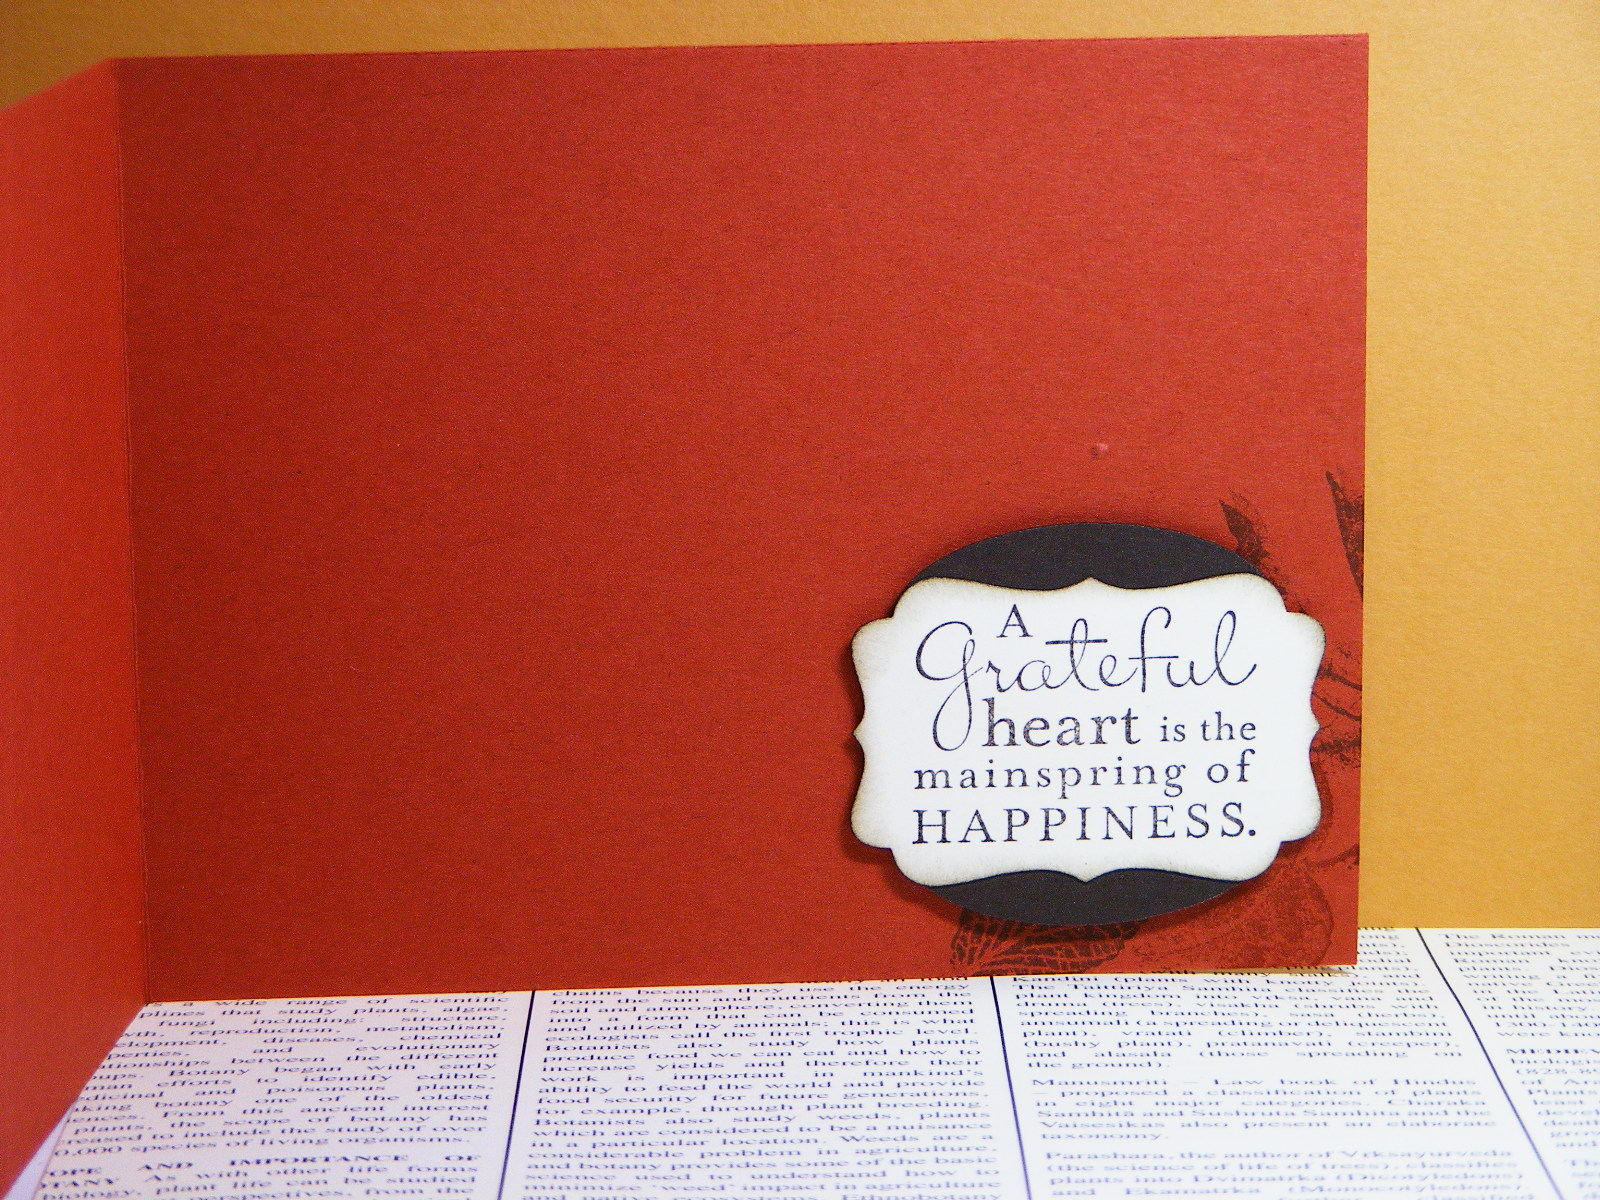
Brayered Just Believe card for our monthly team meeting swap.
Not bad, eh?  Now those of you who were are convention may be thinking this looks kinda familiar...that's likely because I was inspired by that gorgeous "GROW" set on the main stage!  I went for a late-summer-wild-flower-garden-at-sunset kinda look...did I succeed?
This card is WAY out of my comfort zone for a lot of reasons:  first of all the brayering thing...not so good at it yet.  Secondly there are NO embellishments whatsoever on this card!!!  Talk about a departure from the norm for me!!!  The only details I added were the pierced holes in the upper corners and on the sentiment tag.  Now, my critics will be saying "But there are still 4 layers on this card..."  and yes, its true, there are.  But you gotta give me props for the sheer au naturel nakedness of this card, no?  In any case, I was proud of myself and the restraint I showed...I hope  my fellow team members will be too!

For those of you who want to try this background yourselves, the colours I used (in order) were daffodil delight, peach parfait and cajun craze.  The images were stamped using the mahogany ink spot from the distressing kit.  I just found it was  darker and more opaque than the early espresso I had originally planned to use.  The sentiment is stamped using the same ink on very vanilla, punched out with the decorative label punch and then sponged with peach parfait and early espresso. 

This really was an easy card to create, aside from the steep brayering learning curve.  Even so, I did 10 in 2 hours...which translates to 18 minutes per card.  Pretty quick, if you ask me!
Related Posts Plugin for WordPress, Blogger...