Happy Thursday! Today is a BIG Day around here! Not only is it time for our monthly Stamping Symphony Blog Hop, but it is also FLASH SALE day! What's on sale, you ask? Oh, only every stamp set in the Annual Catalogue (with the exception of Host-exclusive sets)! Yep...you read that right. For 24 hrs, today only, Annual Catalogue stamp sets are on sale for 15% off. This sale happens exactly once a year and today is the day. So, after hopping along with us, head on over to my online store and score some deals on stamps!
Now on to our blog hop. This month we are all about Fall projects, but the challenge was to make anything BUT a card. So, I made this adorable treat box that would make a perfect little place-setting gift for Thanksgiving dinner...
I absolutely adore fall and all that it brings. Cooler temperatures, brightly coloured leaves, and, of course, pumpkins! The images in the Hello Harvest stamp set make my fall-loving heart happy. I used a soft orange (Pale Papaya) to colour my pumpkin, which sets it off nicely against the darker shades in the Rustic Harvest Designer Paper. Now, can you guess where the die-cut leaf and sprig came from?? They are from the Ranunculus dies! They just happened to be stored along with my Rustic Pumpkin dies and caught my eye as being perfect to pair with my stamped pumpkin.
The belly band slides off the box to reveal pretty patterns from the Rustic Harvest DSP...I can't get enough of that paper!
The box opens up to reveal a pocket that is sized to fit several treat-size candy bars or a gift card or pumpkin spice tea bags...so many possibilities! There is space on the inside flap to write a brief personalized greeting as well. Gotta love a gift that doubles as a card!
I demonstrated this box in my Facebook live this week. You can catch the replay on my YouTube channel below. Start at about 36:00 to see how this box comes together. (Or watch the entire video for more ideas with the Rustic Harvest suite!)
Happy Friday...who's ready for the weekend?? This weekend is a busy one for me! Today we are holding our monthly Stamping Symphony Blog Hop AND our first-ever Instagram Hop and then tomorrow is the kick-off of my annual retired product BOGO sale. So much happening, so let's get to it!
This month our blog hop theme is Sale-a-bration and I have a fun little gift box and card duo to share...
Both the card and box are made using the Sale-a-bration card and envelopes! I LOVE when I can make cute projects using FREE product! Let's take a closer look...
For the card, I used one of the Soft Sea Foam card bases. The stitched rectangle layer is die-cut from one of the envelopes I disassembled. Those envelopes are printed on the inside and are just too pretty not to use on a project! I die-cut several of the botanical elements from Pool PArty and Soft Sea Foam card stock. The stamped images are stamped in Pool Party and Soft Sea Foam ink and then coloured with the light Stampin' Blends of the same shade. I die-cut the pot from a scrap of the gorgeous Splendid Day Designer Paper for a hit of glam.
My favourite part of this little duo is this adorable treat box. It measures 2-3/4" wide x 4" tall and is 3/4" deep. It is perfectly sized to hold chocolate, a gift card, handmade soaps, a cookie...so many possibilities! Here are the details...
I started with one of the Pool Party card bases from the Sale-a-bration cards and envelopes pack. Without folding the card base and with the long side of the card base at the top, I cut 3/4" off the non printed half of the card base. Then, I scored the printed half at 3-1/2". Then I scored all four sides at 3/4". A quick snip of all of the flaps with my paper snips, some folding and adhesive and I had the cutest little mini shirt box. I demonstrated this project in my Facebook live this week...you can see the replay on my YouTube channel...the video link is posted below.
To decorate the box I used more of the disassembled enveloped, some die-cuts and more of that gorgeous Splendid Day Designer Paper. I added a bit of Pool Party Sheer ribbon to tie the box closed, which adds the perfect bit of shimmer.
Here's the link to my video where I demonstrate these projects, along with two others. You'll want to start at about the 32:00 mark for the card and box demonstration. I've also included all of the measurements in the video description...just scroll down to see them!
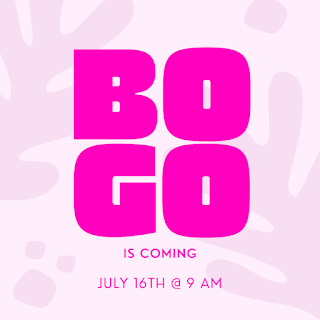
Now before I go, a reminder that my online retired product BOGO sale is kicking off tomorrow, Saturday, July 16th, 2022 at 9:00 am. Shop my huge selection of deeply discounted retired items and receive them FREE with an equal value order of new products from any current catalogue. PLUS, if your order reaches $60 or more, you'll earn Sale-a-bration freebies too! Wahoooo!! You can access the sale by clicking the graphic below:
Now it's time to hop on over to Sandy's blog to see her Sale-a-bration creation:
Happy Tuesday-before-Christmas! I know I have been MIA the past couple of weeks and I do apologize. The demands of teaching in-person and online simultaneously at school have been pretty overwhelming the past while. It has been all I could do to get my lessons planned, posted, work marked and report cards done. Now that the much-needed Christmas break is finally here, I have time to catch my breath and catch up on my Stampin' Up! business. I feel so out of touch with all of you!
Before I get to today's project, I want to remind you that my January-June 2021 Mini Catalogue Designer Paper Share is now open for ordering. For details and ordering information, click the image below. Orders must be placed by January 4th, 2021.
Now on to today's quick and easy project...check out these adorable Christmas trees!
These little boxes are SO cute and easy to make. The larger one holds 4 Lindor chocolate truffles...perfect to set at each place for Christmas dinner. I made the smaller one so it doesn't open, but could easily be left unsealed to hold more treats. I decorated my boxes with Heartwarming Hugs Designer Paper and some gold foil die-cut stitched stars. The sentiment is from the Tree Angle stamp set, stamped in Real Red ink and trimmed with some Real Red Braided Linen Trim.
I posted a how-to video on my YouTube channel, including the measurements and scoring information. For you convenience, I'll post them here too:
Large box:
2-1/2" x 11-1/2" Pear Pizzazz card stock - with 2-1/2" side at the top, score at 1/4" on both long sides. Then rotate so that 11-1/2" side is at the top and score at: 1/2", 3" and 7-1/4"
You'll also need two of the largest isosceles triangles from the Stitched Triangles dies, cut from Pear Pizzazz card stock. I used the next-largest size die to cut the DSP layers.
My banner piece is 7/8" x 3-1/2".
Small box:
2" x 9-3/8" Pear Pizzazz card stock - with 2" side at the top, score at 1/4" on both long sides.
Then rotate so that the 9-3/8" side is at the top and score at: 1/4", 2-3/8" and 5-7/8"
I used the second-largest isosceles triangle die for this smaller box.


.heic)
.heic)
.heic)


.heic)
.heic "Splendid Day Suite Stampin’ Up!")
.heic "Splendid Day Suite Stampin’ Up!")
.heic "Splendid Day Suite Stampin’ Up!")
.heic "Splendid Day Suite Stampin’ Up!")