Saturday, August 30, 2014

Pointillistic Posies for The Twist

Today I have to share my final project for The Technique Twist.  The Design Team have decided to shut down the blog following this week's challenge due to low participation.  For our final challenge we were to try a new technique that takes us out of our comfort zone.  I decided to try a brand-new-to-me way of applying colour to images called Pointillism.  Now, I studied this style of painting in my music history courses in university because musical trends typically reflect those in visual art; but I never imagined I'd actually try it myself!  Here is my project:

Thinking of you card featuring the Bloom With Hope and Papillon Potpourri stamp sets with sentiment from Sassy Salutations.
Now this technique takes some practice.  My first attempt looked nothing like this, but with practice I finally got the hang of it. I stamped my flowers from the Bloom With Hope stamp set, masking the larger flower to give the illusion of depth. I used my Blendabilities:  Melon Mambo, Daffodil Delight and Smokey Slate.  There is a great tutorial over on Splitcoast Stampers that explains how to achieve this looks very clearly.

Essentially, you are colouring your flowers using a series of little dots.  It takes practice to know when to stop with each colour.  The rest of the card is pretty straightforward.  I added a little vellum butterfly from the Papillon Potpourri stamp set and stamped the sentiment from Sassy Salutations.  I used the Large Polka Dots TIEF to emboss the white background panel and the Delicate Designs TIEF  for the black strip.  I added some silver metallic ribbon and a Basics Glimmer Brad to complete the front of the card.

Inside view with sentiment from Really Good Greetings.
On the inside I stamped one of the flowers again and coloured it.  The sentiment is from the Really Good Greetings set and is die cut using the Deco Labels framelits.

I hope you'll consider playing along with our final challenge at The Technique Twist.  It would be great to go out with a bang!  Have a great weekend!!

Friday, August 29, 2014

Fall Thank You

So?  Are you loving the Holiday Catty as much as I am?  Today I have another project using new products...check it out:

Fall thank you card featuring the Embossing Folder Stamping Technique, with sentiment from Letterpress Winter.
I designed this card for my September techniques class.  It uses the Embossing Folder Stamping Technique.  I love the way the honeycomb image almost looks like it is dripping with honey :)  I used Crushed Curry and Cajun Craze ink to get that look.  I die cut the label using the Apothecary Accents framelits...one of the first sets I ever purchased, but still among my go-to Framelits.  The background layer is Kraft card stock that I embossed using the Woodgrain TIEF and layered on a Mossy Meadow card base.


I stamped the sentiment from the new Letterpress Winter stamp set in Mossy Meadow right over my honeycomb background.  I added a bit of Linen Thread and a little leaf from the Autumn Wooden Elements.  The arrangement of leaves came from the Fun Fall Framelits.  I die cut the leaves in Crushed Curry, Cajun Craze, Soft Suede and Mossy Meadow.  I embossed them using the Decorative Dots TIEF to add some texture and added a single little gold glimmer leaf for some sparkle...because who doesn't love a bit of bling?

Inside view with sentiment from the Merry Everything stamp set.
On the inside I stamped the sentiment from the Merry Everything stamp set and added another little die cut leaf with a wee linen thread bow.

Now I need to tell you all of the details about the fabulous Host promotion that just began yesterday.  I've been hinting about it for a month or so now, and I can finally give you the scoop! 

From now until October 31st, host a party that generates $325 in sales (before shipping and tax) and you will receive the absolutely awesomely fabulous Good Greeting stamp set FREE!  That's IN ADDITION to the $40 in free Host Dollars you get to spend on other products of your choice.  Click on the flyer to check out all of the fantastic sentiments in this set...and the font?  LOVE it!

http://su-media.s3.amazonaws.com/media/docs/Host_Promo/NA/Flyer_Host_Demo_8.28-10.31.2014_CA.pdf
Click the Flyer to View


Don't have time to host an event?  Be your own party!  Place a $325 order yourself (not hard to do when you see just how many AWESOME goodies are in the Holiday Catalogue) and you'll get the Good Greetings set FREE as well as another $40 to spend on products of your choice.
Contact me to book your event or visit my website to place your order.

Thursday, August 28, 2014

Today is the day!

Today is a BIG day!  Not only does the Holiday Catalogue go live, but it is also my first challenge as a  Guest Designer for Just Add Ink!  I am so happy to be counted among such a talented group of artists!  So, without further ado, here is this week's challenge:

JAI 229


...and here is my project...inspired by the last fleeting days of summer:

Birthday card featuring the Shaving Cream technique and sentiment from the Yippee Skippee stamp set.
The minute I saw that yummy-looking inspiration photo I thought of the Shaving Cream technique!  Those marbled swirls of colour were exactly what I was going for.  I used Tempting Turquoise, Daffodil Delight, Melon Mambo and Perfect Plum reinkers in my shaving cream.  I love the way it turned out!  I die cut three scoops of ice cream (really they're the thought cloud from the Word Bubbles Framelits).  The cone was punched from Baked Brown Sugar card stock using the new Tree Punch from the Holiday Catty and embossed using the Tiny Triangles TIEF.  Once I had assembled my triple scoop ice cream cone I covered the ice cream with Crystal Effects and left it to dry over night.  It gives my ice cream a great sheen...like it's melting and waiting to be licked!


The background layer is embossed with the Decorative Dots TIEF.  I added several scraps of ribbon for even more texture and colour as well as some Candy Dots in Melon Mambo, Tempting Turquoise and Daffodil Delight.  I layered it on a Melon Mambo mat and then a Daffodil Delight card base.
The sentiment is from the Yippee Skippee stamp set and is perfect for this card...after all, what's happier than ice cream??  I die cut the sentiment using the Labels Collection Framelits and layered it on a Tempting Turquoise label cut with the Deco Labels Framelits.


On the inside I added more scraps of ribbon for a faux-banner and stamped the sentiment from Sassy Salutations in black.

Such a fun and happy card...what a great salute to the end of summer!  I'd love to see your interpretation of the inspiration photo, so play along and be sure to post a photo of your creation HERE.

Today is also the LAST DAY to take advantage of the extra $65 in product in the Demonstrator starter kit.
Last chance to get $65 in free product!


Until midnight tonight you get to choose $190 worth of products of your choice for just $125, no shipping and no tax!  I'd love to have you join my Tri-City Stampers team.  To order your kit click HERE

Wednesday, August 27, 2014

Ornamental Pine and Plaid

One more day!  In less than 24 hours the Holiday Catalogue will be live!  I am SO excited about this catalogue!  So manay awesome new products to play with!  Today I have another project using new products:

Christmas card featuring the Ornamental Pine stamp set
One of the first stamp sets that went on my list when I first saw the Holiday Catalogue is the Ornamental Pine set.  I love the traditional pine branch, pinecone and ornament images.  They were just begging to be paired with plaid, so I used a bit of DSP from the Trim the Tree stack.  I also wanted a bit of a rustic look so I pulled out some Early Espresso Core'dinations card stock and ran it through the Big Shot with the Woodgrain TIEF.  Did you know you can still get Core'dinations card stock on the Clearance Rack?  It's a great deal! 


I stamped the pine branch in Garden Green and then heat embossed the pine cones in Early Espresso.  I die cut the image using the Ovals Collection Framelits as I did the larger Garden Green mat behind it.  I added some Cherry Cobbler seam binding ribbon, forming a bow with a (retired) glimmer brad for just a hint of sparkle.  The sentiment is stamped in Cherry Cobbler ink and die cut with the Project Life Cards and Labels Framelits.

On the inside I stamped the pine branch again and added the sentiment in Cherry Cobbler. 

This is another one that will be in my line up of projects at my Holiday Head Start card buffet in September.  Click here for details!

Tuesday, August 26, 2014

Merry Christmas Wreath

Are you tired of the Wonderous Wreath stamp set yet?  Hope not, because I'm counting down to the new  Holiday Catalogue and today I have a Christmas card I created using  some awesome new stuff...

Holiday card featuring the Wonderous Wreath and Good Greetings stamp sets.
I don't know what it is about the blue and silver combo for Christmas...I just love it!  Here I used Lost Lagoon, Island Indigo, Smokey Slate and silver.  The wreath is stamped first in Lost Lagoon, then the second layer is in Island Indigo.  I heat embossed the berries in silver and then die cut the whole thing with the Wonderful Wreath framelits.  The DSP I used for the background is from the All Is Calm specialty DSP pack, which is just gorgeous! 


The sentiment is from the Host promo set called Good Greetings...(did you know you can get this awesome 24-piece set for free when you host an event this fall??  That is in addition to the regular awesome Host benefits!)...but I digress...I stamped the sentiment in Island Indigo and cut a little banner.  I added a wee bit of Stitched Satin ribbon as well as a little silver metallic bow.  The final touch was a few Frosted Sequins for some sparkle.

Inside view with sentiment from the Wonderous Wreath set.
On the inside I stamped the sentiment in Island Indigo and the Wreath, stamped off, in Lost Lagoon.

This card will be part of the line-up for my Holiday Head-start Card Buffet coming up at the end of September.  Click HERE for more information.

Monday, August 25, 2014

Wonderful Wondrous Wreath

Well this is the week!  The Holiday Catalogue goes live on Thursday...are you excited??  To help you with your Wishlist I'll be posting projects using new products all week...in case you need help deciding that you want it all ;)
Today I have a fall-themed project I made using the Wonderous Wreath stamp set and coordinating framelits...
Fall-themed card featuring the Wondrous Wreath stamp set.
I used a TON of new products on this card!  Here is the list (so you can add them to your Wish List):

  • Wonderous Wreath stamp set (135047)
  • Wonderful Wreath framelits (135851)
  • Colour Me Autumn DSP (135820)
  • Fun Fall Framelits (135856)
  • Good Greetings - Hostess Promotion coming soon!  Be sure to book your fall or Holiday event now so you can get this one for free.  Trust me, you NEED this set!

 I love the little collection of leaves in this shot.  The Fun Fall framelits are simply awesome and have so many possibilities beyond just Fall-themed projects.  LOVE them!

I liked them so much I decided to use a bunch more on the inside of my card!  Heehee :)

I actually based this design on  last week's sketch challenge over at Sunday Stamps, but alas, I am too late to enter it :( 


The really good news is that I'll be designing for every Sunday Stamps challenge starting in September!!  Woohoo!  Be sure to check us out starting September 7th.

Friday, August 22, 2014

Miss Me?

Did you miss me?  I've been away up north at my parents' all week.  I had planned to post while there but their Internet access was sketchy at best, so I've pretty much been off the grid for the last seven days.  It was a nice way to enjoy my last few days of freedom...next week it is school work and preparations for the new school year which begins September 2nd.
Today I have another one of the projects for the first month of my Blendabilities club.  Check it out...

Any-occasion card featuring the Blended Bloom and Tag Talk stamp sets.
I really like the look of the Blended Bloom image stamped on Typeset DSP and then shaded with the Calypso Coral Blendabilities.  To add definition to the centre of the flower I left part of it unshaded, allowing the colour of the DSP to act as a highlight.

The sentiment label is from the new Tag Talk set in the Annual Catalogue.  I love that it gives a chalkboard look.  I heat embossed it in black to give it a bit of a sheen and added a couple of rhinestones for some bling.

If you haven't joined my Blendabilities club yet there's still time!  Check out the details here and sign up today!

Saturday, August 16, 2014

Thinking about fall at the Twist

Well the weather here this week has been so chilly folks have taken to calling it "Aug-tober".  The cooler temperatures and the arrival of my Holiday Catalogue pre-order have put me in the mood for Fall and Holiday projects, so I decided to use one of my favourite new bundles for my project for this week's challenge at The Technique Twist.  We are all about partial die cutting this time...a cool trick to create interestingly shaped cards.  Check it out:

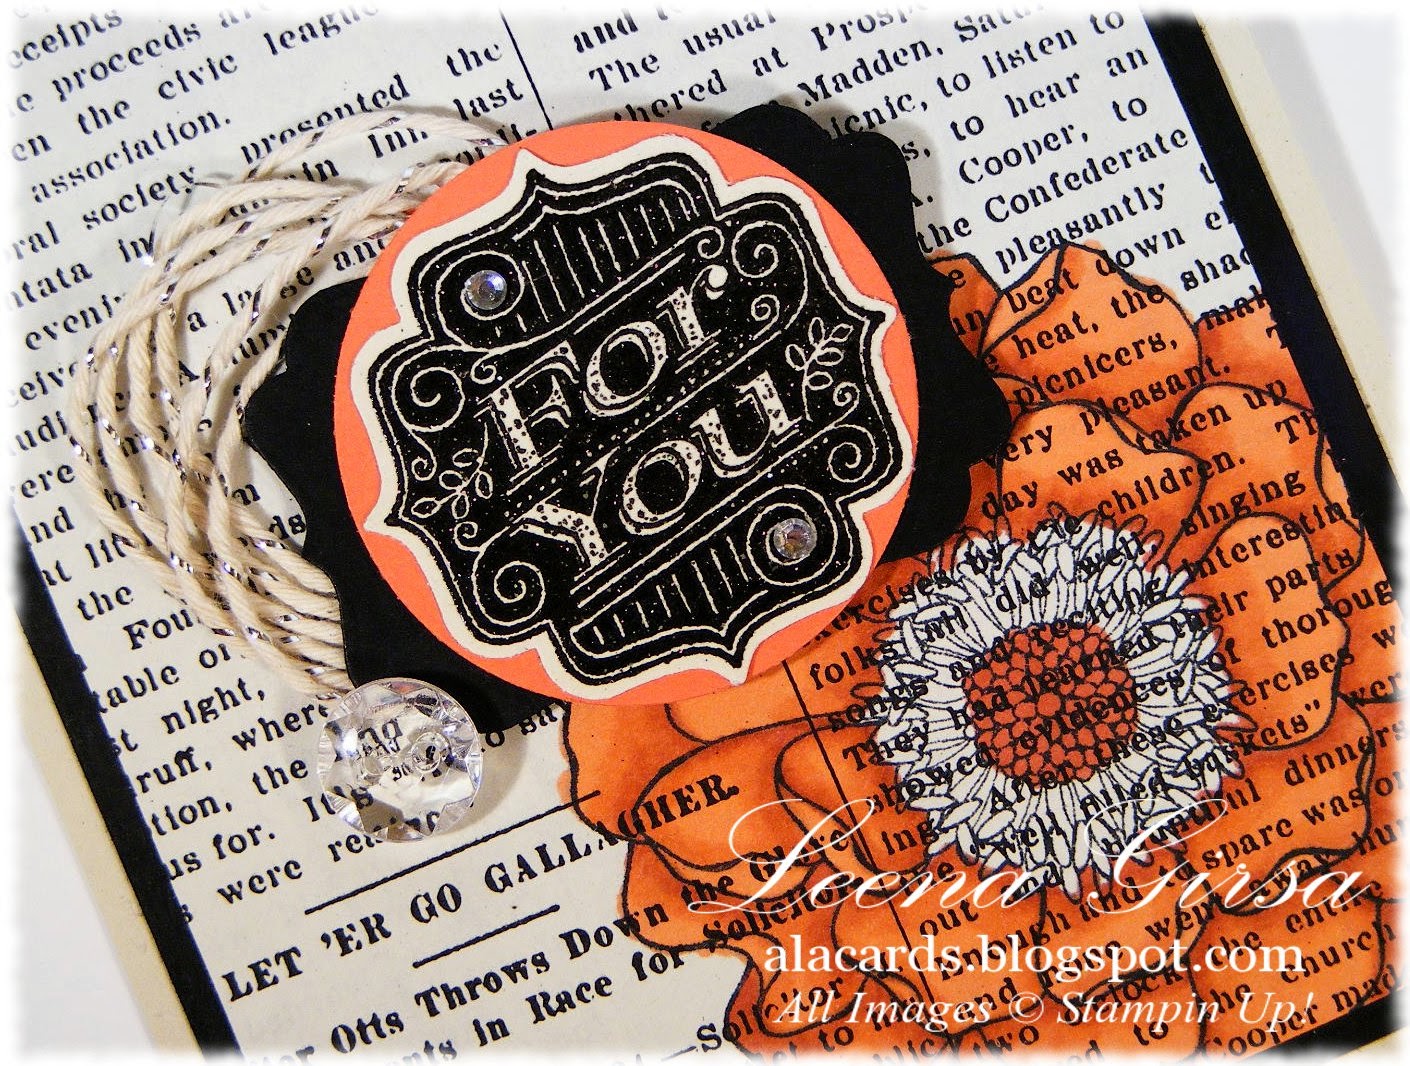
Thanksgiving card featuring the Partial Die Cutting Technique and using the new Wondrous Wreath stamp set and Wonderful Wreath and Fun Fall Framelits.
Here is a side-view shot so you can see how it is cut:

Cool, huh?  To learn how to do this check out Debby Hughes' great tutorial over on Splitcoast Stampers.
I used a few new products that will be available in just a couple of weeks in the Holiday Catalogue.  The wreath is from the Wondrous Wreath set and features different layered images that can be stamped overtop of eachother to create the different coloured leaves and berries.  SO easy and very cool.  The set also has a coordinating set of Framelits which have a marker on them to make lining up the framelit with the stamped wreath image a breeze.  No more fussing with the framelit to try and get it right!  Yippee!!


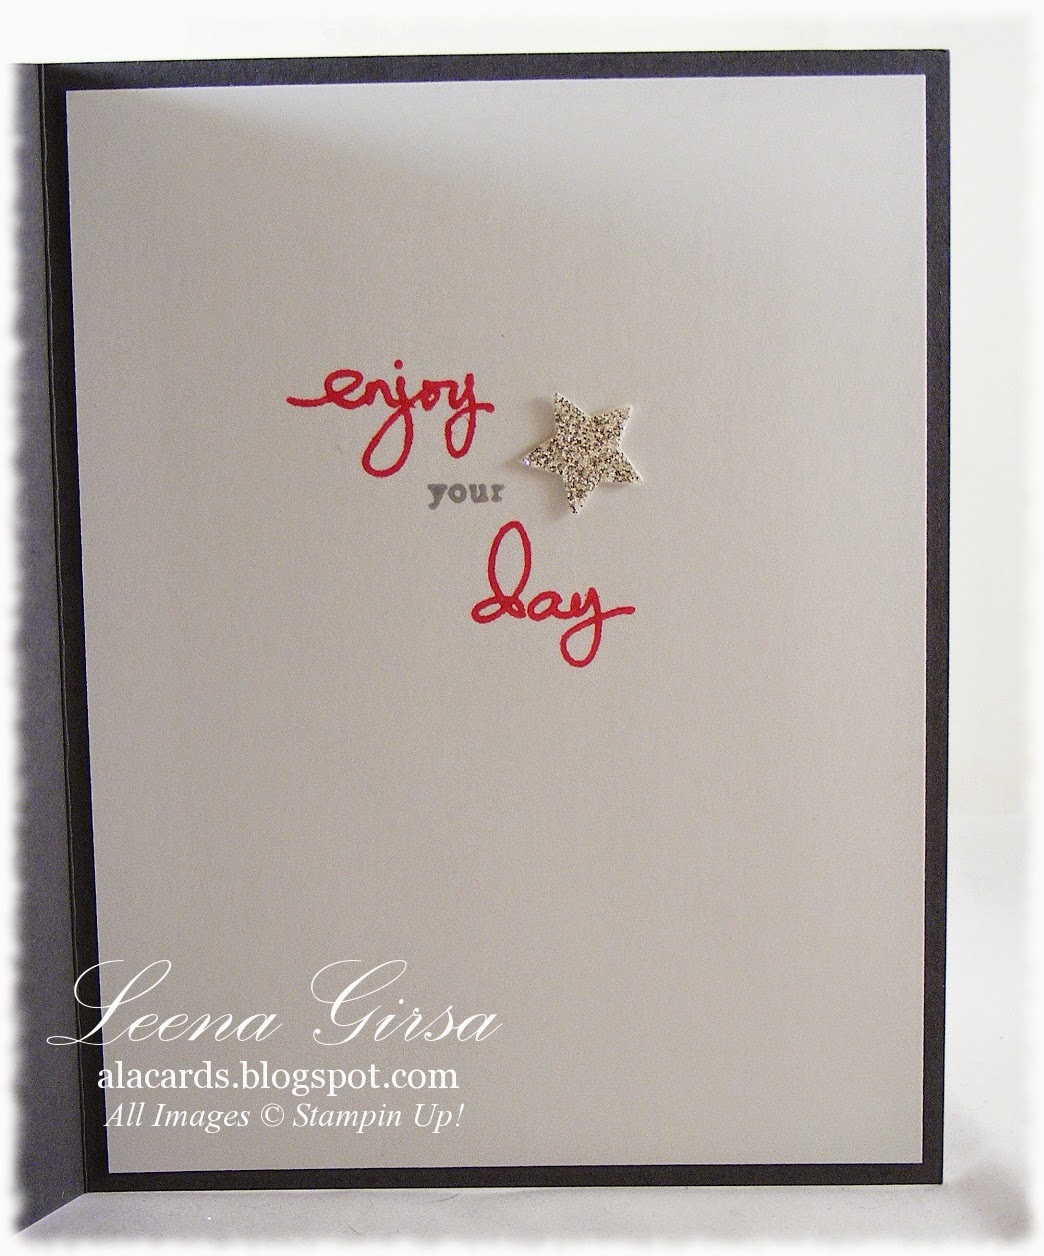
The sentiment is from an upcoming Hostess promotion set called Good Greetings and it is AWESOME!  There are 24 sentiments, all in the same fun handwritten font, that cover just about every fall/winter occasion you can think of.  You'll definitely want to plan to host an event so you can receive this one for FREE!  More details about this will be coming at the end of the month...stay tuned!
The little leaves behind the sentiment were die cut using another new set of framelits called Fun Fall.  They also have a coordinating stamp set with lots of leaf, pumpkin and even a little ghost image, all of which have a matching framelit to cut them out.  Love it!  To add depth to my wee leaves I sponged the edges lightly with Crumb Cake ink before adhering them to the back of my sentiment banner.  I also added a bit of linen thread to complete my arrangement.

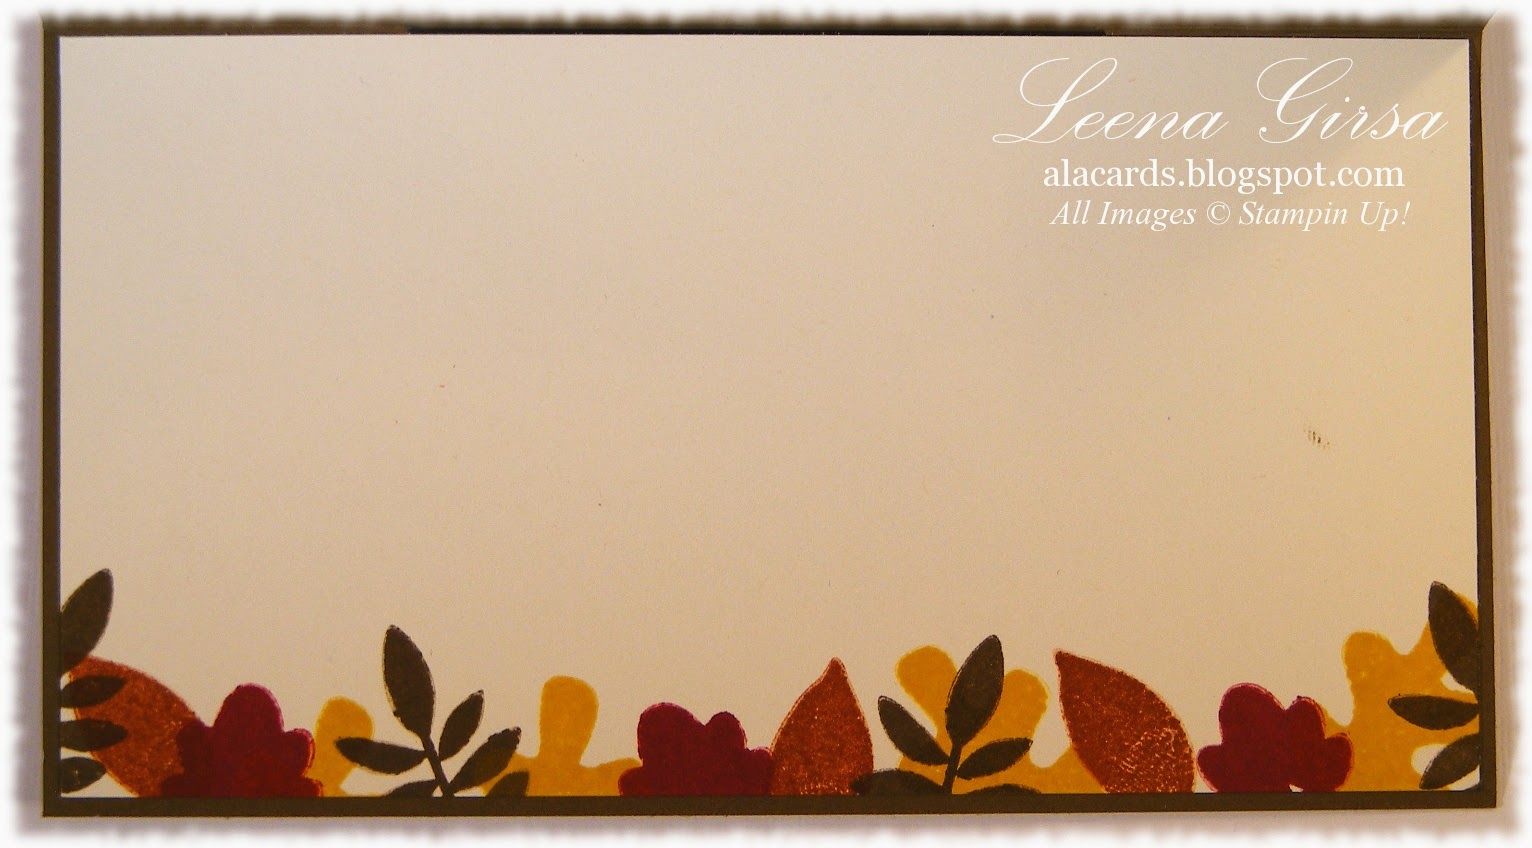
On the inside I stamped the little leaf images from the Fall Fest stamp set several times along the bottom edge, leaving plenty of space for a note of gratitude.
So, now it's your turn!  Get out your favourite dies and Big Shot and give this technique a try.  You'll stretch your creativity and discover a new (slightly adictive) syle of card! 

Now for a little business...
All this week I have been celebrating my Blog-aversary and have offered a draw for some free Blog Candy.  Well today I get to announce the randomly selected winner....drumroll please....
 
The winner is Lindy!
Leena your website looks awesome!! I'm still trying to figure out how you did that header!? I love the little jewels and all the textures which is so what stampin up is all about! :D I am SUPER excited to be a part of the blendabilities club :) I love blending and adding depth and 3d to the pictures. That calypso coral flower with the grey looks amazing! eeeek so excited that you are doing this!! - See more at: http://alacards.blogspot.ca/2014/08/its-my-blog-aversary.html#sthash.MPu7MaMR.dpuf

Leena your website looks awesome!! I'm still trying to figure out how you did that header!? I love the little jewels and all the textures which is so what stampin up is all about! :D I am SUPER excited to be a part of the blendabilities club :) I love blending and adding depth and 3d to the pictures. That calypso coral flower with the grey looks amazing! eeeek so excited that you are doing this!! - See more at: http://alacards.blogspot.ca/2014/08/its-my-blog-aversary.html#sthash.MPu7MaMR.dpuf
Thanks for you kind comments Lindy and congratulations on winning.  I'll be in touch about delivering your new loot.
Have a great weekend eveyone!

Friday, August 15, 2014

Something Worth Celebrating

Today is the final day of my week-long Blog-a-versary celebration.  I hope you've enjoyed the series of birthday cards I've shown you as much as I enjoyed making them :)
Don't forget to leave a comment on Monday's post to be entered in my draw for some sweet loot.  I'll announce the winner tomorrow, so be sure to leave your comment by midnight tonight.
Now today's card is one I designed for my Dog Daze of Summer Card Buffet that is happening tonight; though I really should have called it the "How-can-it-be-this-cold-in-August Card Buffet"...it is FREEZING here this week!  Anyhow...I digress.  Here is my project...

Birthday card featuring the Mixed Bunch stamp set with sentiment from Remembering Your Birthday.
I pulled out my long-neglected Mixed Bunch stamp set for this one.  I really love this set but haven't used it in ages!  I started by stamping the larger blossom in Blushing Bride in and the smaller one in So Saffron and then ran the card stock through the Big Shot with the Honeycomb TIEF


The punched blossom is also stamped in Blushing Bride and punched with the Blossom punch.  The centre is stamped in So Saffron and punched with the 7/8" Scallop Circle punch.  I added some baker's twine and a few pearls that I coloured with the lightest shade in the Old Olive Blendabilities set...it is soooo close to the shade of the Pear Pizzazz card base!  The sentiment, from the Remembering Your Birthday set, was inked with Pear Pizzazz and Blushing Bride markers and die cut using the Ovals Collection framelits.

On the inside I stamped the floral images again and added the corresponding sentiment, also from the Remembering Your Birthday set.  A quick and easy card, perfect for a buffet!
Be sure to stop by tomorrow to see if you've won my give-away and to check out my new contribution for this week's challenge at the Technique Twist...you'll get a sneak peek at some new Holiday Catalogue products!

Thursday, August 14, 2014

Birthday in the Stars

Are you tired of birthday cards yet?  Hope not!  We still have another day in my week-long Blog-a-versary celebration :) 
Today I have another cheeky birthday card I made using the Age Awareness stamp set and the new Hearts and Stars Decorative Masks...

Birthday card featuring the Age Awareness stamp set and Hearts and Stars Decorative Masks.
Like the colour scheme?  I totally CASE'd it from the Annual Catalogue!  I was stumped for a fun, masculine colour combo, so I turned to pg. 50, which is where this stamp set is listed, and lo and behold, the perfect colour combo for my project!  Gotta love a little inspiration ;)

I used the stars mask to stencil the background using Crushed Curry, Night of Navy, Rich Razzleberry and Old Olive ink with sponge daubers.  I added some baker's twine and a couple of glimmer stars for embellishment, not wanting to bling it up too much, given that I wanted something appropriate for a birthday BOY. 


The cool thing is that this colour combo could really work for anyone...gotta love versatility! 

On the inside I stamped another sentiment from the Age Awareness set and stencilled a couple more stars.

If you haven't already done so, be sure to check out Monday's post and leave a comment to be entered in my draw for some birthday loot!  Tomorrow is the last day, so don't miss out :)

Wednesday, August 13, 2014

Mambo Birthday

Well, I'm into day three of my week-long Blog-aversary celebration.  It's been four years and I'm in the mood to party!  Be sure to check out my post from Monday and leave a comment to be entered into my draw for some awesome loot!
Today I have another birthday card that features Blendabilities.  Did you know you can use them to colour more than just flowers???

Birthday card featuring the Endless Birthday Wishes stamp set.
See?  I used my Blenda's to colour a birthday cake!  Teehee :)  I used the Melon Mambo and Smokey Slate collections to colour the cake and stand.  I used the Scalloped Tag Topper punch to cut the Whisper White and Melon Mambo tags and then stamped and coloured my cake on the white tag.  I also added some Irridescent Ice confetti to add texture and shine around the cake...not sure it shows so well in the photo.


The rest of the card is a piece of cake (pun intended)!  The DSP is from the Neturals DSP stack.  I used Melon Mambo 1/8" Taffeta ribbon, a Vintage Faceted button and some glimmer stars for embellishment.

On the inside I created a sentiment with words from the Endless Birthday Wishes set and added another little glimmer star.  Easy peasy!

Tuesday, August 12, 2014

Let's party all week!

A good friend of mine firmly believes in celebrating her birthday all week, which, quite frankly, I can't argue with!  So let's keep the Blog-aversary party going!  Be sure to visit and comment on Monday's post to be entered in my draw for awesome loot.  Now for another birthday card...

Cheeky birthday card featuring the Age Awareness stamp set.
I have to admit that this was the first stamp set on my wish list when I first saw the new Annual Catalogue.  It just makes me chuckle and at my age, I need a chuckle or two on my birthday!  The best part of this one is the inside...

Haha!  I can think of so many people this card would be perfect for...myself included!  It was super-easy to put this together thanks to some marvelous Wahsi tape.  I used patterns from several different packs.  The Bermuda Bay is from the Everyday Adventure Project Life Accessory kit.  The Tangerine Tango is from the Retro Fresh pack and the Crushed Curry is from the Beach House pack.  I love how quick and easy it was to lay down the strips of tape to create a fun, colourful patterned background for my sentiment.  The background Bermuda Bay card stock is embossed with the ZigZag TIEF and is adhered to a Basic Black card base.  I added button and some Baker's twine as well as a little glimmer arrow for fun.

If you love Washi tape as much as I do you're going to love the Holiday Catalogue.  There are several new packs available...one with FIVE rolls in it.  LOVE it!  My pre-order box arrived last evening and I can't wait to dig in and play!  Now if I could just find someone to entertain my 7-year-old for a few hours....

Now today is Tuesday which means its time for a new round of Weekly Deals...

Big Shot Die Bigz L Petite Purse
Price: $40.95  
Sale: $30.71
Envelope Liners Framelits Die
Price: $32.95 
Sale: $24.71
Fancy Fan Textured Impressions Embossing Folder
Price: $9.95 
Sale: $7.46
Label Petite Curly Punch
Price: $15.95 
Sale: $11.96
Natural 7/8 Cotton Ribbon
Natural 7/8" Cotton Ribbon
Price: $9.95  
Sale: $7.46
Rosette Designer Bigz XL Die
Rosette Designer Bigz Xl Die
Price: $52.95  
Sale: $39.71
Tea Time II Digital Kit -- Digital Download
Tea Time Ii Digital Kit - Digital Download
Price: $8.95 
Sale:  $5.37
Wildflower Meadow Textured Impressions Embossing Folder
Price: $9.95 
Sale:  $7.46
 Remember, sale prices are good till next Monday at midnight :)

Monday, August 11, 2014

It's My Blog-aversary!

Today my little blog turns FOUR!  I had no idea when I started writing about my love of papercrafting back in 2010 that I would still be going strong four years later!  As you can see, to celebrate the occasion, I gave my blog a makeover over the weekend, designing a new header using My Digital Studio and changing up the font and colour scheme.  I am thrilled with the result...new and fresh and ready for another 4 years!  I also have a bit of blog candy to give away...after all, what would a birthday party be without a loot bag?!?  More on that below...but first I have, appropriately, a birthday card to show you.  This is one of the projects that is included with the first month's kit for my Blendabilities Club members.  Check it out:

Birthday card featuring the Blended Bloom stamp with sentiment from Sassy Salutations.
I LOVE my Calypso Coral Blenabilities!  The shades blend so perfectly it makes colouring so easy.  It is the perfect set with which to start my club off.


Because my club members will start with just the one colour set I kept my flower monochromatic, but was able to get lots of shading with the three markers and the Colour Lifter (also included in the first month's kit).  So?  Have you joined the club yet?  What are you waiting for?  Click HERE for all the details.

Now for some birthday loot!


I'm giving away the items pictured above:  Artisan Embellishments Kit, Print Poetry DSP stack and Vintage Verses WM stamp set.  So, how do you win this little bundle of goodies?  Simple!  Leave a comment on today's post with your thoughts on my blog makeover and/or what you think of the new Blendabilities alcohol markers.  I will randomly select one lucky winner from all who leave a comment.  You have until Friday, August 15th to leave your comment.  I will announce the winner on Saturday, August 16th.  Good luck!
Related Posts Plugin for WordPress, Blogger...