Friday, February 27, 2015

Thank You Petals

Happy Friday...wahoo!  It's the weekend!  I am SO glad to see this week come to an end...it has been nuts!  On top of that I think my sinus infection is coming back :(  I'm starting to feel like I did before I started my antibiotics...and I just finished them three days ago!  Argh!

Today I have another project I made last weekend whilst playing with the Painted Petals stamp set.

Painted Petals Photopolymer stamp set (137146)  $29.95


Thank you card featuring the Painted Petals stamp set and coordinating Painted Blooms DSP.
I have always been partial to the combination of blue, white and yellow.  It is such a clean, crisp colour pallette.  My kitchen in my very first apartment was decorated in this colour scheme...I still love it!  For this card I took my inspiration from the gorgeous patterned paper in the Painted Blooms pack.  I used Pacific Point, Crushed Curry and Whisper White, with Wild Wasabi for the leaves and stems.  Using the Painted Petals stamp set, I stamped the leaves first and then stamped the flowers; I find it is much easier to line up the images that way. The sentiment is stamped in Pacific Point.  I punched the stamped images using the 2-1/2" circle punch and layered it on a Pacific Point circle die-cut using the Circles Collection framelits.  The background Whisper White panel is embossed using the Spring Flowers TIEF.  I used a 2" strip of DSP from the Painted Blooms pack and embellished it using some of the Sale-a-bration Best Year Ever Ribbon. The entire card is constructed on a Pacific Point card base.


This is a really quick and easy card...the perfect project for a weekend stamping session!  Enjoy!  Be sure to stop by on Sunday for a new sketch challenge from Sunday Stamps for even more inspiration!  Have a great weekend!!

Wednesday, February 25, 2015

Faux Rusted Metal Butterfly

Happy Hump Day...we're halfway to the weekend!  Woohoo!

Today I have one of the projects I did with my techniques group last month.  We were focusing on faux
metal last month...this one uses the Faux Rusted Metal technique...

Birthday card featuring the Butterfly Basics stamp set and the Faux Rusted Metal technique
For this faux rusted metal butterfly I switched it up a little bit.  Before layering the die-cut butterflies, I heat embossed the corresponding butterfly image from the Butterfly Basics stamp set in white and die-cut it out using the Butterflies Thinlits.  I glued that on the top of my stack of die-cuts.  You can see a hint of the lacy-patterned image in this close-up:

I love the extra texture that added step gives to the finished piece.  For more information on how to do the Faux Rusted Metal Technique click HERE.  To create the background piece for my butterfly, I began by stamping the fern image using Old Olive ink.  I added the script text from the By The Tide stamp set using Crumb Cake ink, stamping off before stamping on my card stock.  Then I stamped the honeycomb image using gold metallic ink.  I also sponged the edges of the Very Vanilla panel lightly with Crumb Cake ink.  The background Blushing Bride panel is embossed using the Pretty Print (retired) TIEF.  The sentiment is heat embossed in gold and die cut using the Apothecary Accents Framelits.  I added some gold baker's twine, gold sequins and a rosette from the Artisan Embellishment Kit.  I used a Baked Brown Sugar card base.

On the inside I stamped the fern, the script and the honeycomb in the same manner I did on the front of the card.  The little butterfly is stamped in Blushing Bride ink and the sentiment is is Baked Brown Sugar ink.

Thanks for stopping by...have a great day!

Tuesday, February 24, 2015

Amazing You and Amazing News!

Happy Tuesday!  I hope your week is off to a good start.  Things here are still frigid...sure hope Spring makes an appearance soon!
Today I have a card that will turn your thoughts to Spring.  I played with my Painted Petals stamp set last weekend...

Any-occasion card featuring the Painted Petals stamp set
I absolutely LOVE the Painted Petals stamp set!  When I first saw it in the catalogue I thought "The last thing I need is another flower stamp set!"...boy, was I wrong!  This set is so versatile and yields gorgeous results with very little effort. It also doesn't hurt that I get images that look watercoloured...I love that look...so soft and pretty.  On this card I stamped the stems in Wild Wasabi ink and the blossoms in Rich Razzleberry ink.  Then I took a blender pen and added shading to the leaves and stems with Mossy Meadow ink and to the flowers with Blackberry Bliss.  I also added Crushed Curry centres to the flowers.


The sentiment is stamped in Rich Razzleberry ink and punched with the Decorative Label punch.  I layered it on two more Decorative Labels punched from Rich Razzleberry card stock.  I added a bit of Painted Blooms Cotton Twine in Wild Wasabi and mounted the whole thing on a Rich Razzleberry card base.

On the inside I stamped the stems and blossoms again, adding shading as I did on the front, and stamped the sentiment in Rich Razzleberry.  Such a soft, pretty card...perfect for Spring!

Now I have some exciting news!  Stampin' Up just announced four brand new product offerings that are being added to the Sale-a-bration line-up!  That's four fabulous new freebies you can earn!  Check out the flyer below to see the new products as well as some sample projects.  These new, exclusive items will be available from March 1st to 31st only and my only be earned by placing a Sale-a-bration-qualifying order.

Click the flyer to view.
Don't miss out on your chance to get your hands on these awesome new products! 

Now here are this week's Weekly Deals.  Prices are good until Monday at midnight :)

2013-2015 In Color Sequin Assortment by Stampin' Up!
2013-2015 In Color Sequin Assortment
Price: $6.50 
Sale:  $4.88
Basic Black Baker's Twine by Stampin' Up!
Basic Black Baker's Twine
Price: $3.95  
Sale: $2.96
Celebrate Easter Ensemble -- Digital Download
Celebrate Easter Ensemble - Digital Download
Price: $13.95  
Sale: $8.37
Crisp Cantaloupe Thick Baker's Twine by Stampin' Up!
Crisp Cantaloupe Thick Baker's Twine
Price: $4.95  
Sale: $3.71
Night Of Navy 1/2 Seam Binding Ribbon by Stampin' Up!
Night Of Navy 1/2" Seam Binding Ribbon
Price: $9.50 
Sale:  $7.13
Simply Created Banner
Price: $11.95 
Sale:  $8.96
Tangerine Tango Baker's Twine by Stampin' Up!
Tangerine Tango Baker's Twine
Price: $3.95 
Sale:  $2.96
Whisper White 5/8 Satin Ribbon by Stampin' Up!
Whisper White 5/8" Satin Ribbon
Price: $9.50  
Sale: $7.13

Monday, February 23, 2015

Colouring 101 - Beautiful Blendabilities

Happy Monday!  I hope you had a fabulous weekend.  My hubby and I got to have our belated Valentine's celebration last night with dinner at one of our favourite local restaurants.  The perfect way to end the weekend :)
Today I have my final post in my series on colouring.  I'm all about the Blendabilities today.  Since these awesome tools were released last spring I have used little else to colour my stamped images.  It was good to go back to my blender pens and water colouring for this series, as it has reminded me just how wonderful each medium can be, depending on the look I want.  So, here are some projects using my beloved Blendabilities:

Birthday card featuring the Bloom with Hope stamp set with sentiment from Blooming with Kindness
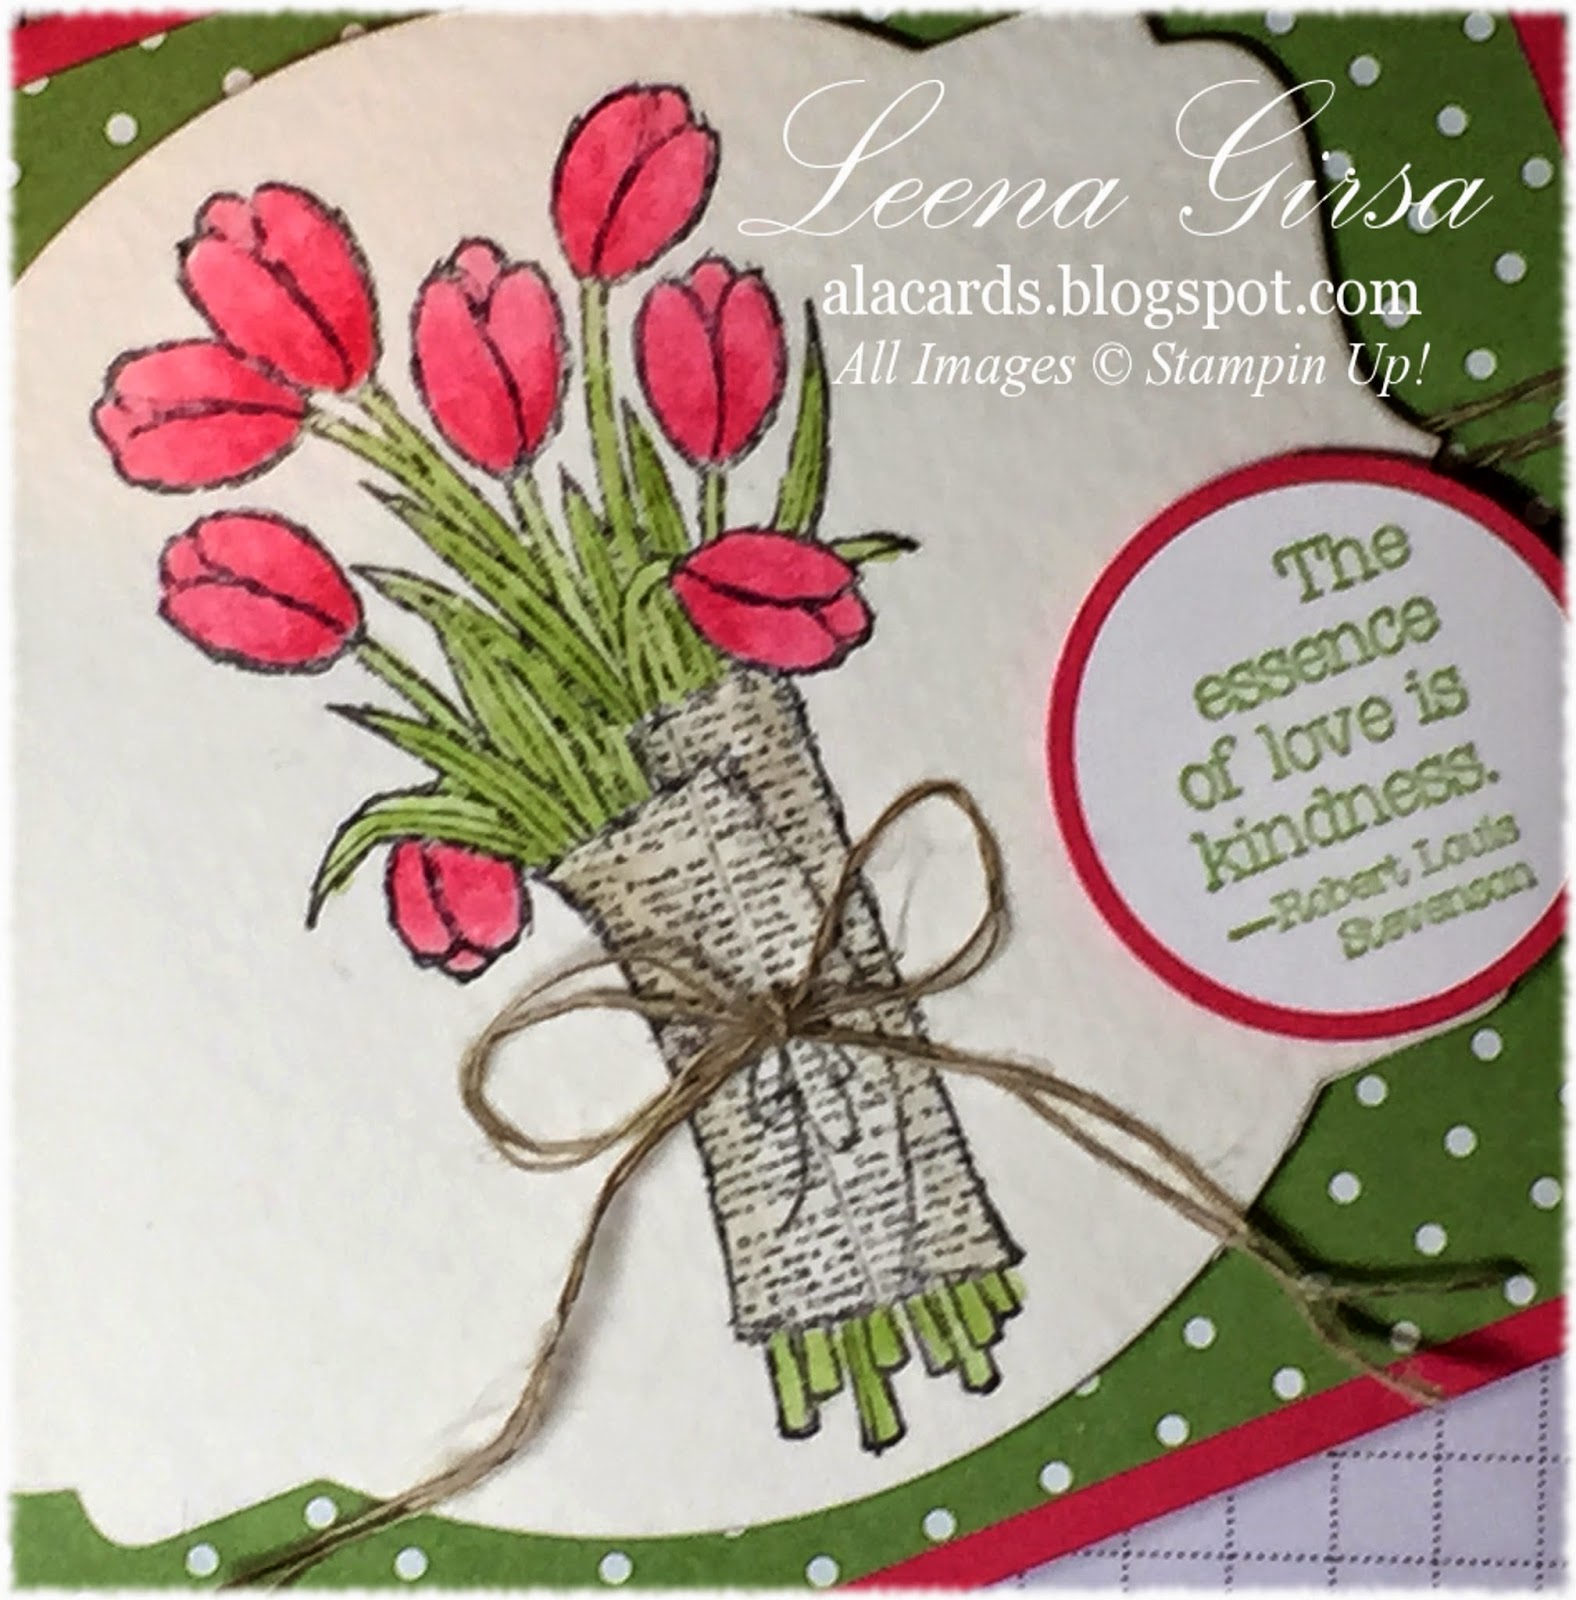
For this one I stamped the flower images from the Bloom with Hope hostess-exclusive stamp set using Memento Tuxedo black ink.  I coloured them using the Cherry Cobbler, Pumpkin Pie and Daffodil Delight assortment Blendabilities sets. I used Old Olive for the leaves and stems.  The background layer of Basic Black is embossed using the Pretty Print (retired) TIEF. 


The sentiment is from the Blooming with Kindness set and is heat embossed in gold and die-cut using the Apothecary Accents framelits.  The wee butterfly is punched from gold foil card stock using the Bitty Butterfly punch and embellshed with rhinestones.

.Here is another project featuring the Blended Bloom stamp.  I kept the same Calypso Coral colour scheme as on the projects from my previous posts in this series so that you can see the difference in the colouring media.

Thank you card featuring the Blended Bloom stamp with sentiment from Sassy Salutations
I stamped the Blended Bloom image in Memento Tuxedo black ink and coloured it using the Calypso Coral and Daffodil Delight Blendabilities assortments.  The sentiment, from Sassy Salutations is also stamped in Tuxedo Black ink.  The edge of the panel is embossed using the Delicate Designs TIEF and embellished with some ribbon from the Best Year Ever Sale-a-bration Accessory pack.


So now the question is:  Which colouring media do you like best?  In case you missed them, here are the previous projects using the Blended Bloom set for easy comparison:

Coloured using a Blender pen and ink pads.
Coloured using an Aquapainter and ink pads.
Leave me a comment telling me which one you prefer...I'm interested in hearing your opinion.  Have a great week!

Friday, February 20, 2015

Colouring 101 - Blended Blossoms

Happy Friday!  I sure hope the weather where you are is warmer than it is here!  We are FREEZING at -30C!!  Brrrr...I can't wait for spring!

Today I have some spring flowers to show you.  Yesterday I showed you a couple of projects I coloured using watercolour...today I have some done with blender pens...

Any-occasion card featuring the Love is Kindness stamp.
This is another one of the projects we'll be making at my upcoming Colouring 101 class.  I stamped the Love is Kindness tulips using black Staz-on ink on watercolour paper.  Then I used my blender pen and Strawberry Slush ink pad to colour the blooms on the tulips.  For the leaves I used Wild Wasabi and Old Olive.  I added a hint of Sahara Sand to the newspaper wrapping around the tulips.  I die-cut the label using the Deco Labels framelits. 

The background DSP is from the Subtles Backgrounds DSP stack.  I added a bit of Linen Thread by way of embellishment.  The sentiment is stamped in Wild Wasabi ink, punched with the 1-1/4" circle punch and then matted on a 1-3/8" circle punched from Strawberry Slush card stock.  I used a Strawberry Slush card base.

Here is another sample I did using the Blended Bloom stamp.  I kept the same colour scheme as the watercoloured card I showed you yesterday so that it would be easy to compare the two colouring media.

Thank you card featuring the Blended Bloom and Simply Sketched (retired) stamp sets.

For this one I used Calypso Coral and Daffodil Delight inks with my blender pen.  Once again I stamped the image in black Staz-on, which is necessary so as not to run the ink with the blender pen.  The sentiment is stamped in Crumb Cake ink, punched with the Large Oval punch and matted on a scallop oval in Calypso Coral.


Be sure to stop by on Monday when I'll feature projects coloured with Blendabilities, as my Colouring 101 series wraps up!  Have a great weekend!!

Thursday, February 19, 2015

Colouring 101 - Wonderful Watercolour

Since the release of Stampin' Up's Blendabilities alcohol-based markers I have gotten away from using some of my other favourite colouring media.  It occured to me that perhaps some of you might be in the same situation, so I decided to do a series of posts highlighting different colouring media offered by Stampin' Up. 
Today I'm all about watercolour.  I have to admit this is still one of my favourite ways to colour stamped images.  It is quick and easy to blend colour and creates a soft look that is very appealing to me.  Here is a project I created using an Aquapainter and my classic ink pads for my upcoming Colouring 101 class:

Any-occasion card featuring the Bloom with Hope Hostess stamp set and sentiment from the Million and One set.
I love the sketched look of the images in the Bloom with Hope hostess set...they are perfect for watercolouring!  The key to successfully watercoloured images is to use Watercolour Paper.  Using regular card stock just leads to warped paper, poorly blended colour and generally unsatisfactory results.  On this card I stamped the flower and leaf images in black Staz-On ink.  I coloured the flowers using ink from the Rich Razzleberry ink pad and an Aqua painter.  (One may also use a small paintbrush and water for this look, but I have found it difficult to control the amount of water I am using with that method.  I much prefer the Aqua painter for watercolouring.) I added a little bit of Blackberry Bliss ink to add darker highlights on the flowers, blending it with the lighter shade as I went.  The centre of the flowers is coloured using Crushed Curry ink.  For the leaves I used Old Olive ink.

Once the images had completely dried I stamped the spatters using the Gorgeous Grunge stamp set and gold metallic ink.  The sentiment, from the Million and One stamp set, is heat embossed in gold.  The coloured panel is mounted on a Blackberry Bliss card base.

Here is another card I did using watercolour that features the Blended Bloom stamp...

On this one I used Calypso Coral ink for the petals and Daffodil Delight for the centre of the flower.

Stay tuned tomorrow...I'll have some projects coloured using a Blender pen to show you...it gives a completely different look!

Wednesday, February 18, 2015

Quick Birthday Card

Last week a friend of mine celebrated her birthday and today I want to share the card I made for her.  It is a super quick project featuring one of my favourite stamp sets...

Birthday card featuring the Butterfly Basics stamp set and coordinating Thinlits.
What I love about the Butterfly Basics stamp set is how easy it is to create a collage look.  For this card I simply stamped the various images in the Butterfly Basics set using a colour scheme of Crumb Cake, Blushing Bride, Pear Pizzazz, Soft Suede and metallic gold.  The gold spatters are from the Gorgeous Grunge stamp set.  I stamped some images full strength and others stamped off to create depth.  I matted the stamped panel with Pear Pizzazz card stock and mounted it on a Crumb Cake card base.

The butterfly is die-cut from Brushed Gold card stock using the Butterflies Thinlits.  I added some pearls to the body of the butterfly and adhered it to the card using glue dots.


On the inside of the card I stamped another Very Vanilla panel with the same images I used for the front.  Talk about quick and easy!  If the Butterfly Basics set isn't already on your wishlist it should be!

Tuesday, February 17, 2015

Time for a taste of Spring

I don't know about you, but I've had just about enough of winter!  The weather here has been brutally cold the past week with lows that have broken 100+ year-old records.  Add to that a sinus infection that just doesn't want to let go and I need a good dose of Spring!
Today I have a project I designed for my Blendabilities Club this month.  They are receiving the Soft Sky set, so I thought it would be perfect to colour some soft blue eggs...

Shabby chic card featuring the Backyard Basics (retired) stamp set with sentiment from the Crazy About You set.
I decided to go with a Shabby chic look for this one.  The eggs, from the (retired) Backyard Basics stamp set,  are stamped in Crumb Cake ink and coloured using the Soft Sky Blendabilities.  I die-cut them using the coordinating Backyard Basics Framelits (also retired) and arranged them on a nest of Hemp twine I have been hoarding saving for years.  I adhered the nest to a doily from the Artisan Embellishments Kit and layered that on a Sahara Sand card base, stamped using the Hardwood background stamp in Whisper White Craft ink.

The sentiment banner is die-cut using the Label Card Thinlits.  This little banner is actually supposed to pop up, but I found that when I ran it through my Big Shot with Whisper White card stock I only got the cut banner without the score lines, which made it perfect for this project.  I stamped the sentiments from the Crazy About You set in Blushing Bride ink, bending the photopolymer stamps slightly so that they would follow the shape of the banner.  I adhered the banner over the nest using dimensionals.  I added a little rosette and a button from the Artisan Embellishments Kit, as well as a little bow tied from Venetian Crochet Trim.

Inside view with sentiment from the Indescribable Gift set.
On the inside I stamped a sentiment from the Indescribable Gift stamp set in Sahara Sand ink and added a little vellum butterfly, punched with the Bitty Butterfly punch and sponged lightly with Blushing Bride ink, and embellished with three little pearls.


Here's hoping we'll really be able to say "Hello Spring"  sooner than later!

Now for this week's Weekly Deals.  Some great prices on punches!  Remember, these sale prices are only good until Monday at midnight :)

2014-2016 In Color Backgrounds Designer Series Paper Stack by Stampin' Up!
2014-2016 In Color Backgrounds Designer Series Paper Stack
Price: $26.95  
Sale: $20.21
Amped Up Ampersands Kit -- Digital Download
Amped Up Ampersands Kit - Digital Download
Price: $10.95  
Sale: $6.57
Celebration Basics Kit
Price: $18.95 
Sale: $14.21
Daffodil Delight 1/4 Cotton Ribbon by Stampin' Up!
Daffodil Delight 1/4" Cotton Ribbon
Price: $7.25  
Sale: $5.44
Mosaic Punch
Mosaic Punch
Price: $21.95 
Sale: $16.46
Pansy Punch
Pansy Punch
Price: $21.95 
Sale: $16.46
Pumpkin Pie 1/4 Cotton Ribbon by Stampin' Up!
Pumpkin Pie 1/4" Cotton Ribbon
Price: $7.25
Sale: $5.44 
What's Up Punch
What's Up Punch
Price: $22.95 
Sale: $17.21

Sunday, February 15, 2015

A New Colour Challenge

It's time for a new colour challenge over at Sunday Stamps!  Check it out:


Here is my Design Team submission...

Baby Boy card featuring the Baby, We've Grown stamp set
Sometimes when I see a colour combo I can immediately picture exactly what I want to do with in my head...this was one of those times.  I knew I wanted to use the sweet bunny from the Baby, We've Grown stamp set.  I stamped him in Memento Tuxedo black ink and then coloured him using Smokey Slate and Soft Sky Blendabilities.  I punched him out using the 1-3/4" circle punch and then layered him on a 2" Soft Sky circle and a 2-3/8" Smokey Slate Scalloped Circle.  The DSP I used is from the Neutrals Backgrounds DSP stack.  I layered it on a piece of Whisper White card stock on which I had stamped the sentiment in Memento Tuxedo black ink.  I coloured the sentiment using the Soft Sky Blendabilities.  The front panel is layered on Basic Gray card stock and then mounted on a Soft Sky card base.

I added half of a Tea Lace Doily, some Soft Sky Seam Binding ribbon and three little silver glimmer hearts punched with the Hearts Border punch by way of embellishment.

On the inside I stamped the sentiment (from Zoo Babies) in Smokey Slate and added the "Brand New" label that I coloured with Soft Sky Blendabilities and die-cut using the Starburst Framelits, along with a few silver glimmer hearts punched with the Confetti Hearts Border punch.

Be sure to visit Sunday Stamps to check out the rest of the Design Team's work and then give this colour combo a try.  We'd love to see what you come up with!

Saturday, February 14, 2015

Happy Heart Day!

Happy Valentine's Day!  I hope your day started better than mine!  I ended up in a walk-in clinic to get antibiotics for this crummy sinus infection.  Not the ideal start to the day, but when I came home, my wonderful hubby had vaccuumed and mopped the floors and had a lovely bouquet of flowers waiting for me!  What a keeper!

Today I have a cute little treat box I designed for my Feel the Love Valentine's class last week:

Treat box made with the Simply Scored and Envelope Punch Board.
This cute little design is not my own.  I used a tutorial by Tracey May.  It is super easy to put together, which made it perfect for my class.

Before assembling the box I stamped all the way around with the confetti hearts stamp from the Perpetual Birthday Calendar set using Real Red ink.  I also added some metallic gold spatters using the Gorgeous Grunge set.  The top of the box is punched with the Confetti Hearts Border Punch.  I tied the box closed with some 1/4" Real Red cotton Ribbon.

The tag began with Whisper White card stock punched with the Note Tag punch.  I added a gold foil heart that I embossed using the (retired) Adorning Accents TIEF.  I layered it on a Real Red heart die-cut with the (retired) scalloped heart Embosslit.  I added some gold sequin trim and a little banner heat embossed in gold  using the Good Greeting Hostess set (retired).

I hope you are spending today with the ones you love...make a special one!


Related Posts Plugin for WordPress, Blogger...