 |
| Birthday Card featuring the Pretty Petites stamp set and Sycamore Street DSP...both available for FREE during Sale-a-bration! |

Sharing my love of all things paper.
Thursday, January 31, 2013
Pretty Petites Take Two!
Today I want to show you a completely different look for the card I posted yesterday. I designed this one using the same basic layout but rotated it and switched up the DSP. This time I used the fabulous Sycamore Street DSP available for FREE during Sale-a-bration. Have a look:
Cute, huh? I am in love with the Pretty Petites stamp set and coordination punch in this year's Sale-a-bration brochure. The best part? The punch will be available for purchase AFTER Sale-a-bration, so I'll get to spend lots of quality time with it over the coming year! Can you believe I used FOUR different freebies on this card? The stamp set, the punch, the DSP and the ribbon were all free! Talk about crafting on a budget! Oh, how I adore Sale-a-bration!
Wednesday, January 30, 2013
It's Gonna Be An Extravaganza!
Many of you know that my Sale-a-bration Open House is coming up this weekend. Today I want to show you one of the Make-n-takes my guests will be creating. I wanted everyone to have the option of creating a Valentine's card for someone special in their lives and thought the More Amore DSP was just the ticket. Have a look:
Fun, huh? Don't you wish you were coming on Saturday? Well, what are you waiting for?? Email to confirm your attendance and drop on by between 2 and 5! This card will be waiting for you, as will yummy treats, games, prizes and a few surprises as well! Hurry...today's your last chance to get in on the fun!
By the way, the punch and stamp set I used to create this card are available for FREE during Sale-a-bration! Can't come Saturday? Email me your order of $60 and get the Petite Curly Label punch free! As a thank you I'll send you this card as well as the other Make-n-Take. Free product, free cards...what could be better? See you Saturday!!
 |
| Valentine's card featuring the Pretty Petites stamp set with sentiment from Lovely Little Labels. |
By the way, the punch and stamp set I used to create this card are available for FREE during Sale-a-bration! Can't come Saturday? Email me your order of $60 and get the Petite Curly Label punch free! As a thank you I'll send you this card as well as the other Make-n-Take. Free product, free cards...what could be better? See you Saturday!!
Tuesday, January 29, 2013
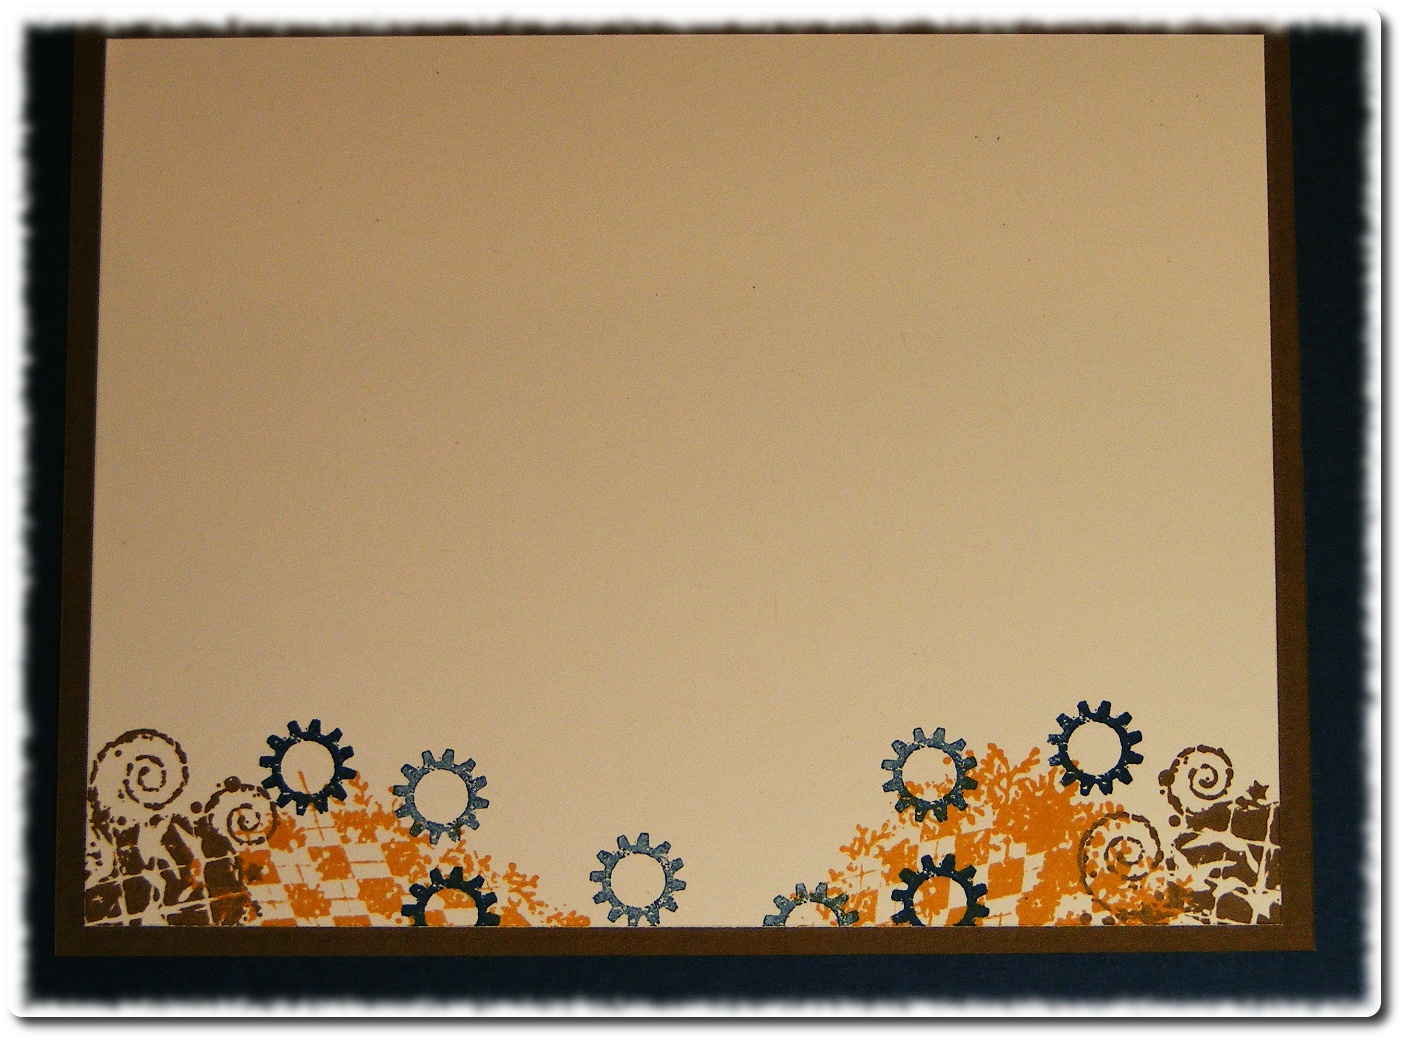
More Clockworks Manliness
I am so on a roll with the Man-cards this week! I mentioned last week that I am working on a new Kit-to-Go that features the Clockworks set. Today I'd like to show you a card I designed based on this week's sketch challenge over at The Paper Players. It's a great sketch with so many possibilities...have a look:
Here's my manly take on it:
I just love this stamp set! It is so much fun to just play with. For this card I completely omitted the actual pocket watch image and stuck to just the gears and backgrounds. This design will most certainly make it into the line-up for my Kit...stay tuned for more previews. The kit launches Feb. 1st!
Speaking of February, have you RSVP'd for my Sale-a-bration Extravaganza yet? It is coming up this Saturrday afternoon. It is a FREE event, but I need to order food, so please confirm your attendance by Wednesday, January 30th.
 |
Here's my manly take on it:
 |
| Masculine Thank You card for PP130 featuring the Clockworks stamp set with sentiment from Essentials. |
 |
| Inside view |
Speaking of February, have you RSVP'd for my Sale-a-bration Extravaganza yet? It is coming up this Saturrday afternoon. It is a FREE event, but I need to order food, so please confirm your attendance by Wednesday, January 30th.
Monday, January 28, 2013
Baptizing Baby
This weekend was a special one for our family as we celebrated the baptism of my nephew, Matthew. It was one long, food-filled day with Matthew's Italian Daddy, Mommy, Big Brother, Aunties and Grandparents! Lots of fun! To commemorate this special day in Matthew's life I created a card using this week's sketch over at Just Add Ink. Here is the sketch:

And here is Matthew's card:
Now, I have to admit I had a mighty hard time putting this one together. Not because I had trouble designing it, but because I literally couldn't put it together straight! I whipped it up first thing in the morning before we headed into Toronto (and before I'd had my first cup of coffee...that was my first mistake!) and I felt so rushed and pressed for time I just was gluing everything crooked! My bow was wonky, my oval uncentred, you name it I screwed it up! What should have taken 15 minutes took over an hour! I've learned my lesson...no stamping before coffee (or before 9:00 am!!) Regardless, I did manage to get it done and it looks ok...not my best work, by any means, but I think Matthew will appreciate it (he is only 6 months old, after all!!) I'm sure he'll drool and chew it lovingly and won't even notice my wonky bow or crooked oval!!

And here is Matthew's card:
 |
| Baptism Card for JAI150 featuring the Crosses of Hope stamp set. |
Now, I have to admit I had a mighty hard time putting this one together. Not because I had trouble designing it, but because I literally couldn't put it together straight! I whipped it up first thing in the morning before we headed into Toronto (and before I'd had my first cup of coffee...that was my first mistake!) and I felt so rushed and pressed for time I just was gluing everything crooked! My bow was wonky, my oval uncentred, you name it I screwed it up! What should have taken 15 minutes took over an hour! I've learned my lesson...no stamping before coffee (or before 9:00 am!!) Regardless, I did manage to get it done and it looks ok...not my best work, by any means, but I think Matthew will appreciate it (he is only 6 months old, after all!!) I'm sure he'll drool and chew it lovingly and won't even notice my wonky bow or crooked oval!!
Friday, January 25, 2013
Friday at last!
Wahoo it's Friday! Another week in the books! I hope your week was a productive one and that you've got lots of R & R planned for the weekend. We're heading off to my nephew's christening, so lots of family time on tap for us.
Today I want to show you a card I designed as I've been playing around with new ideas for Kits-to-Go. You may have noticed that tab disappeared from the top of this page a while ago, but fear not, there will be new kits coming soon! Anyhow, I am working on a kit to make Man-cards. So many people I talk to have trouble designing projects for male recipients, I thought it might be helpful if I offered a kit that focuses exclusively on that demographic. At this point I'm playing with the Clockworks set, which is perfect for just about any guy. Here is the first card I came up with:
Now, remember, this design is a work in progress...I'm not entirely satisfied with it, but it is a good start. One thing I am sure of is the colour scheme of More Mustard, Soft Suede and Midnight Muse...such warm, rich, vibrant colours! I'm going to have fun playing with them as I finalize my designs for this kit! I also really love the First Edition DSP for adding interest without overwhelming a design with pattern. It is one of my go-to elements, for sure. Speaking of go-to products, I couldn't resist using an Antique Brad here...still my very favourite embellishment of all time!! Every project just looks better with one of those beauties on it somewhere!! ;)
Today I want to show you a card I designed as I've been playing around with new ideas for Kits-to-Go. You may have noticed that tab disappeared from the top of this page a while ago, but fear not, there will be new kits coming soon! Anyhow, I am working on a kit to make Man-cards. So many people I talk to have trouble designing projects for male recipients, I thought it might be helpful if I offered a kit that focuses exclusively on that demographic. At this point I'm playing with the Clockworks set, which is perfect for just about any guy. Here is the first card I came up with:
 |
| Birthday card featuring the Clockworks stamp set and sentiment from Made For You. |
Thursday, January 24, 2013
Bloomin' Marvelous!
That's how I feel about Sale-a-bration! This promotion is my absolute favourite because it is so easy to earn FREE stuff! Today I have another card I made using some of the freebies I received with my Sale-a-bration benefits. I based on this week's sketch over at Retro Sketches. Here's the sketch:
...and here's my CAS card:
I've decided this is my very favourite Sale-a-bration set. Why? Because it is so darned versatile! I love the way the images all work together and that there are sentiments included. This is a terrific set to have in your stash, trust me! Another great perk is that the butterfly image from this set fits the new Bitty Butterfly punch in the Spring Catalogue perfectly!! How awesome is that?!? I'm also totally in love with the Sycamore Street DSP, which yet another SAB freebie. The variety of patterns and colours are just so versatile and fun to play with! The DSP on this card is from the Sycamore Street pack and provides just enough texture to add interest without distracting from the CAS look of the design. Such fun products and all for FREE!
 |
...and here's my CAS card:
 |
| CAS design for RS47 featuring the Bloomin' Marvelous stamp set |
Wednesday, January 23, 2013
A Little Love
Happy Wednesday everyone! Half-way to the weekend - yahoo!! I hope your week is going well. Today I have a cute little project I designed for an upcoming class. With the end of January fast-approaching, we all need to start planning for Valentine's Day; so I thought I'd show you this cute little card I designed based on this week's sketch challenge over at Hand Stamped Sentiments. Here is the sketch:
And here is my simple little card:
Now I have to admit, it took great willpower not to add bling to this card. I designed it with a male recipient in mind, so I resisted the urge to add a little sparkle highlight to the heart, but let me tell you it wasn't easy! I love this new stamp set from the Spring Catalogue. It has such a great variety of sentiments and images, perfect for just about any occasion. In case you missed it, here is the entire set:
 |
And here is my simple little card:
 | ||
| Love note for HSS 151 featuring the Cross My Heart Stamp set |
 | |
| Cross My Heart WM 126580 ($27.95) or CM 126582 ($20.95) |
Add it to your wishlist...you know you want to!!
Tuesday, January 22, 2013
Happy Sale-a-bration!!
Happy Sale-a-bration!!! Today marks the first day of two solid months of fabulous Freebies!! What's not to love about that?!? There are three ways to earn free product:
- Host - Host your very own stamping party or private class and receive extra (sweet!) hostess benefits.
- Shop - For every $60 you spend you'll receive your choice of 16 fantastic options
- Join - Join my Tri-City Stampers team and you'll receive an extra bonus 25% in your starter kit...that's $194 worth of product for just $125 (no shipping or tax added!!)
Now for some stamping. Today's project was inspired by last week's sketch over at Freshly Made Sketches, but alas, I am too late to enter! The linky list closed yesterday at noon, but I still want to share this fun little card with you. First, here is the sketch:

And here is my version using some fantastic SAB freebies:
 |
| Cheerful Thank you card featuring the Madison Avenue SAB stamp set with sentiment from Made For You. |
Monday, January 21, 2013
Water Colour Silhouette
Happy Monday! I hope you had a wonderful weekend filled with lots of relaxation and a little stamping! Most of my weekend was spent on household tasks, so I didn't get as much stamping time as I'd hoped, but I do have a few projects to show you this week. Today, I want to show you another card I designed for my monthly techniques class last week. It uses a technique I call Water Colour Background. Have a look:
This technique took me a while to master, but once I figured it out, it really was quite easy...and the results are fantastic! Much of the success of this technique lies in the choice of colours. Here I used So Saffron, More Mustard, Soft Suede and Chocolate Chip, after seeing them used for this technique by a fellow demonstrator. I love the way they blend and create a beautiful sunset background. I stamped the tree image from Serene Silhouettes in Early Espresso. The rest of the card is quite simple. I used a bit of the woodgrain patterned Natural Compositions specialty paper and some of the fantastic new Natural 7/16" ribbon to add some texture. The button is on of the Naturals Designer buttons from the Annual Catalogue and I added a couple of bitty button brads from the Vintage Trinkets. The little tag is stamped using the Lovely Little Labels set and punched with the Jewelry Tag punch. I didn't really set out to create a masculine card, but this most certainly has lots of manly features, though I'm sure most women would be happy to receive it as well!
 |
| Thank you card featuring the Serene Silhouttes stamp set with sentiment from Lovely Little Labels. |
Friday, January 18, 2013
Waxed Paper Resist Valentine Take Two!
Yesterday I showed you a masculine Valentine's card that used the Waxed Paper Resist technique. Today I have another Valentine that uses the same technique but with a totally different look! Check it out:

Cute, huh? I love this little love note! I used one of the notecards as the base, so this card measures just 5" x 3.5"...the perfect size for writing sweet nothings to your Honey. I kept the design very simple, stamping the sentiment with my Simply Serif Mini Alphabet stamps in Raspberry Ripple ink and the little honey bees from the new Itty Bitties set in Summer Starfruit. I added one of the fabulous new Designer build-a-brads, as well as a touch of Summer Starfruit stitched satin ribbon. Simple, fun and oh, so cute!
 |
| Cute little Valentine featuring the Itty Bitties and Simply Serif Mini Alphabet stamp sets |

Thursday, January 17, 2013
Waxy Valentine
Tonight my monthly techniques class meets and one of the techniques I'll be showing them is Waxed Paper Resist. This easy-peasy technique is a fun way to create interesting backgrounds on your projects. Here is one of the cards we'll be making tonight:
Ok...the colour in this photo is WAY off! It is supposed to be Soft Suede, Early Espresso and Cherry Cobbler...doesn't look anything like those gorgoues shades. Man, do I need a new camera!!
Anyhow, the background uses the Wax Paper Resist technique and then I stamped several of the images from the Clock Works set in various neutral shades: Crumb Cake, Soft Suede and Early Espresso. I also stamped the hand-drawn heart from the new Hearts A-flutter set in Cherry Cobbler. The sentiment is from the Happy Hour stamp set, but I think works well with the clock images. I added just a hint of texture to the card base with the new Needlepoint Border TIEF...love it! Here is shot of the inside of the card:
 More stamped images from the Clock Works set and a sentiment from last year's P.S. I Love You set. Here's hoping my class participants will like this technique as much as I do!
 |
| Masculine Valentine's card featuring the Clockworks stamp set with sentiment from Happy Hour. |
Anyhow, the background uses the Wax Paper Resist technique and then I stamped several of the images from the Clock Works set in various neutral shades: Crumb Cake, Soft Suede and Early Espresso. I also stamped the hand-drawn heart from the new Hearts A-flutter set in Cherry Cobbler. The sentiment is from the Happy Hour stamp set, but I think works well with the clock images. I added just a hint of texture to the card base with the new Needlepoint Border TIEF...love it! Here is shot of the inside of the card:

Wednesday, January 16, 2013
Welcome to the Team!
I so love welcoming new stamping friends to my Tri-City Stampers team. This past Monday we had our monthly meeting and at it I got to welcome Mirela to my circle of stamping friends. I am thrilled to have her as part of the group and wanted to make her a special card to mark her first team meeting. As it happens, this card also works for this week's pattern and colour challenge over at The Friday Mash-up:

Here is the card I made for Mirela:
 |
| Bright and Bold card for FM92 featuring images from the Bloomin' Marvelous and Pretty Petites stamp sets. |
 |
| Inside View with sentiment from Workshop Words |
Tuesday, January 15, 2013
One Week and Counting...
...till the start of Sale-a-bration!! Are you excited? I sure am!! To help get you fired up, I 've got a couple of fun projects to show you over the next few days that feature some of the fantastic new products available for FREE during Sale-a-bration.
Today I have a card I designed for this week's sketch challenge over at Retro Sketches. Here is the sketch:

 |
| CAS Any-Occasion card for RS46 featuring the Bloomin' Marvelous stamp set and Sycamore Street DSP |
Monday, January 14, 2013
The Paper Pumpkin is here!

Wondering what the heck I'm talking about? Paper Pumpkin is a new monthly crafting kit subscription from Stampin' Up! Starting today, you can sign up to receive your own box of creativity each and every month. Here is how it works:
- Each month Stampin' Up sends you a unique, surprise kit with a project-cards, journals, décor, and more! (They've even colour-coordinated, measured, and cut everything for you!)
- Each kit includes stamps, ink, paper, and accessories-everything but adhesive.
- Your Welcome Kit (the first month of your subscription) includes a free gift: a size "D" acrylic block, which you'll need to stamp your projects each month.
- Your Paper Pumpkin will ship on or around the 15th of the month.
- You need to sign up for a kit by the 10th of the month to get that month's kit. If you sign up on the 11th of the month, your first kit will come the next month. (Let's say you sign up on May 10th, we'll send your kit around May 15th. If you sign up on May 11th, we'll send your first kit around June 15th.)
- A Paper Pumpkin membership is just $24.95 per month (and shipping is included!)
- There's no commitment, you can cancel your monthly Paper Pumpkin at anytime. You can also skip a month if you want.
- Still not sure? Starting in early March, you'll be able to purchase a Try-It kit from my online store if you'd like to try Paper Pumpkin for just one month.
I am SOOO excited about this program! I can't wait to get my magical red box of stampin' goodness in the mail! I am so sure you'll love it too that I'm scheduling a FREE new event called "The Pumpkin Patch", where each month you can bring your box of goodness over to put together with me and my other stamping friends. What a fun way to share the Pumpkin magic!! Watch for "The Pumpkin Patch" coming in February!
Now on to some stamping! I spent lots of time in my stampin' corner this weekend designing the projects for my team's Sale-a-bration challenge (more on that later this week...after my team meeting tonight) and my monthly techniques class. I've got lots to show you, so let's get on with it, shall we?? Today's project is a set of note cards with a cute little holder that I designed using some of the fab products from this year's Sale-a-bration brochure. Check it out:
 |
| Notecard set featuring the Patterned Occasions stamp set, available Jan. 22nd as a FREE Sale-a-bration reward! |
 |
| Card #1 |
 |
| Card #2 |
 |
| Card #3 |
 |
| Card #4 |
 |
| All bundled up for gift-giving |
Friday, January 11, 2013
A Team Challenge
Happy Friday! TGIF!! This has been the longest week ever!! Every now and again, my upline posts a challenge for our team. This time it was a sketch designed for Sunday Stamps by one of my downline, Steph VanDorp. Steph designs for Sunday Stamps and is super talented and oh, so creative. Check out her blog and you'll see what I mean. Here is Steph's Sketch:

 |
| Birthday card featuring the Secret Garden stamp set with sentiment from Apothecary Art. |
 |
| Inside view with sentiment from You Are Loved. |
If you get a chance this weekend, try playing along wth Sunday Stamps or one of the other challenges listed in my sidebar. You'll be amazed at the way they inspire your creativity! Have a stamp-eriffic weekend!
Wednesday, January 9, 2013
Mashed up Valentine
Happy Thursday everyone...just one more day till the weekend! Why is it always so hard to get back to a full 5-day week after the holidays??
Today I have a little Valentine's ensemble I created for this week's Friday Mash-up challenge. Here is the sketch:

I decided to "mash it up" and do the sketch using hearts as one of my elements. Here is what I came up with:
 |
| Valentine's ensemble for FM91 featuring the Hearts A-flutter stamp set and More Amore DSP. |
 |
| Close up of card...sentiment is from Teeny Tiny Wishes |
 |
| Inside view of card with sentiment from You Are Loved |
 |
| Treat holder made using the Petite Pocket die, More Amore DSP with sentiment from Itty Bitty Banners |
So I got a little carried away with the hearts! I just couldn't stop adding them LOL...I used pretty much every heart die and punch I own on this project. I even used the heart-patterned Adorning Accents TIEF to add texture. I did manage to stay pretty much true to the sketch, though it was tempting to add a few extra embellishments! There isn't a stitch of ribbon or bling anywhere on the card!! I remedied that when I designed the treat holder, using some of the gorgeous SAB ribbon to tie the box closed. Thanks for stopping by...have a great day!
A Two-fer
If you've read my blog for any length of time you know how much I love to play along with online challenges. I haven't had much time of late to participate, but found myself with time to play last weekend and decided to jump right back in! Today's project was inspired by a couple of online challenges. This week Hand Stamped Sentiments is running a colour challenge that uses a fab combo:

Over at Retro Sketches there is terrific sketch:

So I decided to combine the two and came up with this card:
 |
| CAS Love Note for HSS150 and RS45 featuring the Hearts A-Flutter stamp set and More Amore DSP with sentiment from P.S. I Love You (retired) |
 |
| Inside view with another sentiment from P.S. I Love You |
I have to apologize for the poor colour quality in these photos...I had hoped Santa would bring me a new camera and photo booth, but alas, I mustn't have been a very good girl this year...he didn't come through!! Guess I'll have to clean up my act...or go shopping ;)
Tuesday, January 8, 2013
Happy Birthday, Mom!
Today is my mom's 70th birthday! I can't believe she's that old...'cuz if she's 70 I must be....well, never mind! Back to mom...she is as active and vibrant as she ever was and still does all of the things she loves. Her greatest passion is gardening, and to honour that I decided to give her a flower garden on her birthday card. Check this out:
This card certainly was a labour of love! It took my upwards of two hours to make, but I am thrilled with the result and I think my mom will be too. I started by stamping the leaves and various floral images on Whisper White card stock and then coloured them using my aquapainter. I then die cut the inmages using my new Secret Garden Framelits...so much quicker than fussy cutting them all!! I did do a bit of fussy cutting so that I could layer some of the flowers to give them dimension. In case you are wondering, here are the colours I used: Rich Razzleberry, Melon Mambo, Summer Starfruit, Tangerine Tango, Garden Green, Old Olive and Pear Pizzazz (retired). The sentiment panel on the front uses the Memorable Moments set and is heat embossed in silver and stamped in Rich Razzleberry. The DSP is from the Twitterpated pack. The card base uses my very last piece of Pear Pizzazz card stock...sure hope that colour comes back some day! I hope my mom likes this card...I sure do!
 |
| Birthday card for my Mom featuring the Memorable Moments and Secret Garden stamp sets. |
 |
| Flower detail |
 |
| Inside view with sentiment from You Are Loved. |
Monday, January 7, 2013
Happy New Catty!
Ok, so I know I'm a few days late, but YIPPEE!! The new Spring Catalogue is now live and full of fabulous new products to inspire you. I've been having great fun this weekend playing with some of my new goodies and I have lots to show you this week! I know I've not been very good about posting the last month or so, but now that the holiday craziness and our Disney vacation are behind me, I'm ready and raring to get back to stamping! So, enough chit-chat...on to some fun! Today I have a card for you that combines two challenges in one. Over at Pals Paper Arts this week there is a colour challenge that uses a great combo:

And over at Freshly Made Sketches there is a fun sketch challenge.

So, I decided to combine the two and came up with this fun card:
 |
| Love note for PPA150 and FMS67 featuring the Seasonal Sayings stamp set and lots of new catty product! |
Delicate Details Lace Tape (LOVE THIS STUFF!!) 130966
Honeycomb TIEF 129378
Designer Builder Brads 129329
Sunshine and Sprinkles DSP 126922
Large Rhinestone Basic Jewels 129324
I really had fun with this colour combo and just might have to use it again some time soon!
Subscribe to:
Posts (Atom)
