Showing posts with label Sassy Salutations stamp set. Show all posts

Tuesday, April 28, 2015

Grungy Thanks

Happy Tuesday!  I hope your week is off to a good start.  Today I have another take on this week's sketch from Sunday Stamps.  In case you missed it on Sunday, here is the sketch:


...and here is a completely different take on it:

Thank you card featuring the Gorgeous Grunge and Sassy Salutations stamp sets.
I kind of went a little wild with this one!  I love playing with my Gorgeous Grunge stamp set and once I got started, I just couldn't stop!  I began by stamping the larger splatter in Crushed Curry ink, stamped off once to get a slightly lighter shade.  Then I used Bermuda Bay to add the large spots and finally Memento Tuxedo Black for the smaller spatters.  I added some Washi Tape from the Beach House and Stacked with Love bundles and the Everyday Adventure Project Life Accessory Pack

The sentiment, from the Sassy Salutations set,  is stamped in Memento Tuxedo Black ink.  I added some Baker's Twine in Basic Black, Bermuda Bay and Crushed Curry, as well as some Itty Bitty Accents Epoxy Stickers for texture.

On the inside I stamped more spatters, as I did on the front.  Gotta love getting grungy!

Monday, February 23, 2015

Colouring 101 - Beautiful Blendabilities

Happy Monday!  I hope you had a fabulous weekend.  My hubby and I got to have our belated Valentine's celebration last night with dinner at one of our favourite local restaurants.  The perfect way to end the weekend :)
Today I have my final post in my series on colouring.  I'm all about the Blendabilities today.  Since these awesome tools were released last spring I have used little else to colour my stamped images.  It was good to go back to my blender pens and water colouring for this series, as it has reminded me just how wonderful each medium can be, depending on the look I want.  So, here are some projects using my beloved Blendabilities:

Birthday card featuring the Bloom with Hope stamp set with sentiment from Blooming with Kindness
For this one I stamped the flower images from the Bloom with Hope hostess-exclusive stamp set using Memento Tuxedo black ink.  I coloured them using the Cherry Cobbler, Pumpkin Pie and Daffodil Delight assortment Blendabilities sets. I used Old Olive for the leaves and stems.  The background layer of Basic Black is embossed using the Pretty Print (retired) TIEF. 


The sentiment is from the Blooming with Kindness set and is heat embossed in gold and die-cut using the Apothecary Accents framelits.  The wee butterfly is punched from gold foil card stock using the Bitty Butterfly punch and embellshed with rhinestones.

.Here is another project featuring the Blended Bloom stamp.  I kept the same Calypso Coral colour scheme as on the projects from my previous posts in this series so that you can see the difference in the colouring media.

Thank you card featuring the Blended Bloom stamp with sentiment from Sassy Salutations
I stamped the Blended Bloom image in Memento Tuxedo black ink and coloured it using the Calypso Coral and Daffodil Delight Blendabilities assortments.  The sentiment, from Sassy Salutations is also stamped in Tuxedo Black ink.  The edge of the panel is embossed using the Delicate Designs TIEF and embellished with some ribbon from the Best Year Ever Sale-a-bration Accessory pack.


So now the question is:  Which colouring media do you like best?  In case you missed them, here are the previous projects using the Blended Bloom set for easy comparison:

Coloured using a Blender pen and ink pads.
Coloured using an Aquapainter and ink pads.
Leave me a comment telling me which one you prefer...I'm interested in hearing your opinion.  Have a great week!

Friday, February 6, 2015

Bow-tiful Birthday

Happy Friday!!  SOO glad the weekend is almost here :)
Today I have a super-quick and easy birthday card for you:

Birthday card featuring the Sassy Salutations stamp set and the Bow Builder Punch
This is another project from my buffet a couple of weeks ago.  I used the Decorative Dots TIEF to emboss the Whisper White background panel, leaving a smooth area at the bottom.  The sentiment, from the Sassy Salutations stamp set, is stamped in Bermuda Bay ink.  I layered the embossed panel on a piece of Bermuda Bay card stock and then to a Whisper White card base.  The little bows are punched from the Brights Backgrounds DSP Stack using the Bow Builder punch.  I used Daffodil Delight, Tangerine Tango and Real Red.  The little silver glimmer hearts are punched with the Itty Bitty Accents pack.


On the inside I stamped the sentiment from Really Good Greetings using Bermuda Bay ink and added another little silver glimmer heart.  It really doesn't get much easier than this one!

Inside view with sentiment from Really Good Greetings.
Have a great weekend!!

Sunday, December 14, 2014

Faux Patina'd Birthday

Happy third Sunday of Advent!  Just a few more days till Christmas.  Today marks the beginning of a new challenge over at Sunday Stamps.  This one runs for three weeks, so there is plenty of time to play along!  Check it out:


 Here is my project:

Masculine birthday card featuring the Sassy Salutations stamp set and using the Faux Patina technique.
Now when I start to design this project I began playing with the ink colours.  I sponged some Bermuda Bay ink over the Daffodil Delight ink and LOVED the amazing shade of green it produced.  I just knew I had to use it for the Faux Patina technique.  Here is what I did:

  • Beginning with a 4"x 5-1/4" piece of Whisper White card stock, I sponged Daffodil Delight ink all over it.  Then I lightly sponged on Bermuda Bay ink, blending the colours as I went.  I left some areas a bit more yellow...I liked the depth it created.
  • I ran the sponged card stock through the Big Shot with the Alphabet Press TIEF.  Then I sponged again, lightly, with Bermuda Bay ink to highlight  the raised areas.
  • I lightly ran a Versamark pad over the entire surface, taking care to try to only hit the raised pattern.  I sprinkled on gold embossing powder, shook off the excess and then heated it with my heat tool.  I love the way it turned out!

The star image from the Many Merry Stars set.  I stamped it in Versamark ink on Soft Suede card stock and then heat embossed in gold.  I die cut it out using the Stars framelits.  This brings me to my little clock embellishment.  It is from the long-retired Tea Time Trinkets.  I wanted something in gold, but the trinkets in that set are silver, so I took matters into my own hands.  I mashed the little clock into my Versamark pad and then dunked it into my pot of gold embossing powder.  I heated it and...voila...a gold clock!!

Cool, huh??  Remember this little trick the next time you need the perfect embellishment ;)
The rest of the card is pretty simple...I stamped the sentiment from Sassy Salutations in Bermuda Bay ink and trimmed it into a pennant.  I added a few In-Colour sequins to add a little more bling. The card front is mounted on a Soft Suede card base.

Have a wonderful Sunday!


Friday, October 17, 2014

Eclectic Christmas

Today I have a funky Holiday card I came up with using two sets from the Annual Catalogue.  Check it out:

Christmas card featuring the Kinda Eclectic and Sassy Salutations stamp sets.
This one looks kind of retro, no?  I love that starburst image from the Kinda Eclectic set and thought it might make a fun background for a Christmas card.  I used a colour scheme of Smoky Slate and Coastal Cabana, along with Whisper White.  The background panel is embossed using the Snowburst (retired) TIEF.

The sentiment is from the Sassy Salutations set.  I highlighted the sentiment panel with a star frame that I die cut from silver glimmer paper using the Stars Framelits.  I added a little silver metallic bow and some Frosted and In-Colour Sequins.


On the inside I stamped the starburst image again is Smoky Slate and then added the sentiment from the long-retired Many Merry Messages set, which I punched with the XL Oval punch. 

Be sure to stop by on Sunday for the new challenge from Sunday Stamps.  In the meantime, have a fabulous weekend!

Saturday, August 30, 2014

Pointillistic Posies for The Twist

Today I have to share my final project for The Technique Twist.  The Design Team have decided to shut down the blog following this week's challenge due to low participation.  For our final challenge we were to try a new technique that takes us out of our comfort zone.  I decided to try a brand-new-to-me way of applying colour to images called Pointillism.  Now, I studied this style of painting in my music history courses in university because musical trends typically reflect those in visual art; but I never imagined I'd actually try it myself!  Here is my project:

Thinking of you card featuring the Bloom With Hope and Papillon Potpourri stamp sets with sentiment from Sassy Salutations.
Now this technique takes some practice.  My first attempt looked nothing like this, but with practice I finally got the hang of it. I stamped my flowers from the Bloom With Hope stamp set, masking the larger flower to give the illusion of depth. I used my Blendabilities:  Melon Mambo, Daffodil Delight and Smokey Slate.  There is a great tutorial over on Splitcoast Stampers that explains how to achieve this looks very clearly.

Essentially, you are colouring your flowers using a series of little dots.  It takes practice to know when to stop with each colour.  The rest of the card is pretty straightforward.  I added a little vellum butterfly from the Papillon Potpourri stamp set and stamped the sentiment from Sassy Salutations.  I used the Large Polka Dots TIEF to emboss the white background panel and the Delicate Designs TIEF  for the black strip.  I added some silver metallic ribbon and a Basics Glimmer Brad to complete the front of the card.

Inside view with sentiment from Really Good Greetings.
On the inside I stamped one of the flowers again and coloured it.  The sentiment is from the Really Good Greetings set and is die cut using the Deco Labels framelits.

I hope you'll consider playing along with our final challenge at The Technique Twist.  It would be great to go out with a bang!  Have a great weekend!!

Thursday, August 28, 2014

Today is the day!

Today is a BIG day!  Not only does the Holiday Catalogue go live, but it is also my first challenge as a  Guest Designer for Just Add Ink!  I am so happy to be counted among such a talented group of artists!  So, without further ado, here is this week's challenge:

JAI 229


...and here is my project...inspired by the last fleeting days of summer:

Birthday card featuring the Shaving Cream technique and sentiment from the Yippee Skippee stamp set.
The minute I saw that yummy-looking inspiration photo I thought of the Shaving Cream technique!  Those marbled swirls of colour were exactly what I was going for.  I used Tempting Turquoise, Daffodil Delight, Melon Mambo and Perfect Plum reinkers in my shaving cream.  I love the way it turned out!  I die cut three scoops of ice cream (really they're the thought cloud from the Word Bubbles Framelits).  The cone was punched from Baked Brown Sugar card stock using the new Tree Punch from the Holiday Catty and embossed using the Tiny Triangles TIEF.  Once I had assembled my triple scoop ice cream cone I covered the ice cream with Crystal Effects and left it to dry over night.  It gives my ice cream a great sheen...like it's melting and waiting to be licked!


The background layer is embossed with the Decorative Dots TIEF.  I added several scraps of ribbon for even more texture and colour as well as some Candy Dots in Melon Mambo, Tempting Turquoise and Daffodil Delight.  I layered it on a Melon Mambo mat and then a Daffodil Delight card base.
The sentiment is from the Yippee Skippee stamp set and is perfect for this card...after all, what's happier than ice cream??  I die cut the sentiment using the Labels Collection Framelits and layered it on a Tempting Turquoise label cut with the Deco Labels Framelits.


On the inside I added more scraps of ribbon for a faux-banner and stamped the sentiment from Sassy Salutations in black.

Such a fun and happy card...what a great salute to the end of summer!  I'd love to see your interpretation of the inspiration photo, so play along and be sure to post a photo of your creation HERE.

Today is also the LAST DAY to take advantage of the extra $65 in product in the Demonstrator starter kit.
Last chance to get $65 in free product!


Until midnight tonight you get to choose $190 worth of products of your choice for just $125, no shipping and no tax!  I'd love to have you join my Tri-City Stampers team.  To order your kit click HERE

Monday, August 11, 2014

It's My Blog-aversary!

Today my little blog turns FOUR!  I had no idea when I started writing about my love of papercrafting back in 2010 that I would still be going strong four years later!  As you can see, to celebrate the occasion, I gave my blog a makeover over the weekend, designing a new header using My Digital Studio and changing up the font and colour scheme.  I am thrilled with the result...new and fresh and ready for another 4 years!  I also have a bit of blog candy to give away...after all, what would a birthday party be without a loot bag?!?  More on that below...but first I have, appropriately, a birthday card to show you.  This is one of the projects that is included with the first month's kit for my Blendabilities Club members.  Check it out:

Birthday card featuring the Blended Bloom stamp with sentiment from Sassy Salutations.
I LOVE my Calypso Coral Blenabilities!  The shades blend so perfectly it makes colouring so easy.  It is the perfect set with which to start my club off.


Because my club members will start with just the one colour set I kept my flower monochromatic, but was able to get lots of shading with the three markers and the Colour Lifter (also included in the first month's kit).  So?  Have you joined the club yet?  What are you waiting for?  Click HERE for all the details.

Now for some birthday loot!


I'm giving away the items pictured above:  Artisan Embellishments Kit, Print Poetry DSP stack and Vintage Verses WM stamp set.  So, how do you win this little bundle of goodies?  Simple!  Leave a comment on today's post with your thoughts on my blog makeover and/or what you think of the new Blendabilities alcohol markers.  I will randomly select one lucky winner from all who leave a comment.  You have until Friday, August 15th to leave your comment.  I will announce the winner on Saturday, August 16th.  Good luck!

Thursday, July 24, 2014

A Quickie

I am just heading out the door with my family for an overnight getaway to Great Wolf Lodge in Niagara Falls but wanted to do a quick post to show you a fast and easy card...

Masculine birthday card featuring the Sassy Salutations stamp set
It doesn't get much easier than this one!  I started by laying down three strips of Washi tape.  The scalloped black pattern is from the Sweet Sadie pack, the Real Red diamond pattern is from the Beach House pack and the Bermuda Bay triangles is from the Everyday Adventrures Project Life Accessory Pack.  After applying the Washi tape I ran the card stock through the Big Shot with the Triangles TIEF and then adhered it to a Real Red mat before gluing it to a black card base.

The sentiment, from the Sassy Salutations set, is stamped in Bermuda Bay and trimmed into a pennant.  I added some Bermuda Bay baker's twine to a piece of Basic Black card stock and then adhered the sentiment strip with dimensionals.  I adhered the whole thing to the card using dimensionals as well.  I added some glimmer stars I had leftover from another project.

Inside view with images and sentiment from the Be The Star stamp set.


On the inside I stamped and die cut a star from the Be the Star stamp set and die cut it with the Stars Framelits.  I layered another glimmer star and then added the sentiment, also from the Be The Star set and matted in Bermuda Bay, to the centre.  Easy peasy and perfect for a young man celebrating a special day!

Saturday, May 24, 2014

Card in A Box for the Twist

Happy Saturday!  I know those of you living in the US are celebraing Memorial Day this weekend, so happy Memorial Day...I hope the weather there is as perfect as it is here!
It's time for a new challenge over at The Technique Twist again and this time we're all about the oh-so-trendy Card-in-a-Box!  For my sample project I decided to try a horizontally-oriented one...just to...ahem...step "outside the box"..heehee :)
Check it out:

Birthday Card in A Box featuring the Sketched Birthday and Sassy Salutations stamp sets.
I decided to pull out some favourite retiring products: the out-going In-colours and Birthday Basics DSP.  I made the card base out of Gumball Green card stock.  In case you want to try re-creating this one, here is a great cutting and scoring guide from Australian demonstrator  Debbie Henderson:

Debbie's Designs


I added one strip on the inside of the box to adhere my flag posts to.  I cut it 1" wide by 4-3/8" long and scored each end at 1/8".  You can see it in this side-view photo.


The little banners are cut with the smallest die in the Bitty Banners Framelits set from several patterns of DSP in the Birthday Basics pack, as well as Raspberry Ripple, Bermuda Bay and Summer Starfruit card stock.  I used toothpicks for the flagposts and white baker's twine to string them on.  The balloon image is from the Sketched Birthday set and is coloured with Bermuda Bay and Pool Party Stampin' Write Markers.  I added a few rhinestones I coloured with the darkest of the Daffodil Delight Blendabilities set.

On the back panel I stamped the balloon and party hat from the Sketched Birthday set and again coloured them with my Stampin' Write markers.

If you haven't tried making a Card in a Box yet you really should give it a go...they're such fun!  Then be sure to share your creation with us over at The Technique Twist!  Have a wonderful weekend!!

Tuesday, May 13, 2014

Blended Bloom Love

I am in love with Stampin' Up!'s new Blendabilities alcohol markers!  They will be available to order when the new Annual Catalogue goes live in June, but as a demonstrator I got to pre-order select sets.  This weekend I had a chance to crack them open and have a go and, let me tell you, I LOVE them!!  I spent a good chunk of my Mother's Day afternoon sitting on the deck colouring...it was heaven!  I used them with several different stamp images, but my favourite, by far, is the brand new Blended Bloom stamp, which will also be available June 2nd.  Check it out:

Thank you card featuring the Blended Bloom A la Carte stamp with sentiment from Sassy Salutations

Isn't that gorgeous??  I had such fun playing with my Blendabilities that I had my whole team create this card at our meeting last night.  Each person used a different colour set but with the same basic card layout.  Such fun!  You may notice that, in addition to colouring that pretty flower, I also used my Blendabilities to colour the three rhinestones in the upper left corner.  A quick and easy way to add coordinating embellishments!

Now you may also be wondering about my colour scheme on this card.  It uses two of the gorgeous new 2014/15 In-Colours:  Blackberry Bliss and Hello Honey.  Both are simply yummy colours that look fantastic together.


 I can't wait for the new Annual Catalogue to go live so that I can complete my set and have a full colour pallette to work with!  The Blended Bloom image is so pretty and a great one to learn to colour on.  I made several more projects using this beautiful image which I will share later this week. 


Wednesday, April 16, 2014

Sassy Birthday

BIG NEWS from Stampin' Up!!  Yesterday they announced a brand new partnership with Becky Higgins and Project Life!  Now you can get authentic Project Life products in Stampin' Up's exclusive colours AND they coordinate with other fabulous Stampin' Up products!  Check out this video to learn more:


I just can't wait to get my hands on these fantastic products!  As a demonstrator I get to pre-order starting this coming Monday...woohoo!!  Want in on the action?  Join my team and you'll be able to place your order on Monday AND get a 30% discount!  Click Join My Team above to learn more!

Today I have another project for my upcoming Card Buffet...this time it is a simple birthday card for the women in your life...

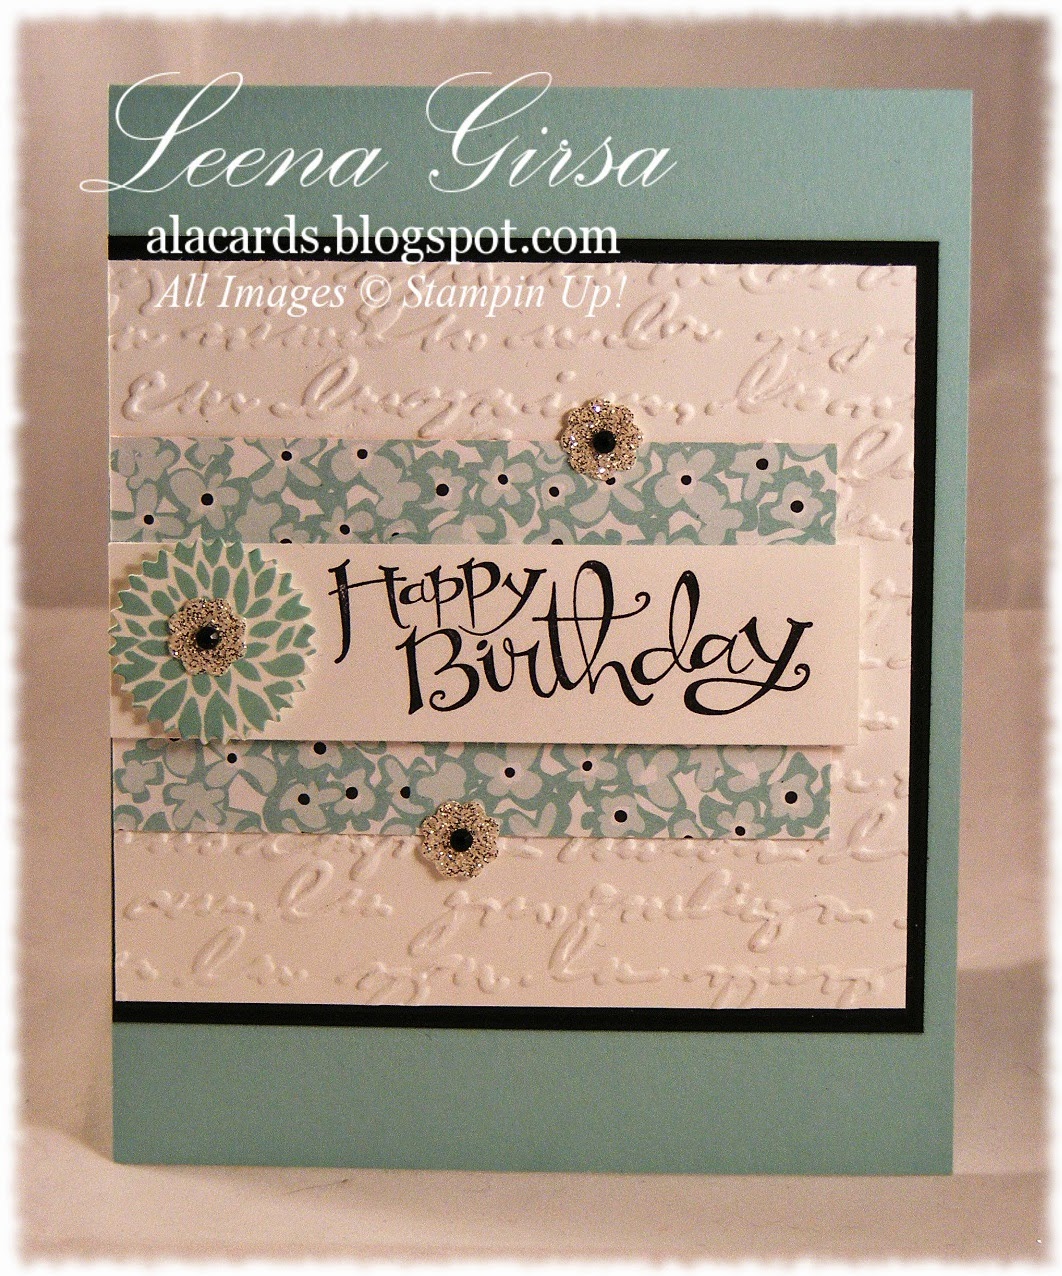
Feminine Birthday card featuring the Sassy Salutations and Betsy's Blossoms stamp sets.
This is another one you can throw together in no time!  Here are some tips for you:

  • The background is embossed using the (retired) Pretty Print TIEF (but just about any TIEF would do!)
  • The DSP is leftover from the Sweet Sorbet Sale-a-bration DSP pack.
  • The flower is from the Betsy's Blossoms set, is stamped in Pool Party in and then die cut using the smallest of the Starburst Framelits.
  • The sparkly little flowers are punched with the Itty Bitty Punch pack.  The centres are some long-retired black rhinestones, but you can get the same look by colouring regular rhinestones with a black sharpie!

 On the inside I used some of the same DSP and a black card stock mat to echo what I had done on the front.  The inside sentiment is from the Another Great Year set.


The cool thing about this design is that you can easily switch up the DSP and the coordinating card base to use up those pesky scraps you have laying around!  Gotta love it!

Thursday, March 13, 2014

Bubble Background Birthday

This month my techniques group is learning how to do the Bubble Background technique.  I showcased it a while back as one of the challenges over at The Technique Twist, but never got to show it to my monthly group.  I decided it was time!  Here is the card we'll be making at tonight's class:

Birthday card featuring the Bubble Background technique with the Petal Parade and Sassy Salutations stamp sets.
Can you tell I'm ready for spring??  Two days ago it was a beautifully mild, sunny day...warm enough for shirt sleeves.  Yesterday we received 20 cm of snow and today it's a high of -10 C!!  I am SO sick of winter, so I decided to make this card as spring-like as possible. 


My colour scheme is Coastal Cabana, Daffodil Delight and Crumb Cake.  I went a little hog-wild with the embellishments on this one, but I love the texture the layers of ribbon add and the sparkle from the little rhinestones.  Check out my how-to HERE for creating the bubble backgound.  It's a fun technique that can be a wee bit addictive!! 

Inside view with sentiment from Bring on the Cake and images from Petal Parade and Banner Blast Sale-a-bration stamp sets.

 I hope my class participants like this one...I know I would love to receive a card like this in the mail on this cold and snowy day!!  I sure hope the weather is nicer wherever you are today!

Tuesday, February 11, 2014

Ready for Spring

I don't know about you, but I am so over winter.  Spring can, well...spring any time now!  I'm ready to say good-bye to the mountains of white all around me and hello to green grass and colourful blooms.  Today's project is perfect to get you thinking of warmer temperatures and blossoming gardens.  Check it out...

Birthday card featuring the Bright Blossoms stamp set with sentiment from Sassy Salutations.
Can't get much more spring-like than that, can you?  I love how happy and cheerful this card is...exactly what I need on a gloomy February Tuesday.


It is really quick and easy to create.  The colours I used were Daffodil Delight, Calypso Coral, Coastal Cabana, Gumball Green and Strawberry Slush.  All of the floral stamps are from the Bright Blossoms stamp set, with the exception of the Daffodil Delight flowers, which are from the Banner Blast SAB stamp set.
The sentiment is stamped in Gumball Green using the Sassy Salutations stamp set.  I added a little softness with some Stretch Ruffle Trim in Coastal Cabana and some bling with some scattered rhinestones.

Inside view with sentiment from the Another Great Year stamp set.
The inside features more of the floral images from the front and the sentiment from the Another Great Year stamp set, stamped in Gumball Green.

One of my long-time customers chose to feature this project on her blog.  You can view it here, along with the story of how we came to meet.  It is an interesting one!   In the meantime, have a spring-like Tuesday, everyone!

Thursday, January 16, 2014

Another Sale-a-bration Sneak Peek

Today I have one of the Make-n-Take projects I did with my team at our monthly meeting this week.  It features lots of new product from the upcoming Sale-a-bration brochure.

Birthday card featuring the Banner Blast SAB stamp set with sentiment from Sassy Salutations.
Isn't that fun?  Here's a list of the new Sale-a-bration products I used:

  • Sweet Sorbet DSP
  • Sweet Sorbet Accessory Pack
  • Banner Blast Stamp Set
  • Banner punch
  • Decorative Dots TIEF

I love the Banner Blast stamp set and matching punch!  It is so cute!!  On this card I used both stamped banners and some punched from the the Sweet Sorbet DSP...I like the way they work so well together.  Another new product I love the the twine from the Sweet Sorbet Accessory pack.  It is such a nice weight...not as visually heavy as ribbon, but with more presence than baker's twine.

Inside view with sentiment from Another Great Year.
On the inside of the card I stamped a few more banners and added a greeting from the Another Great Year set, which is in the new Occasions Catalogue.  As far as I'm concerned, one can never have too many birthday-themed greetings...I seem to make far more birthday cards than anything else!


Related Posts Plugin for WordPress, Blogger...