Showing posts with label Magnificent Maple stamp. Show all posts

Thursday, October 23, 2014

Strong and Free...still

Yesterday was a day my country hoped would never come.  An armed gunman shot and killed an unarmed soldier who was guarding the National War Memorial near Parliament Hill in Ottawa.  Then he entered our Parliament Buildings and opened fire.  Two security guards were injured, thankfully not fatally, before the Sergeant at Arms, a ceremonial figure in our House of Parliament, shot and killed the gunman. 
The death of Corporal Nathan Cirillo, the unarmed soldier shot while keeping vigil over our War Memorial, is senseless and tragic.  That someone was able to enter the heart of our governement with a weapon and open fire is terrifying.  But we will not live in fear.  We will not let the hatred of others turn us to hate.  We are strong.  We are free.
This is a card I posted earlier this year in celebration of our country's birthday.  Today I am reposting it in honour of Corporal Cirillo, and of all those who fight each day to keep us strong and free...
Oh Canada, our home and native land;
True patriot love, in all thy sons' command.
With glowing hearts we see thee rise
The True North strong and free.
From far and wide, Oh Canada,
We stand on guard for thee.
God keep our land,
Glorious and free.
Oh, Canada, we stand on guard for thee.

Saturday, July 5, 2014

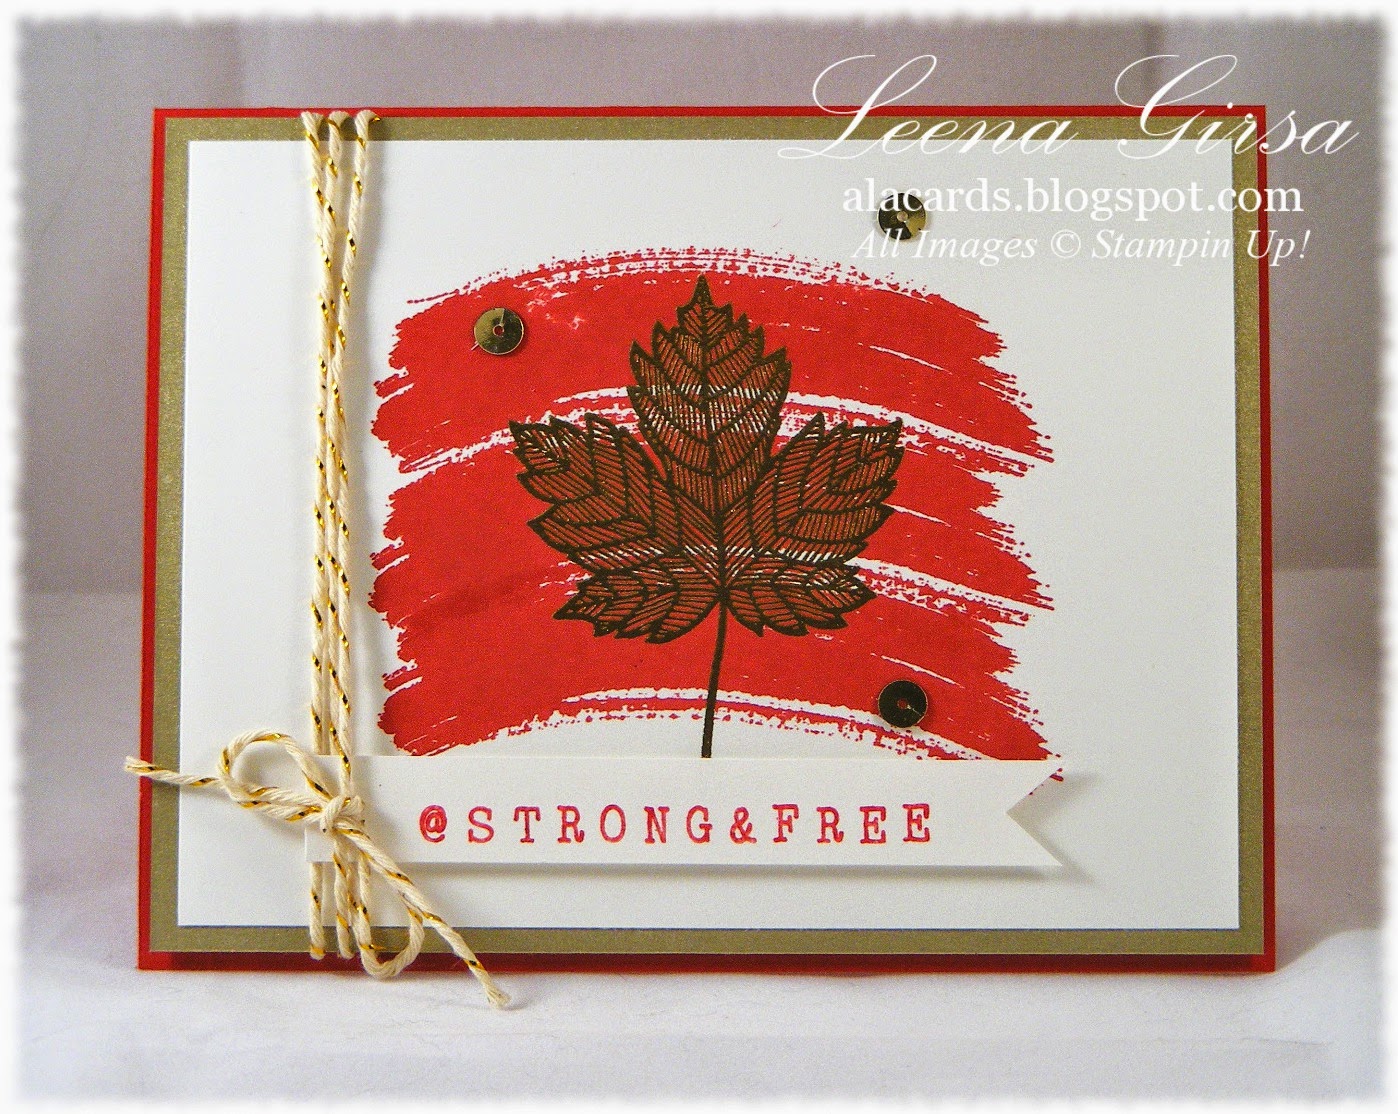
@Strong&free

Happy day-after-the-4th-of-July/Saturday-after-Canada-Day!  It's time for a new challenge over at The Technique Twist and this time we're all about national pride.  We're using patriotic colours on our projects to show our love for our respective countries.  Since I'm a Canadian my project is all about the red and white and, of course, the maple leaf...

Patriotic card featuring the Magnificent Maple (retired) stamp, Work of Art stamp set and the Alphabet Rotary stamp
Since we don't have a current maple leaf image in the Stampin' Up! catalogue (holding out hope for one in  the Holiday catalogue), I turned to one of my favourite images from last year's Holiday catty...Magnificent Maple.  I heat embossed the leaf image in gold over top of the brush stroke images stamped in Real Red.  To accentuate the gold embossing I matted the front panel on Brushed Gold card stock before mounting it on a Real Red card base.


The sentiment was done using the new Alphabet Rotary stamp...love it...and inked with a Real Red marker.  I added a little gold baker's twine to keep the gold theme going and added a few gold sequins as well.

Inside view with sentiment from the And Many More stamp set
On the inside of the card I stamped another brush stroke image from the Work of Art set, stamping off once to get a lighter shade of red.  I heat embossed in gold the sentiment from the new And Many More set.

I hope you had a chance to celebrate your nation, whether American or Canadian, this week.  We all have so much to be thankful for!

Wednesday, October 9, 2013

Team Swap Card

This week has had a decidedly Fall-like theme, which is perfect, given the weather in these parts.  Definitely feeling - and looking - like Fall!
One of the things I look forward to at my monthly team meetings is our team swap.  This month's theme was masculine cards...did you just do a groan?  Why is it so many of us have such trouble creating cards for the men in our lives??  I actually love making Man-cards!  It's fun to pull out my non-flower stamps once in a while!  Here is the card I made for our swap:

Man-card featuring the Maginificent Maple  and Gorgeous Grunge stamp sets.
This was easier than it looks...it had to be - I made a bunch of them!  Here's the how-to:
  • I started by stamping the Magnificent Maple image in Cajun Craze on Naturals Ivory card stock.  Then I used my blender pen and Cherry Cobble ink to blend the colours in the leaf.  
  • I stamped one of the spatter images from Gorgeous Grunge in Early Espresso ink.
  • I pierced the circles using the Essentials Paper Piercing template.
  • I added a bit of Burlap ribbon, securing it with two brads from the Antique Trinkets.
Easy peasy!

Now don't forget...


 You, too, can be part of my team of stamping friends when you join for just $25!!  If you've ever wondered what it would be like to be a part of the Stampin' Up! family, this is the time to take it for a test-drive!  For very little investment (actually, no investment because you get a $26.95 stamp set in your Starter Kit!) you can see what it's like to be a part of this wonderful family.  I would love to have you join my circle of friends.  Click HERE to learn more about this amazing opportunity.

Sunday, September 1, 2013

September....really??

I can't believe the summer is over.  How is it possible today is September 1st??  With a new month comes a new challenge over at The Technique Twist.  This time we're all about bleaching...

Thank you card  featuring the Magnificent Maple stamp (131868) with sentiment from Truly Grateful (131733)
I went a little crazy with the bleach on this card...I used it in three differnt ways!  Here's a quick how-to:
  • The background panel is a piece of Cajun Craze card stock that I spritzed with bleach (I just poured the bleach in a Stampin' Spritzer and went to town!).  That lovely yellow spatter is what the card stock bleached out to!
  • The focal panel started as a plain piece of Early Espresso card stock that I stamped with the Magnificent Maple stamp, using a home-made bleach ink pad (folded paper towel in a  plastic box moistened with bleach)
  • I stamped the leaf again in Versamark and heat embossed in gold.
  • I dabbed the edges of the focal panel with a bleach-soaked sponge.  (Amazing how the more concentrated bleach on the sponge resulted in a totally different shade than the leaf image in the background!)
  • I embossed the Crushed Curry layer with the Woodgrain TIEF (127821).
  • I added some 7/16" Natural Trim (129287) for a little more texture.
  • The sentiment is stamped in Early Espresso ink on Naturals Ivory card stock and is punched using the Large Oval Punch.
  • I used Crushed Curry Candy Dots (130932).
I love stamping with bleach.  One never knows what shades will emerge when coloured card stock is exposed to bleach. It makes the whole design process much more of an adventure!  Give it a try and then link up at The Technique Twist this week!

Monday, August 12, 2013

Monday Sketch Inspiration

Happy Monday!  I hope that where ever you are your weekend was as beautiful as ours was here!  Simply gorgeous! 
To start your week off I have another project I created using this month's inspiration sketch.


Fall-themed card featuring the Magnificent Maple stamp (131868) and Sweater Weather DSP (134184), both from the Holiday catalogue
In case you've forgotten, here is this month's sketch:


For some reason, this sketch has really inspired my creativity!  I have so many ideas for how to use it and so little time to make them happen!  Here are some tips for you, in case you want to recreate this card:
  • I heat embossed the Magnificent Maple image in pewter and then die cut it with the Deco Labels Framelits
  • I sponged the background over the embossed image using, in this order, the following inks:  Crushed Curry, Pumpkin Pie, Cajun Craze and Cherry Cobbler.
  • The faux wood panel behind the stamped image is from the Natural Composition specialty paper pack.  I sponged it with Early Espresso ink to bring out the wood grain.
  • I used torn strips of Sweater Weather DSP, sponged with Early Espresso ink, behind the focal image
  • The background panel in Crushed Curry is embossed using the Houndstooth TIEF
Give this sketch a try...it really is super versatile and such fun to play with.  When you do, be sure to leave a comment with a link to your project...I'd love to see what you come up with!

Have a great week!


Thursday, August 8, 2013

Magical Masking Tape Meets Magnificent Maple

How's that for a mouthful of a header??  If perfectly describes today's project though...

CAS Thank you card featuring the Magnificent Maple (131868) stamp and using the Magical Masking Tape Technique with sentiment from Simply Sketched (Hostess 129672)

This month my techniques group is learning the Magical Masking Tape technique.  I thought it would work perfectly with this month's inspiration sketch.  Here is the sketch...

August Sketch Inspiration
I actually had a ton of fun with this sketch...I have LOADS of samples to show you...all in good time ;)
Here is a closer look at this one...

In case you aren't familiar with this technique, here's a quick how-to:
  • Be sure to use painter's tape...not regular masking tape for this technique.  I like the blue stuff best.
  • Choose various widths of tape for visual interest.  I wanted to use some narrower tape but my husband used it all up when he painted our son's bedroom a couple of weeks ago (sheesh!!).  I settled for uniform widths on this project but it would be SO much better with different ones!
  • Use the old-style felt ink pads.  The new firm foam ones are WAY too juicy for this to work...you'll just end up with a mess...ask me how I know ;)
  • Use light colours.  Dark ink doesn't look good...again...ask me how I know ;)  On this card I used So Saffron, Pool Party and Calypso Coral.
  • To apply ink to the tape, tear a length of tape, lay it sticky-side-down on your ink pad and lightly burnish it (I used my bone folder so as not to get my fingers inky...the ink just wipes right off the bone folder!).  If your tape is longer than the ink pad you'll need to move it and burnish again to ink the entire piece.
  • Lay the tape on your card stock and burnish gently again (I just used my fingers for this).  Don't rub too hard or you'll have trouble peeling the tape off again.
  • Carefully peel the tape off...the ink will transfer to the card stock and you'll have a lovely, textured strip of colour.
  • Repeat as many times as you'd like to create the background you want.  Then stamp over top with a darker colour.  Here I actually heat embossed the Magnificent Maple image in Early Espresso.  The sentiment is stamped in Early Espresso ink.
We'll be doing this one for my techniques class this evening...hope my gals like it!

Related Posts Plugin for WordPress, Blogger...