Showing posts with label Holiday Catalogue 2015. Show all posts

Friday, January 1, 2016

Hello 2016!

Happy New Year! I hope you rang in 2016 with those you love and that the coming year holds much love, health and happiness for you.

In honour of the brand new year, I put together this project...

New Year's card featuring the Day-to-Day Project Life stamp set and Hello You Thinlits
I was going through leftover card kits from various events last fall and found a kit that contained all but the die-cut sentiment, so I re-purposed it from a Christmas card to a New Year's one. The numbers are from the Day-to-Day Project Life set...that one is a must-have for any scrapbooker! I heat embossed them in gold, punched them with my 1-3/4" circle punch and then layered it on a 2" circle punched from gold foil sheets. The sentiment is die-cut twice, once from Basic Black card stock and once from gold foil sheets, using the Hello You Thinlit dies. I layered the gold on the black to make it pop a little more against the white background. I used the Softly Falling TIEF to emboss the thick Whisper White card base.

The DSP is from the Winter Wonderland pack...which is on sale for four more days as part of the Year-End Closeout sale...be sure to pick some up before it's gone!  It is perfect for much more than Christmas...black and gold go with everything! I added some gold cording trim and a few metallic sequins by way of embellishment.

On the inside I stamped the sentiment from the Six Sayings host set in Basic Black ink and then highlighted it with a gold glimmer circle frame, punched using the 1-3/4" and 2" circle punches, and a teeny little gold glimmer star, punched with the Confetti Stars punch.

Have a fabulous first-day-of-2016!

Here are the products used to create this card:

Built for Free Using: My Stampin Blog

Wednesday, December 23, 2015

Gift Wrapping Anyone?

If you're anything like me, you're doing just a wee bit of gift-wrapping these days. I thought I would share some ideas I used to add a little extra something to some of my gifts this year...

Firstly, I made these sweet little Baker's Boxes to hold chocolate treats in no time, thanks to two kits: All Boxed Up (from the Annual Catty) and the Oh What Fun Tag Kit (from the Holiday Catty). These two kits are a match made in crafting heaven! The boxes come already cut and scored in the All Boxed Up kit, which also includes that sweet Mint Macaron pom-pom trim. The Oh What Fun Tag Kit includes all of the pre-cut tags and tons of embellishments. Did I mention this fabulous kit (along with the Real Red Pom-pom Trim) is on sale right now in the Year-End Sale?  Yep...grab it while you can and save it for next year when you're pressed for time! It took me mere minutes to whip up several of these cute little treat holders.  It definitely pays to have a couple of kits on-hand!

Next, I made this cute little pillow box to hold some small gifts. I used some (retired) Under the Tree Specialty DSP (that I pick up during last year's year-end sale) to create my pillow box. The best part about this paper is that it is card stock weight AND it's printed on both sides, so even the inside of my box looks pretty! I used the Square Pillow Box Framelits to cut the box, which goes together in a snap. I used some Garden Green 1/8" striped ribbon to embellish the box. I added a little punched tree and a banner I had leftover from the Oh What Fun Tags kit to make my little tag...so sweet!

Finally, I whipped up some simple snowflake tags to go with this pretty cable-knit-patterned wrapping paper I found. I used the Festive Flurry (retired) stamp set and coordinating framelits to die-cut the tag and then added a wooden Snowflake Element and a Metal-rimmed Pearl. The ribbon is Smoky Slate 5/8" Natural Chevron Ribbon from the Annual Catty. It was the perfect complement for the gift wrap and tag.

I so love making my friends and family feel extra-special by beautifully wrapping their gifts. They so appreciate it and I love doing it! Happy wrapping!!

Here are all of the products I used to create these projects:

Built for Free Using: My Stampin Blog

Thursday, December 10, 2015

The Year-End Sale is Here!


 It's a busy time of the year, and our Year-End Sale can help you finish your Christmas shopping for the crafters in your life AND get those final items from your own Wish List.  With more products on clearance and discounts up to 60%, you will want to take advantage of these amazing deals! All Holiday Catalogue products on the Retiring List are discounted up to 40%!!

During the Year-End Sale, you can find ALL discounted products in one location in the online store: under the Year-End Sale category. So don't fret if you don't see the category "Clearance Rack" on the online store right now--it has been integrated into the Year-End Sale.

Now, here are some important details to note:
  • The sale runs from  December 10, 2015-January 4, 2016.        
  • No minimum purchase required.
  • No refunds or exchanges on Year-End Sale items.
  • Items offered during the Year-End Sale are while supplies last.
  • Year-End Sale orders are eligible for Stampin' Rewards with qualifying orders.
  • Following the Year-End Sale, some remaining items may stay in the Clearance Rack. Other items may be removed from the Clearance Rack to be added at another undetermined time.
  • Orders must be placed online
That last point is a big one. Because all items are offered while supplies last, orders must be placed online through my webstore. This is to ensure that you aren't disappointed by sold out items, as there will be no backorders on sale items.

So, are you ready to check out the deals?  Click the image below to start shopping!

Year end Sale
Click the image to view the sale items.

Wednesday, December 9, 2015

Falala Pillow Box

As we continue the countdown to Christmas I thought maybe you could use some quick and easy gift packaging ideas. Today I want to show you the little boxes I made to package and gift the tree ornaments I made for the members of my Tri-City Stampers team (see yesterday's post if you missed it!).  I used the adorable square pillow box die....check it out:

Pillow Box featuring the Embellished Ornaments stamp set and coordinating Delicate Ornaments Thinlit dies.
I began my cutting two panels from thick Whisper White card stock. I then embossed each panel using the Softly Falling TIEF before assembling my box. To decorate the box I began with a length of 1-1/4" Very Vanilla Striped Satin ribbon, which I wrapped around the box and secured with Fast Fuse. I then added a length of 3/8" white glitter ribbon over top of the Very Vanilla ribbon and secured it with glue dots. I layered a silver metallic doily over the ribbon. The ornament is heat embossed in silver on gold foil sheets and die-cut using the Delicate Ornaments Thinlits. I adhered the ornament to the box using dimensionals.

The die cut sentiment is cut from gold foil sheets using the Christmas Greetings Thinlits and is secured by looping some silver cording trim through the loop on the "f" and tying a bow.

Here is the box with the ornament I tucked inside for my team members:


This little box takes very little time to make, but can make even the simplest little gift special. I am a big believer in the power of pretty packaging...it goes a long way in make the recipient feel extra-special. Give it a try this Christmas and you'll see what I mean :)

Here are the supplies I used to create this project:

Built for Free Using: My Stampin Blog

Tuesday, December 8, 2015

Peaceful Ornaments

So, are you ready for Christmas yet?  For the first time since...well, ever(!) I actually feel like I have a handle on things as we speed toward the big day. The house is decorated, the tree is up and I am almost done my shopping...I know...I can't believe it either!!
Last Saturday I held my team Christmas dinner as a small way of saying thank you to the amazing women with whom I have the privilege of sharing my Stampin' Up! journey. I wanted to give them a small keepsake, so I designed these ornaments for them to hang on their Christmas trees...

Christmas ornament featuring the Dove of Peace stamp set and the Christmas Greetings Thinlits.
I had several of these to make, so I needed to keep the design relatively simple. I found these little ornament frames at a local craft store and knew they would be perfect for what I wanted to do. I began by stamping the dove from the Dove of Peace set in Versamark ink and heat embossed it in gold. Then, because the opening in the frame was a 2" circle, I used my 2" Circle punch to punch out a portion of the embossed image. I removed the frame backing from the ornament, leaving only the plastic window. I used some of the long strips of dimensionals I had left over from the To You and Yours Shaker card kit to create a shaker frame for my ornament. I ended up having to cut the strips in half lengthwise so that they would be narrow enough not to show from the front of the ornament. I then added gold and silver sequins and stars from the Metallics Sequin Assortment before sealing my shaker with the punched 2" circles.

I added the die-cut sentiment, which I created using gold foil sheets and the Christmas Greetings Thinlit dies, by looping a piece of silver cording trim through the "p" in peace and then tying a bow. I removed the red ribbon that the ornament frame came with and added another length of silver cording trim with which to hang the ornament on the tree.
I have to say I am quite happy with the way these turned out...and my team were too.  I was so glad I could give them a small keepsake of the amazing year we have all had. Be sure to stop by tomorrow when I'll show you the cute little boxes I made to package and gift these ornaments in.  Till then, have a great day!

Here are the products I used to create this project:

Built for Free Using: My Stampin Blog

Sunday, December 6, 2015

Peace on Earth

Happy Sunday!  I hope you are having a good weekend...it's hard to believe there are less than 3 weeks till Christmas!
Today marks the beginning of a new colour challenge over at Sunday Stamps.  I am loving the cool shades of blue and gray in this challenge.


Here is my project for the Design Team:


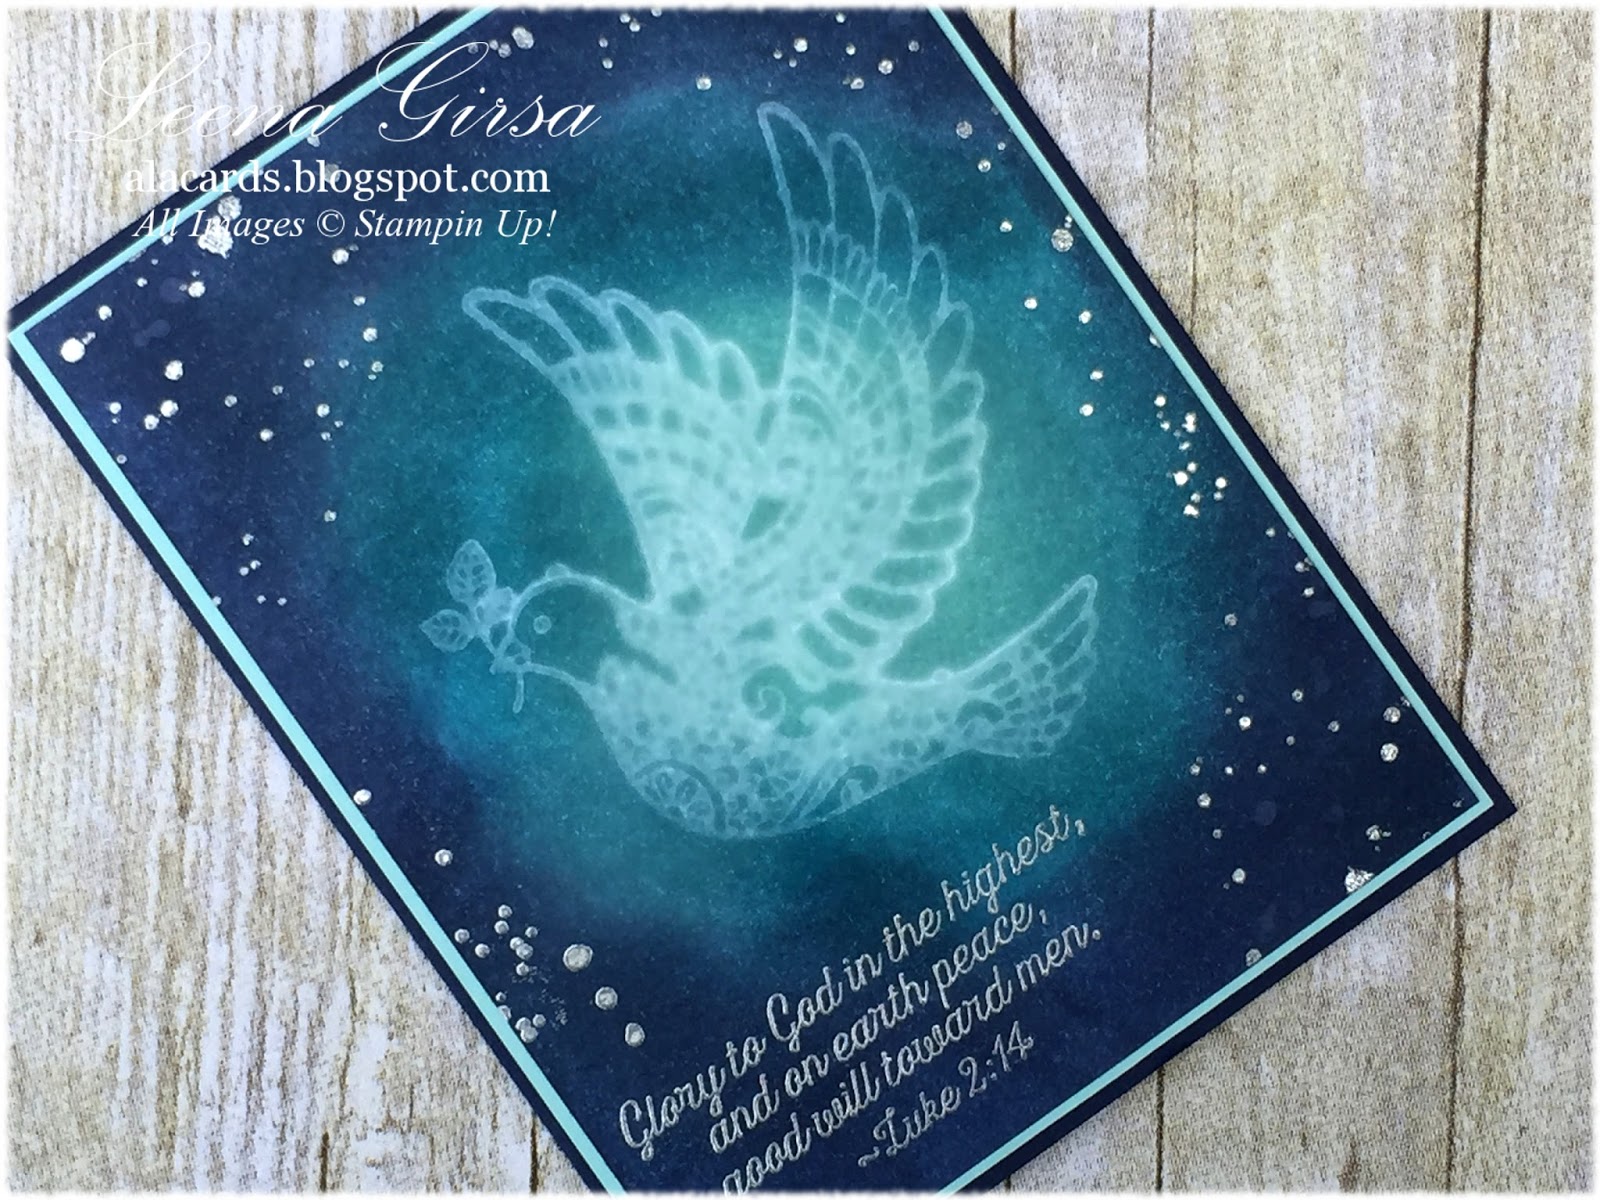
Holiday card featuring the Dove of Peace and Holly Jolly Greetings stamp set.
With all that has been going on in the world the past few weeks, this card seems somehow even more appropriate.  I absolutely love the dove image in the Dove of Peace set. Here I heat embossed it in silver on Whisper White card stock and then coloured the patterns using Pool Party and Bermuda Bay Stampin' Write markers. I fussy cut the dove, added a swirl of silver metallic thread and adhered it to a panel of Pool Party card stock that I had embossed using the new World Traveller TIEF (available January 5th in the Occasions Catalogue). I accented the continents of the map with a dauber and some Pool Party ink.

The stamped portion of the sentiment is done in Basic Gray Archival ink on vellum. The die-cut is from silver foil sheets using the Christmas Greetings Thinlits.  The card is built on a thick Whisper White base. The only embellishments, in addition to the aforementioned silver metallic thread, are a few small rhinestones.


On the inside, using Pool Party ink, I stamped the globe image from the new Going Global stamp set (also available January 5th) and added a sentiment from the Peaceful Pines stamp set in Basic Gray.

I always love when I find ways to use new products with ones that I already own.  This embossing folder has so many possibilities...I see lots of projects in it's future ;)

Be sure to check out the rest of the Design Team's projects and then give this colour challenge a try...it is a great one!  See you soon over at Sunday Stamps!

Here are all of the projects used to create this card:


Built for Free Using: My Stampin Blog

Tuesday, December 1, 2015

Silent Snowy Night

Happy December!  The countdown is on...just 24 days till Christmas!  Have you got your Christmas cards done yet??  Today I have some more inspiration for you.  This is one I designed for my team to create at our meeting last month...

Christmas card featuring the Wonderland and Kinda Eclectic stamp set and Sleigh Ride Edgelits.
Of all of the cards I have made using the Sleigh Ride Edgelits, I think this one is my favourite. I love the quiet serenity of it.  Just like a silent winter's night. To create the background I inked a piece of Whisper White card stock with Night of Navy ink and then, very lightly, with Black Berry Bliss ink. I love the hint of purple the Blackberry Bliss provides. Then I spritzed the entire sponged panel with my trusty Stampin' Mist to get the snowy effect. I also stamped the starburst image from the Kinda Eclectic set using Stampin' Mist as well.  I love the effect behind the Dazzling Diamonds glimmer star.

I used the the Sleigh Ride Edgelits with Dazzling Diamonds glimmer paper to cut the bottom section and layered it over top of my sponged and spritzed background. I layered that on a piece of Night of Navy card stock before mounting it on a thick Whisper White card stock base. The sentiment, from the Wonderland stamp set, is heat embossed in silver on vellum. The only embellishment is a bit of silver cording trim.

On the inside I stamped the sentiment from the Six Sayings host set in Night of Navy ink. Clean and simple and so pretty!  This is one that is quick and easy to make but sure is pretty and oh, so sparkly!

Here are all of the products I used to create this card:


Built for Free Using: My Stampin Blog

Wednesday, November 18, 2015

Craziness!

Well so far this week has been crazy!  Between a funeral, Stampin' Up! OnStage, two days of jury duty and report cards, I don't know whether I'm coming or going!  My posting has been rather sporadic and will likely continue to be for the next couple of weeks until things settle down a bit. My apologies...my poor stamps are feeling very unloved.
I do need to share with you that the retiring products list for the Holiday Catalogue has posted. All accessories are now available only while supplies last, so you'll want to pick up your favourite items sooner than later. Stamp sets are guaranteed until December 28th.

Click the image to view the list of retiring items.

Now for today's project.  It is the last card I designed for my final round of Christmas Card Buffets this week.  It was inspired by the work of Mindy Backes

Christmas card featuring the Season of Cheer DSP and the Oh, What Fun stamp set.
I love the softness of the watercoloured images on the Season of Cheer DSP. I used two patterns here and matted each on Mossy Meadow card stock. The sentiment is from the Oh, What Fun stamp set and is stamped in Cherry Cobbler ink.

I added a wooden snowflake, a gold button and some gold baker's twine, as well as half of a gold metallic doily. The card is built on a Crumb Cake card base.

On the inside I used a sentiment from the Six Sayings host set...I love that the font is the same as the sentiment from the front of the card. Can you believe I didn't use the Big Shot for this card?  I can't remember the last time I did that!
This is a really quick and easy one to put together, if you're in need of a stack in a hurry. Time is passing quickly and it is time to start thinking about getting Christmas cards in the mail. ;)

Have a good week!

Here are all of the products used to create this card:

Built for Free Using: My Stampin Blog

Sunday, November 15, 2015

A New Sketch from Sunday Stamps

Happy Sunday!  I hope you are having a good weekend.  I spent most of the weekend with lots of Stampin' Up! friends at the OnStage local event here in Mississauga, Ontario. It was good to see so many old and new faces and to get our first look at the new Occasions Catalogue and Sale-a-bration brochure. Sooo many good things coming our way in January!  Watch for some sneak peeks here over the next couple of weeks.
Today marks the start of a new sketch challenge over at Sunday Stamps. This one will run for THREE weeks because of the US Thanksgiving holiday, so there is lots of time to give this sketch a whirl.  Check it out:


Here is my card for the design team:

Christmas card featuring the Holly Jolly Greeting stamp set and Perfect Pines and Wonderful Wreath Framelits.
I was in a neutrals state-of-mind when I designed this one! I started with a Whisper White panel on which I stamped the snowflake from the Holly Jolly Greetings set in Tip Top Taupe ink. I then added the little confetti stars image from the same stamp set in metallic silver Encore ink. I added some spatters from the Gorgeous Grunge set that I heat embossed in gold. I was liking the hit of gold, so I Versamarked the edges of the panel and embossed in gold again.

The bottom panel is a piece of Tip Top Taupe card stock that I embossed using the Softly Falling TIEF . I added a silver foil doily and some 1-1/4" Striped Vanilla Satin Ribbon. Then I die-cut a tree from white corrugated paper using the Perfect Pines Framelits. I decorated the tree with some gold metallic thread and an Iced Rhinestone Embellishment. The sentimet is die-cut from silver foil sheets using the Wonderful Wreath Framelits. The entire card is built on a thick Whisper White card base.

On the inside I stamped the sentiment from the Holly Jolly Greeting set in Tip Top Taupe ink and added a snow flake in Crumb Cake ink. The final touch was a few more confetti stars in silver metallic ink.

I have to say this is one versatile sketch!  So many possibilities to play with...be sure to check back over the next few weeks for more with this one!  Also check out the rest of the Design Team's projects...they are FABULOUS!  Have a great week!

Here are all the products used to create this card:

Built for Free Using: My Stampin Blog

Friday, November 13, 2015

Red and Green Christmas

Happy Friday!  Are you as happy as I am that this week is finally over??  It has been a VERY long one around here.
Today I have a project I designed for my final set of Christmas card buffets this season. Recently a customer remarked that I really don't do red-and-green Christmas cards...and when I thought about it, she was right! I tend otoavoid traditional Christmas colours like the plague...LOL.  So, today I am rectifying that with a very traditional colour palette...

Christmas card featuring the Jolly Christmas stamp set.
How's that for traditional??  I used Real Red, Old Olive and Whisper White, along with a hit of gold glimmer.  I stamped the Real Red background with the snowflake images from the Jolly Christmas stamp set using ink of the same shade. I also sponged the edges to add some depth. The DSP strip is from the Merry Moments pack.

I added a tree die-cut from white Corrugated Paper using the Perfect Pines Framelits (which are ON SALE THIS WEEK!). The sentiment is die-cut from gold Glimmer paper using the Wonderful Wreath framelits. I also added a little Reindeer Clip and a Real Red Candy Dot for his nose. The whole card is built on an Old Olive card base.

Inside view with sentiment from Versatile Christmas.
On the inside I stamped the sentiment from the Versatile Christmas set in Real Red ink and added a little gold glimmer star.

I hope you have a fabulous weekend...be sure to check in on Sunday for a new sketch challenge from Sunday Stamps.  Till then, happy stamping!

Here are the products used to create this project:


Built for Free Using: My Stampin Blog

Wednesday, November 11, 2015

Changing Gears

I know I've been all about Christmas for a while now, but I do actually work on other things! Today I want to show you two of the Project Life layouts I designed for my Project Life club this month. We are all about Halloween this month, using the Seasonal Snapshot 2015 card kit from the Holiday Catalogue.

Halloween-themed Project Life layout featuring the Seasonal Snapshot 2015 card kit.
So I pulled out some of my favourite photos of my son from when he was just a wee one for this layout. As sad as it is, I am waaaaay behind scrapbooking his life.  Thanks to my new-found love of Project Life, I am making some good progress getting his book(s) done.

On this page I used lots of products to pretty-up my page. I used some Happy Haunting DSP, Spider Web Doilies, black Glimmer paper, and the Cheer All Year  and Gorgeous Grunge stamp sets. I also made a little shaker card using sequins, a window sheet and some Washi Tape.

On this page I again used some Happy Haunting DSP, black and gold Glimmer paper, Spider Web doilies and the Alphabet Rotary stamp.  So fun!

If you haven't yet jumped on the Project Life by Stampin' Up train yet, I'd be happy to have you join me! My next Project Life club starts in January with all new layouts. I'm even offering a long-distance option for those who want to participate but aren't local to me.  Stay tuned for more information in December!

Here are the products used to create these layouts:


Built for Free Using: My Stampin Blog

Monday, November 9, 2015

Monday Morning CASE

Happy Monday!  I hope you had a good weekend.  Today I have another project from my upcoming Christmas card buffet. It is a CASE of the amazingly awesome Kimberly VanDiepen.

Christmas card featuring the Winter Wishes stamp set
I love the neutral colour palette of this one. I used Sahara Sand, Whisper White and Early Espresso.  So warm and wintry ;)  I stamped the sled in Early Espresso ink on Whisper White card stock and then matted the stamped piece with Early Espresso card stock. The background panel is Sahara Sand card stock that is embossed using the Woodland TIEF. The card is built on a base of thick Whisper White card stock.

For added texture, I used a strip of white Corrugated Paper and then added some (retired) 7/16" Natural Ribbon Trim.  I love the texture of that ribbon...reminds me of a cozy sweater. The sentiment is stamped in Early Espresso ink on a strip of Sahara Sand card stock. I added a wooden Snowflake Element and a bit of Linen Thread, wrapped around the snowflake and tied in a bow.

On the inside I stamped the sentiment from the Lots of Joy stamp set in Early Espresso ink. I then stamped the pine bough in Sahara Sand ink over the stamped sentiment as well as along the upper edge.

Here are all of the products I used to create this card:

Built for Free Using: My Stampin Blog

Wednesday, November 4, 2015

Ghostly Dove

Today I have another project AND a tutorial video that uses the Stampin' Mist ghosting technique. I am SO loving the magical mist!  Check it out:

Christmas card featuring the Dove of Peace and Gorgeous Grunge stamp sets using the Stampin' Mist Ghosting technique.
Isn't that dove image GORGEOUS??  I so love it!


I'm not going to go into a whole lot of detail about how I created this one, as I cover it all in the video. Be sure to check it out and if you like it, don't forget to share it :)


Built for Free Using: My Stampin Blog

Tuesday, November 3, 2015

Magic of the Season

Today I have a project I designed recently for my November Christmas card buffets.  It features the Home for Christmas DSP.

Holiday card featuring the Cozy Christmas stamp set and Home for Christmas DSP
This layout really grew out of another, completely different, sketch I had seen. It is a bit unusual for me to use a sentiment as my focal point, but I think it works in this case. I began by heat embossing the sentiment in gold on Very Vanilla card stock. I die-cut it using the Circles Collection Framelits and layered it on another circle cut from Real Red card stock. The label is punched from Mossy Meadow card stock using the Ornate Tag Topper punch. I punched both ends so that I could add the ribbon at both the top and the bottom.

I added half of a gold metallic doily peeking out from behind the label. Behind that I layered two different patterns from the Home for Christmas DSP pack which I then mounted on a Real Red card base.  The only embellishments are some 1/8" Striped Ribbon in Real Red, a wooden Snowflake Element and some rhinestones.

On the inside I added another little tag that I also heat embossed in gold and punched using the Note Tag punch.

Here are all of the products I used to create this project:


Built for Free Using: My Stampin Blog

Sunday, November 1, 2015

All Is Calm for Sunday Stamps

Happy November!  Can you believe it? Where has the fall gone??  If you are one of those people who can't start thinking about Christmas until after Halloween, the time has come! Time to get going on those Christmas projects! Today I have some inspiration for you from this week's new challenge over at Sunday Stamps.  It is a colour challenge this week...here is the inspiration photo:


Here is my project for the Design Team:


Holiday card featuring the Wonderland stamp set and Home for Christmas DSP
This card was SO much fun to make! It has been a very long time since I have been able to just sit and play with ink, paper and rubber. I began by sponging a piece of the sheet music patterned DSP from the Home for Christmas pack. I used Island Indigo and Night of Navy inks for the sponging. Then I stamped the trees from the Wonderland stamp set in Soft Suede and white Staz On ink. I then spritzed the entire thing with Stampin' Mist. I played some more, adding hints of Versamark ink around the edges and sprinkling with gold embossing powder.

The stamped panel is matted on a piece of Soft Suede card stock and then mounted on a Kraft card base. The sentiment is heat embossed in gold on a strip of vellum. I added some gold metallic thread, a wooden Snowflake Element and a single rhinestone.

On the inside I stamped the pine branch in Soft Suede ink, stamping off once. The sentiment, which is from the Six Sayings host set, is heat embossed in gold.

I am sooo happy with the way this one turned out.  Amazing things can happen when you just let yourself play.  Give it a go and see what this colour challenge inspires you to create, then share it with us over at Sunday Stamps. :)

Here are all of the products I used to create this card. Clicking any one of them will take you directly to my online store for easy ordering.


Built for Free Using: My Stampin Blog

Tuesday, October 27, 2015

Merry Little Christmas

I am getting so excited about my upcoming Christmas card buffets this week!  It is going to be a full house each night as we get busy creating cards to send to those we love this season.  Here is another of the projects that will be on offer:

Christmas card featuring the Home for Christmas DSP and Cozy Christmas stamp set.
The inspiration for this one came from a sample I found on Pinterest by the ever-so-talented Mercedes Weber. I layered several different patterns from the Home for Christmas DSP pack to create a collage effect. I used the Angled and Ornate Tag Topper punches to create the two larger tags and the Tags and Labels Framelits for the stamped one. The sentiment, from the Cozy Christmas set, is stamped in Basic Black ink. That sweet little deer is fussy-cut from the Home for Christmas DSP...I just love his sweet little face and jolly red bow!

I also layered a Tea Lace Doily,  a gold foil poinsettia, cut with the Delicate Ornaments Thinlits and a Home for Christmas Designer button, tied with gold baker's twine. I built the card front on a piece of Crumb Cake card stock which I sponged around the edges with Whisper White craft ink. I layered that on a piece of Real Red card stock before mounting it on a Mossy Meadow card base.

On the inside I stamped another of the sentiments from the Cozy Christmas stamp set in Basic Black ink and then the bell image, also from the Cozy Christmas set, in Crumb Cake behind it.

I think this is my favourite of all ten cards I'm offering at this event. I'm sure it will be a popular one!

Here are all of the products used to create this project:


Built for Free Using: My Stampin Blog

Monday, October 26, 2015

Merry Monday

I am generally not a fan of Mondays, but this week will be a festive one, as I host my second round of Christmas card buffets. We'll be rockin' the Christmas music this Halloween!  Here is another of the projects we'll be making:

Christmas card featuring the Snow Place stamp set
This one is a CASE of a card in the Holiday catalogue. I stamped the sentiment in Bermuda Bay on a piece of Home for Christmas DSP. To create the "snow" I tore the edge of a piece of white corrugated paper...I love the look of that stuff.  The snowmen are stamped in Basic Gray ink and then die-cut using the Snow Friends Framelits. All of their accessories are also die-cut using the same set.

The only embellishments on this card are the little red rhinestones on the larger snowman's hat, which I coloured with a red Sharpie, and some Bermuda Bay thick Baker's Twine.

On the inside I stamped the sentiment , which is also from the Snow Place set, in Bermuda Bay, and the snowflakes in Basic Gray, stamped off once.

I have to say, dressing up these little fellows reminded me of playing paper dolls when I was little...such fun!  I may just have to make some more ;)

Here are all of the products I used to create this card:


Built for Free Using: My Stampin Blog
Related Posts Plugin for WordPress, Blogger...