Sunday, May 10, 2015

Colour Me Challenged!

Happy Mother's Day to all of the moms out there...I hope you are being suitably spoiled today!

It is time for a new colour challenge over at Sunday Stamps.  I LOVE the rich combination of shades in this challenge:


Here is my take on it:

Thank you card featuring the Choose Happiness stamp set with sentiment from Painted Petals.
I began with a piece of Basic Black card stock on which I heat embossed the leaf image from the Choose Happiness stamp set using clear embossing powder.  (It doesn't show up well in this photo...check out the one below!).  To create the patterned blue panel, I began with a piece of Tempting Turquoise card stock, on which I heat embossed the flower image from the Choose Happiness set using clear embossing powder.  Then I sponged the entire surface with Island Indigo and Smoky Slate ink.  I love the depth that combination gives the images.  I wanted a silver accent, so I heat embossed a Tea Lace Doily using silver embossing powder.  


The focal image is a 2-1/2" circle stamped with the border, bird and flower images from the Choose Happiness set.  The sentiment, from the Painted Petals stamp set, is heat embossed in silver.  I also sponged the edges of the circle in Smokey Slate ink before adhering it to the card front.  I added some long-retired black lace trim, a Vintage Faceted Button and some rhinestones coloured with my beloved Blendabilities (not ever gonna give those up!) by way of embellishment.  The entire panel is adhered to a card base in Island Indigo.


On the inside I stamped the leaves in Smoky Slate ink and the flowers in Island Indigo.  I added a bit of colour by sponging the flowers with Tempting Turquoise ink.
This colour challenge is a great one to get your creative juices flowing.  Be sure to check out the rest of the Design Team's samples and then give it a go!  Have a happy Sunday!

Thursday, May 7, 2015

Watercoloured Sunshine

I am SOOOO excited!  My new catalogue pre-order is scheduled for delivery today...yippee!!  So many fabulous new toys to play with this weekend!  I can't wait!
For today, I have another sneak peek at a project I'll be doing with my techniques class next week.  We're going to try faux watercolour using the Painted Petals stamp set.  Check this out:

Any occasion card featuring the Painted Petals and Crazy About You stamp sets and using the faux watercolour technique.
I began with a 3" x 5-1/4" piece of watercolour paper which I spritzed with water so that it was fairly wet. Then I stamped the blossom images from the Painted Petals stamp set using Blackberry Bliss ink. The water on the paper caused the ink to run.  I stamped the leaves using  Mossy Meadow ink and again, the ink ran, but not quite as much as I had wanted, so I spritzed with a bit more water.  Then I took an aquapainter and added a bit of Crushed Curry ink in the centres of the flowers for just a hint of colour.  The faux watercoloured panel is adhered to a piece of Mossy Meadow card stock that is embossed using the Spring Flowers TIEF and sponged used Mossy Meadow ink. 


The die-cut "hello" is done with the Hello You Thinlits from gold foil card stock.  The sentiment is from the Crazy About You set and is stamped in Mossy Meadow ink.  I added some stitched satin riboon in Hello Honey to make the little hints of yellow in the watercolouring pop. I really love this look and can't wait to play with it some more!

Tuesday, May 5, 2015

Flower Patch Ghosting

Happy Tuesday!  I hope your week got off to a good start :)  My son started his baseball season last night, so summer mustn't be too far off!

Today I have a sneak peek at one of the projects we'll be making in my monthly techniques class next week.  This one uses the ghosting technique.  Check it out:

Thank you card featuring the Flower Patch stamp set with sentiment from Work of Art.
I just love the fresh, spring-like colour scheme on this one.  I began by stamping several  images from the Flower Patch stamp set using Whisper White craft ink on Crumb Cake card stock.  Once that was dry, I stamped over top of the white images using the three Colorbox Chalk inks from the Occasions catalogue: Aquamarine, Rose Coral and Yellow Citrus.  While it isn't necessary to use chalk inks for this technique, I like the soft colour they offer.    You'll notice I didn't quite line up the images exactly, but that is part of the charm of this technique.

The sentiment is from the Work of Art set.  I stamped "thank" in Crumb Cake ink and "you" in Coastal Cabana.  I punched the sentiment with the 1-3/4" circle punch and then layered it on a 2" circle in Coastal Cabana.  (What will I ever do without that colour??? *sob*)  I added some pearls that I coloured with my Blendabilities as well as a bit of thick baker's twine in Coastal Cabana.

On the inside I stamped several of the flower images again using the same inks I did on the front, leaving plenty of space to write.

I'm pretty excited that I get to pre-order my new Annual Catalogue Sneak Peek products today!  With any luck they'll be here by the weekend and I'll have lots of new surprises for you next week!

Now, here are this week's new Weekly Deals.  As always, prices are good until Monday at midnight:

1/16 Handheld Punch by Stampin' Up!
1/16" Circle Handheld Punch
Price: $11.95 
Sale:  $8.96
1/8 Handheld Punch by Stampin' Up!
1/8" Circle Handheld Punch
Price: $11.95  
Sale: $8.96
2 Circle Punch
2" Circle Punch
Price: $22.95  
Sale: $17.21
Gift Box Punch Board by Stampin' Up!
Gift Box Punch Board
Price: $24.95  
Sale: $18.71
Gold Baker's Twine
Gold Baker's Twine
Price: $3.95 
Sale:  $2.96
Soft Sky 1/2 Seam Binding Ribbon
Soft Sky 1/2" Seam Binding Ribbon
Price: $9.50  
Sale: $7.13
Sweet Taffy Designer Series Paper by Stampin' Up!
Sweet Taffy Designer Series Paper
Price: $13.50  
Sale: $10.13
Wisteria Wonder 1/2 Seam Binding Ribbon by Stampin' Up!
Wisteria Wonder 1/2" Seam Binding Ribbon
Price: $9.50  
Sale: $7.13

Monday, May 4, 2015

Did you miss me??

Happy Monday!  Long time, no post, huh?  Last week was a bit of a whirlwind with a trip out of town that involved four flights in two days, including one trans-continental red-eye.  I was just a little bit exhausted by the time Friday evening rolled around!  Thank goodness for weekends and time to recouperate!  I've almost figured out what time zone I'm in :)
Today I have another take on this week's sketch from Sunday Stamps.  Last week I showed you a couple of relatively predictable takes on it, but this one is a bit of a stretch.  First of all, here is the sketch:


...and here is my upside-down take on it:

Any-occasion card featuring the Butterfly Basics stamp set and the Dictionary background stamp.
Do you see what I did there?  I flipped the sketch upside down and used the ferns to replace the banners.  Kinda different, huh?  I love playing with sketches to create something different!
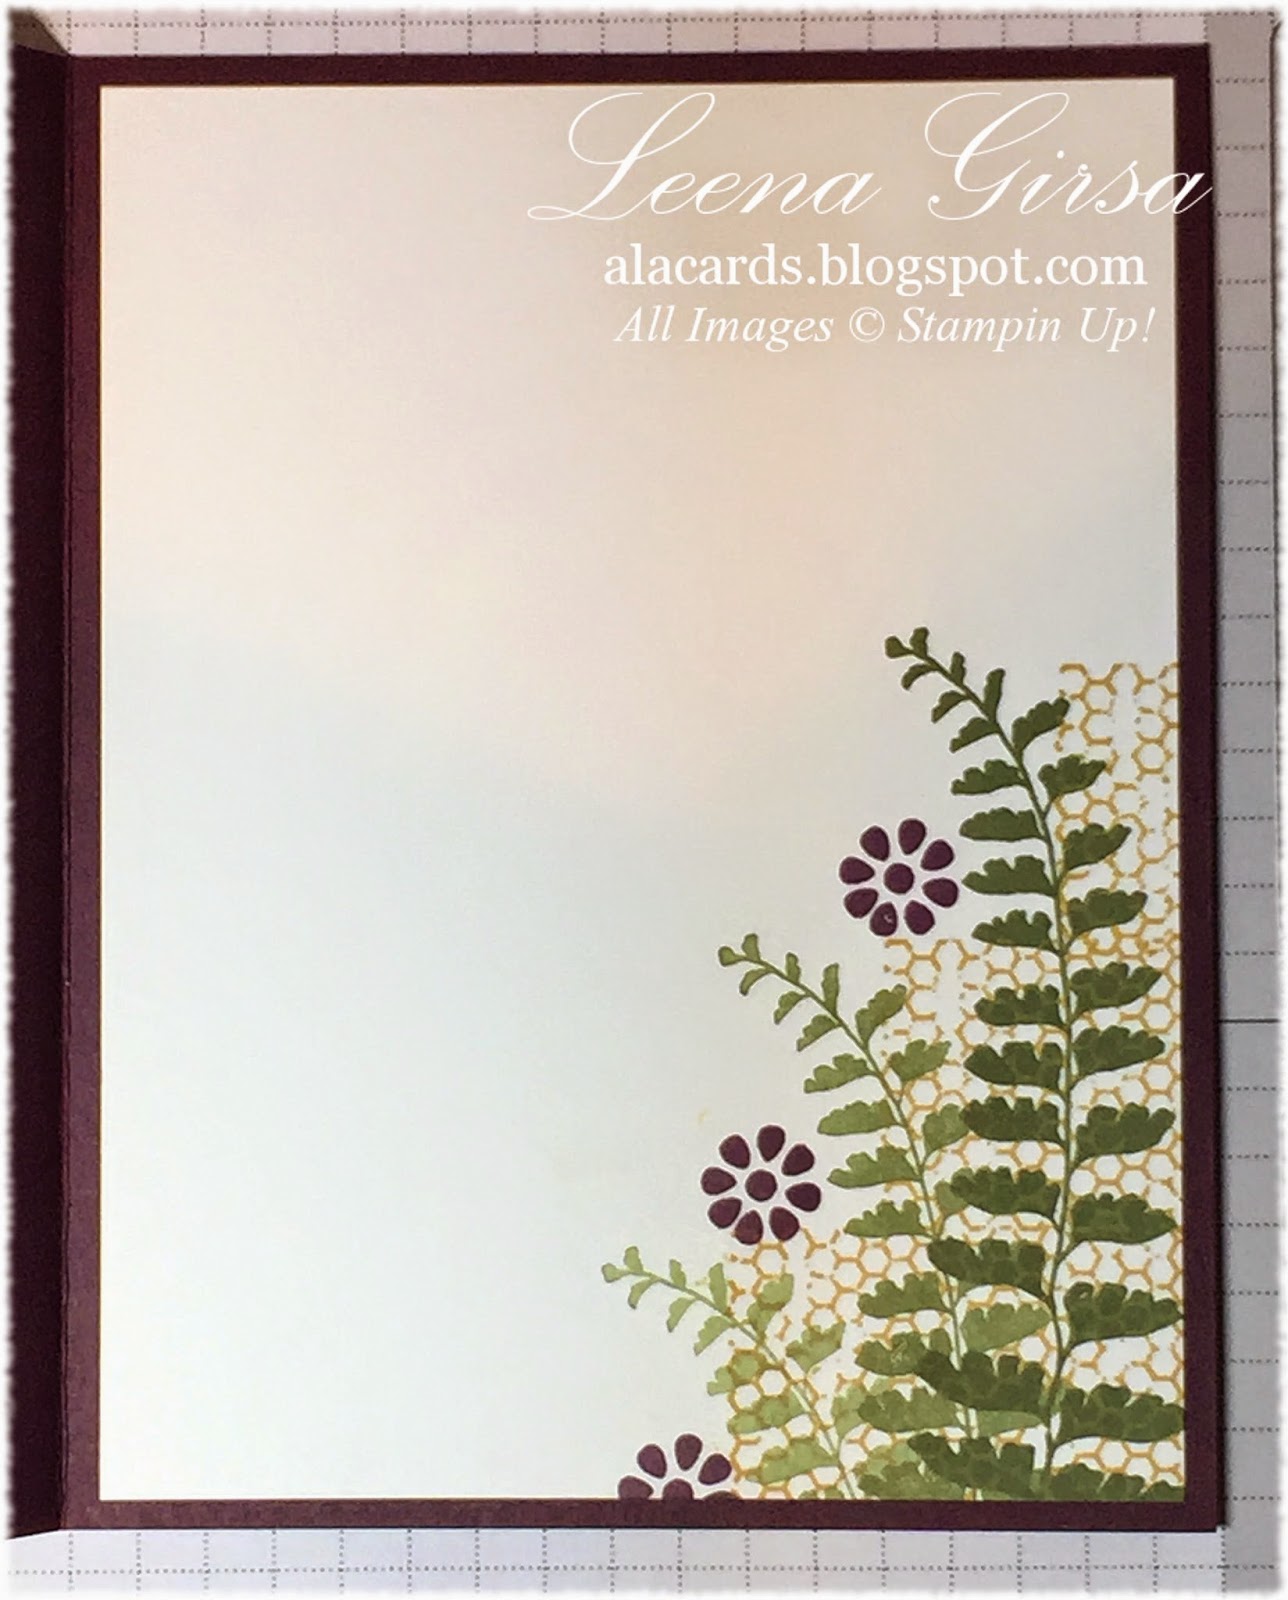
I used the Dictionary background stamp on a piece of Whisper White card stock with Sahara Sand ink.  I masked off the bottom section with a post-it note before I started stamping so that it would remain pristine white.  Then I stamped images from the Butterfly Basics stamp set:  the ferns in Mossy Meadow ink and the little flowers in Blackberry Bliss ink.  I added a couple of butterflies in Lost Lagoon, as well as the postmark image in Soft Suede and the honeycomb in metallic gold.  I sponged the whole thing lightly with Sahara Sand ink to soften the images and take the brightness out of the white card stock.

The butterflies are die-cut using the Butterflies Thinlits.  I used Hello Honey card stock for the smaller one and gold foil for the larger.  I layered them with glue dots and then added a little button in Blackberry Bliss and some thick Baker's Twine in Hello Honey.  Because the twine was too thick to fit through the holes of the button, I separated the strands...I kind of like the look!  The final touch was some Hello Honey stitched satin ribbon before adhering the card front to a Blackberry Bliss card base.

On the inside I stamped the ferns again in Mossy Meadow, added some flowers in Blackberry Bliss ink and the honeycomb in metallic gold.  If you haven't yet give this sketch a try, there is still time!  The challenge doesn't close until Friday, so get busy and give it a go.  Then be sure to link up over at Sunday Stamps!  Have a great week!

Tuesday, April 28, 2015

Grungy Thanks

Happy Tuesday!  I hope your week is off to a good start.  Today I have another take on this week's sketch from Sunday Stamps.  In case you missed it on Sunday, here is the sketch:


...and here is a completely different take on it:

Thank you card featuring the Gorgeous Grunge and Sassy Salutations stamp sets.
I kind of went a little wild with this one!  I love playing with my Gorgeous Grunge stamp set and once I got started, I just couldn't stop!  I began by stamping the larger splatter in Crushed Curry ink, stamped off once to get a slightly lighter shade.  Then I used Bermuda Bay to add the large spots and finally Memento Tuxedo Black for the smaller spatters.  I added some Washi Tape from the Beach House and Stacked with Love bundles and the Everyday Adventure Project Life Accessory Pack

The sentiment, from the Sassy Salutations set,  is stamped in Memento Tuxedo Black ink.  I added some Baker's Twine in Basic Black, Bermuda Bay and Crushed Curry, as well as some Itty Bitty Accents Epoxy Stickers for texture.

On the inside I stamped more spatters, as I did on the front.  Gotta love getting grungy!

Sunday, April 26, 2015

It's a Sketchy Challenge!

Today marks the 100th edition of Sunday Stamps!  We are celebrating with a fabulous new sketch challenge...check it out:


Here is my project for the Design Team:

Any-occasion card featuring the Regarding Dahlias and Perfect Pennants stamp sets.
This project was inspired by a recent order from a customer.  She ordered several packages of Blushing Bride, Chocolate Chip and Whisper White card stock, which got me to thinking about that yummy colour palette.  So, I decided to give it a go for this week's challenge.  I began by heat embossing the dahlia from the Regarding Dahlias stamp set (this one is on the Retirement List...get it before it's gone) using Blushing Bride embossing powder (this is retiring too!) on a panel of Chocolate Chip card stock.  I then coloured in the entire dahlia image using an aquapainter and Whisper White craft ink.  Once that had dried I went back and added a subtle hint of colour using my Blushing Bride Stampin' Write marker and a blender pen.  I love the soft look this technique produces! 

I die-cut the silver glimmer pennant using the Itty Bitty Banners Framelits, and the Blushing Bride pennant using the Banners Framelits.  The sentiment, from the Perfect Pennants stamp set, is stamped in Chocolate Chip ink and then die-cut using the Banners Framelits.  I added some long-retired Blushing Bride stitched grosgrain ribbon and a few random rhinestones for some added bling.  The final touch was a wee butterfly, punched from vellum with the Bitty Butterfly punch.

On the inside of the card I stamped the dahlia image again, this time using Chocolate Chip ink.  I lightly sponged the image using a dauber and Blushing Bride ink.

We would love to have you join us for our 100th challenge...why not give this sketch a try?  In case you need more inspiration, I'll be back with a couple of other takes on the sketch! 

Friday, April 24, 2015

Birthday Butterflies CASE

Happy Friday!!  This week has been SO long...I couldn't be happier to see it end!  My poor boy has been sick with the stomach flu again and it has been a long haul.  Looking forward to the weekend and some R & R (and time to stamp!). 
Today I have a project I CASE'd at the request of a client who asked me to design projects for her upcoming Ladies Retreat at her church.  She found this project on Pinterest and asked me to make kits for the women on her retreat to make.  The original design is by Carol Payne...I changed the colour scheme slightly to accommodate the inks my client has in her collection...

Birthday card featuring the Gorgeous Grunge stamp set with sentiment from Express Yourself (retired)
I began with a piece of Whisper White card stock on which I stamped the spatter image from the Gorgeous Grunge stamp set using Lost Lagoon ink.  I also stamped the lines in the lower right corner using Lost Lagoon ink.  The sentiment, from the Express Yourself stamp set, is stamped in Soft Suede ink.  The stamped panel is mounted on a piece of Lost Lagoon card stock before being adhered to a Crumb Cake card base. 

The butterflies are punched from vellum using the Elegant Butterfly and the Bitty Butterfly punches.  I also layered the two larger vellum butterflies with smaller ones punched from the Moonlight DSP stack.  I added Linen Thread and some rhinestones for embellishment.

Inside view with sentiment from the Endless Birthday Wishes set.
On the inside I stamped the spatter image again using Lost Lagoon ink.  I added a couple more punched butterflies and the sentiment, from the Endless Birthday Wishes set, in Lost Lagoon ink.

In case you missed it earlier this week, the Retirement List has posted AND the online Clearance Rack was update.  Be sure to check out both this weekend for some great deals!  Have a good one!!
Related Posts Plugin for WordPress, Blogger...